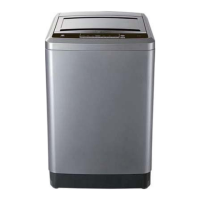
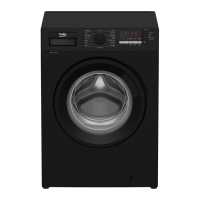
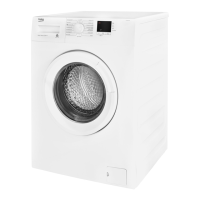
This document serves as a user manual for a Beko Washing Machine, model WTL 11019 G, providing comprehensive instructions for its installation, operation, maintenance, and troubleshooting. It emphasizes safety precautions and environmentally friendly practices throughout the product's lifecycle.
The washing machine is designed for domestic use, specifically for washing and rinsing laundry that is appropriately marked. It is not intended for commercial use. Users are advised to read the entire manual carefully before operating the machine and to keep it for future reference. The product is manufactured with high-quality, state-of-the-art technology, aiming to deliver optimal results.
Function Description
The Beko Washing Machine offers a range of functions and programs to cater to various laundry needs. It features a control panel with several buttons and a display for easy interaction.
- On/Off Button: This button is used to power the machine on or off.
- Start/Pause Button: This button allows users to start a selected program or pause an ongoing operation. It can also be used to change the washing procedure during an operation, by pausing, making changes, and then restarting.
- Program Select Button: Pressing this button cycles through available washing programs, allowing the user to choose the desired one.
- Water Level Button: While the machine automatically adjusts the water level, users can manually select a specific water level by pressing this button. This function is active during standby status and can also be adjusted during a running program by pausing, changing the level, and then resuming.
- Delayed Start Time Button: This feature allows users to set a delay for the start of a washing program, up to 18 hours.
- Function Button: This button cycles through various auxiliary functions, enhancing the flexibility of the washing cycles.
- Remaining Time / Delay Start Time / Error Display: This display shows the remaining wash time, the set delay start time, or error codes if a problem occurs, guiding the user to take appropriate action.
The machine includes several main programs:
- Auto: This program automatically selects the best water level and wash course based on the laundry amount, suitable for cotton and blended items. High water and 3-minute air turbo options are automatically set.
- Delicate: Designed for machine-washable delicate items like sweaters, jumpers, and cardigans (cotton, blended, and wool). Hot water and soaking options are not available for this program. It is recommended to use special purpose detergents and load up to 1/3 of the full capacity.
- Blanket: Ideal for bulky items such as blankets and bed sheets. Users should fold bulky items appropriately and load up to 1/2 of the full capacity.
- Normal: Suitable for a full capacity of normally soiled durable cotton and blended clothes.
- Eco: This program is for smaller loads (max 1/3 capacity) of lightly/daily soiled laundry, using minimum water and completing in a shorter time.
- Quick: Designed for a full capacity of lightly/daily soiled durable cotton and blended clothes, offering a fast wash.
- Heavy: Suitable for a full capacity of heavily soiled durable cotton and blended clothes. Soaking and hot water functions are automatically set for this program.
- Tub Clean: This program is for sanitizing and cleaning the machine itself, recommended monthly to prevent odors. No laundry should be in the machine during this cycle.
Auxiliary functions available include:
- Wash: An additional wash cycle.
- Soaking: Recommended for heavily soiled laundry items, allowing users to add detergent and soak clothes before the main wash. Not available for Eco, Fuzzy, Tub Clean, and Wool programs.
- Rinse: Used for rinsing or starching laundry separately.
- Spin: Applies an additional spin cycle or drains water from the machine.
- Air Turbo: Speeds up the drying process, selectable only if a spin cycle is set. This function can be changed during standby or by pausing and restarting a running program.
- Rinse Hold: After the last rinse, water is not drained, and the laundry remains in the machine. The machine pauses, and indicator LEDs blink. To drain the water, the user must press the start/pause button to continue spinning with the default time.
- Child Lock: A safety feature to prevent children from accidentally interacting with the machine. It is activated by pressing the "Water level" and "Function" buttons simultaneously for 3 seconds, indicated by "CL" on the display. The same action releases the lock.
Usage Features
The manual provides detailed guidance on preparing laundry for washing and optimizing energy consumption.
- Laundry Preparation: Users should remove metal attachments from clothes (e.g., underwired bras, belt buckles), empty pockets, and turn them inside out. Small items like socks should be placed in a laundry bag. Zippers should be fastened, loose buttons sewn, and rips mended. Curtains should be placed without compressing them, and attachments removed. New, dark-colored cottons should be washed separately to prevent dye transfer. Tough stains should be pre-treated. Only dyes/color changers and limescale removers suitable for machine wash should be used. Trousers and delicate laundry should be turned inside out. Angora wool items can be placed in the freezer for a few hours before washing to reduce pilling. Laundry with flour, lime dust, or milk powder should be shaken off to prevent buildup in the machine.
- Energy Saving: To use the product ecologically and efficiently, users should operate it at the highest capacity allowed by the selected program without overloading. Following detergent packaging instructions, washing lightly soiled laundry with warm or cold water, and using faster programs for small, lightly soiled loads are recommended. Soaking and hot water should be avoided for laundry that is not heavily soiled. If using a dryer, selecting a longer spin time during washing is advised. Detergent should not be used in excess.
- Correct Load Capacity: The maximum load capacity varies by laundry type, soiling degree, and program. The machine automatically adjusts water based on laundry weight. Overloading can reduce washing performance, increase noise, and cause vibrations.
- Detergent and Softener Usage: Detergent and softener should be added before starting the program. The detergent drawer should not be left open during operation. Detergent bags or dispensing balls can be placed directly among the laundry. Different detergents are recommended for colored and white laundry, and special detergents for delicate items. Woolens require specific wool detergent. Only detergents manufactured for washing machines should be used, not soap powder. The amount of detergent depends on laundry amount, soiling, and water hardness. Detergent should be poured into the main wash compartment or directly into the drum if no drawer is present. Excessive detergent should be avoided to prevent foam, poor rinsing, and environmental impact. Less detergent is needed for small or lightly soiled loads.
- Softener Usage: Softener should be poured into its dedicated compartment, not exceeding the maximum level. If thick, it should be diluted with water first.
- Liquid, Gel, and Tablet Detergents: Liquid detergent should not be used with the Delayed Start function as it can stain clothes. Fluidal gel detergent goes into the main wash compartment during initial water intake. Non-fluidal gel or capsule liquid tablets should be placed directly into the drum. Tablet detergents can be placed in the main wash compartment or directly into the drum; if residues occur, place tablets between laundry items.
- Starch Usage: Liquid starch, powder starch, or fabric dye can be added to the softener compartment. Softener and starch should not be used together. The machine's interior should be wiped with a damp cloth after using starch.
- Bleach Usage: Bleaching agent should be added to its dedicated compartment on the top cover. It should not be mixed with detergent. A small amount of bleach should be used, and clothes rinsed thoroughly to prevent skin irritation. Bleach should not be poured directly onto clothes or used for colored items.
Maintenance Features
Regular maintenance and cleaning are crucial for extending the product's service life and preventing common problems.
- Cleaning the Detergent Drawer: The detergent drawer should be cleaned regularly (every 4-5 washing cycles) to prevent powder detergent accumulation. This involves pulling the drawer forward, turning it upwards, and removing it for cleaning with water.
- Cleaning the Body and Control Panel: The machine's body should be wiped with soapy water or mild gel detergents and dried with a soft cloth. The control panel should be cleaned with a soft, damp cloth.
- Cleaning the Water Intake Filters: Filters are located at the end of each water intake valve at the rear of the machine and at the end of each water intake hose connected to the tap. These filters prevent foreign substances from entering the machine and should be cleaned when dirty. To clean, close the taps, remove hose nuts, clean filters with a brush (or pliers if very dirty), clean filters on hose ends with gaskets under running water, and then replace gaskets and filters, tightening hose nuts by hand.
- Draining Remaining Water and Cleaning the Pump Filter: The pump filter prevents solid items (buttons, coins, fabric fibers) from clogging the pump impeller. If the machine fails to drain, the filter is clogged and needs cleaning every 3 months or when clogged. Water must be drained first. To clean, unplug the machine, open the filter cap by pressing the tab and pulling it out. Place a container to catch water, loosen the pump filter anticlockwise until water flows, and collect the water. Once empty, remove the filter completely, clean residues and fibers around the impeller, and reinstall the filter.
- Cleaning the Fuzz Collector: The fuzz collector should be pushed out, opened, cleaned, and then reassembled in its original position.
Installation
Proper installation is critical for the safe and efficient operation of the washing machine.
- Appropriate Installation Location: The machine should be placed on a rigid, solid, and flat floor with sufficient load-carrying capacity, at least 1 cm away from other furniture. It should not be placed on long-pile rugs, high platforms, near cascaded surfaces, or where temperatures may fall below 0°C. The power cable should not be placed under the product.
- Connecting Water Supply: The required water supply pressure is 1 to 10 bars (0.1 – 1 MPa), with 10-80 liters per minute flow from a fully open tap. A pressure reducing valve should be used if pressure is higher. Special hoses supplied with the product should be connected to the water inlets (red for hot, blue for cold). Connections must be correct to avoid damage to laundry. Hose nuts should be tightened by hand, and taps opened to check for leaks. Taps should be closed when the machine is not in use. Models with a single water inlet should not be connected to the hot water tap.
- Connecting to the Drain: The drain hose must be directly connected to the wastewater drain or washbasin and fixed tightly to prevent flooding or scalding from hot water.
- Connecting to the Drain Without Pump: The drain pipe should be pushed into the machine's drain, then secured with a spring. The drain pipe should be less than 10 cm, and must be kept down and untangled during operation to prevent leakage.
- Adjusting the Feet: The two front feet can be adjusted to level the machine. The level can be checked using the indicator on the top cover.
- Electrical Connection: The product must be connected to a grounded outlet protected by a 6 A fuse, in compliance with national regulations. The power cable plug must be easily accessible. A qualified electrician should install a 6 Amp fuse if the house's current fuse or breaker is less than 6 Amps. The mains voltage must match the voltage specified in the technical specifications. Extension cables or multi-plugs should not be used. Damaged power cables must be replaced by Authorized Service Agents.
- Transportation: Before transporting, unplug the product, remove water drain and supply connections, drain all remaining water, and install all styrofoams before packaging. Packaging materials should be kept away from children.
- Rat Guard Installation: If a rat guard is to be installed, screws should be removed, the guard assembled, and then fixed with the screws.
Troubleshooting
The manual includes a troubleshooting section to help users resolve common issues.
- Power Cut Off: Check electric voltage, ensure the washer is plugged in.
- Water Does Not Drain: Check if the drain hose is down, unfolded, or clogged.
- Washing Machine Not Working: Ensure the lid is closed, check if the Pause button is on, verify sufficient water level (if water pressure is low, it takes longer to start), and ensure the tap is open.
- Frozen Drain Hose, Water Tap, or Drum: Add hot water to the frozen tap, remove and soak the drain hose in hot water, pour hot water into the drum for 10 minutes, and place a hot water towel on the drain hose connector. Reconnect and check draining once defrosted.
- Water Does Not Drain Out Immediately: Check for coins or pins clogging the drain, or if the drain hose is hung over the hook. Half-fill the drum and try spinning again.
- Water Leaks at Water Supply Hose Connector: Check for loose connections and repeat assembly steps if necessary.
- Water Not Supplied: Ensure the Start/Pause button was pressed after selecting water supply, the tap is open, the filter net at the hose connector is not clogged, and the water supply is not cut off.
- Spinning Makes Loud Noises and Vibrations: Ensure laundry is spread evenly, the machine is level on a sturdy flat floor (adjust feet if needed), and remove any unnecessary items around the machine.
Error messages (E1-E6) are also explained with corresponding solutions, such as checking water tap, supply, hose, drain hose, laundry balance, and door closure. Users are advised to contact their dealer or Authorized Service Agent if problems persist after following troubleshooting steps, and not to attempt repairs themselves.