6
4
5
7
2
R UBBER
SCREW
COVER
8
SCREW
CONE GEAR
6B
6A
【】Figure 7
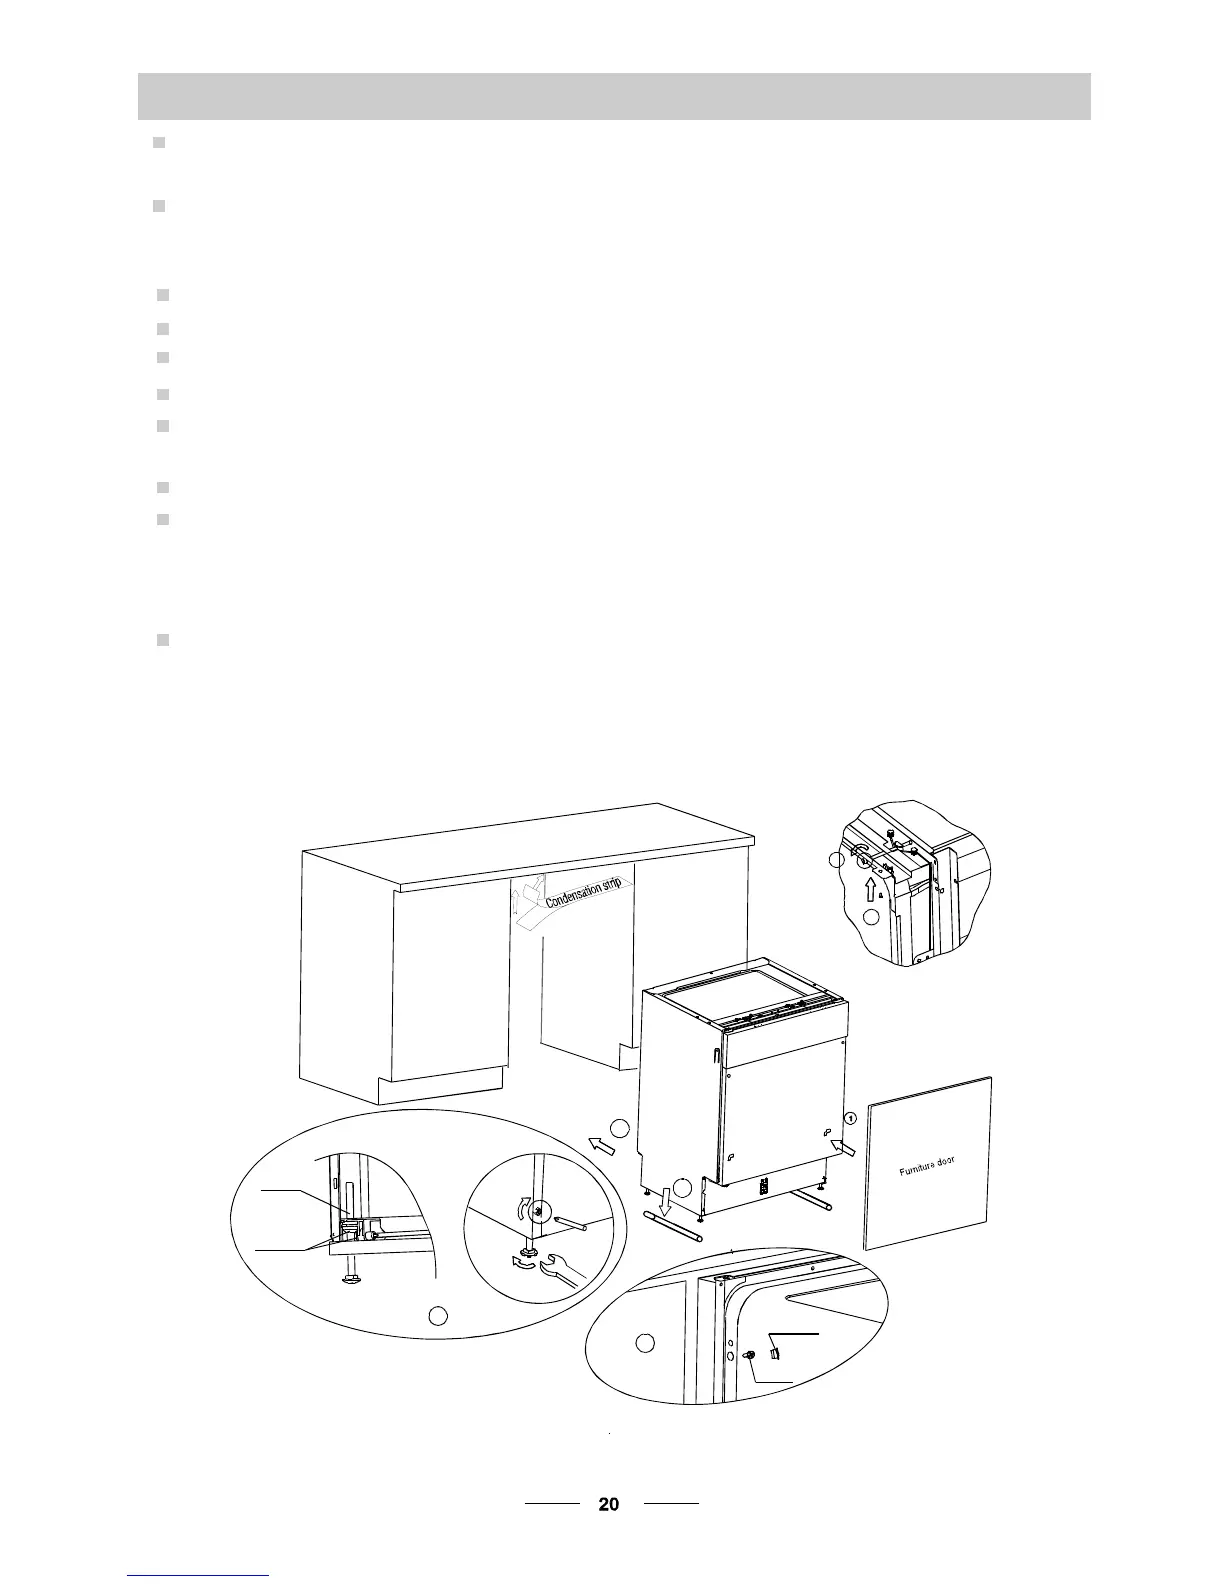
Dishwasher installation steps
●
.
.
.
.
6
8
9
1 In sta ll th e furn itu re d oo r t o t he ou t er do o r of t h e di shw ash er us ing the br ac ket s
pr ovid ed. R ef er to t he t e mplat e for p osit io ni ng o f t he b ra cke ts .
2 Adjust the tension of thedoor springs by using anAllen key turning in a clockwise
motion totighten the left and right door springs. Failure to do this could cause damage
to your dishwasher (Illustration 2)
3 Con nect t he i nl et hos e to t he cold wat er su pp ly
4 Connect the drain hose. Refer to diagram (Figure 6)
5 Connect the power cord
Put the dishwasher to slide rails(Illustration4)
7 Affix t he c o nden satio n s trip un de r th e w or k s urf ace of cab inet . P leas e e nsu re
the condensation strip is flush with edge o f work surface.
Place the dishwasher into position.
Level the dishwasher. The rear feet can be adjusted from the front of the dishwasher
by turning the screws on theleft and right hand side of the cabinet (Illustration 6A).
To ad jus t th e fr on t fe et, u se a w renc h and tu rn t he fron t f eet un til t h e di sh wash er is l ev el
(Illustra tion 6B).
10 The dishwasher must be secured in place.There are two ways to do this:
A. Nor mal w ork su rf ace- secur e t o th e wor k s urfac e by u sing t wo w o odscr ews ensu ri ng
the dishwasher weight is not being hit by the surface (Illustration 7).
B. Marble or granite work top-secure the bracket to the side panel of the dishwasher
and s ec ure the di s hwa she r t o the fu r nitur e h ousi ng. P ut t he r ubbe r cap o ver th e sc re w
(Illus tration 8) .
.