EasyManua.ls Logo

Belmont Criticool 6.3 - User Manual

Belmont Criticool 6.3
72 pages
Print Icon
To Next Page IconTo Next Page
Loading...
701-00235 Rev. B
CRITICOOL 6.3
OPERATIONAL
TRAINING
UPDATED MAY 2020
701-00235 Rev. B
Question and Answer IconNeed help?

Do you have a question about the Belmont Criticool 6.3 and is the answer not in the manual?

Summary

Core Functions and Benefits

Advanced Temperature Management Features

User Interface Overview

CureWrap Selection Guide

Wrap Type and Specification Table

Provides a table for selecting CureWrap based on patient size, weight, and dimensions.

Setting Up CritiCool

Unpacking CritiCool: Initial Steps

Unpacking CritiCool: Final Steps

Setting Up CritiCool for TTM: Initial Setup

Unit Placement, Tank Filling, and Power On

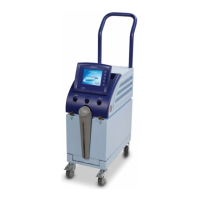
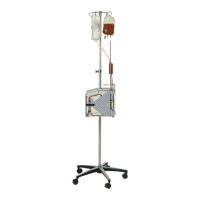
Guide to placing the unit near the bed, filling the tank, and powering on the system.

Setting Up CritiCool for TTM: Mode Selection

Selecting the TTM Mode

Instructions on selecting the TTM mode after the initial setup and self-test.

Setting Up CureWrap: Placement

CureWrap Placement on Patient or Bed

Guidance on placing the CureWrap on the bed or underneath the patient.

Temperature Probe Types

Reusable vs. Disposable Probe Comparison

Comparison of reusable and disposable temperature probes for core and surface measurements.

Setting Up CritiCool with Disposable Probes

Connecting Disposable Core and Surface Probes

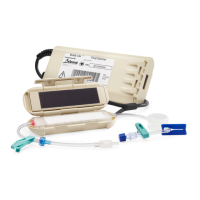
Instructions for connecting disposable core and surface probes to the CritiCool unit using color coding.

Setting Up the Patient: Sensor Connection

Connecting Patient Sensors to Adapter Cables

Guide to connecting core and surface sensors to their respective adapter cables.

Setting Up the Patient: Probe Placement

Core and Surface Probe Placement Details

Details on placing core sensors (rectal/esophageal) and surface sensors (clavicle).

Setting Up the Patient: Core Readout

Core Readout Requirement for Thermoregulation

Explains that thermoregulation requires a valid core readout from the attached patient probe.

Setting Up CureWrap: Water Hoses Connection

Connecting Water Hoses to CritiCool Unit

Instructions for connecting the blue water hoses to the CritiCool unit's water in and out connectors.

Setting Up CureWrap: Hoses to Wrap

Connecting Water Hoses to CureWrap

Guidance on connecting the plastic ends of the water hoses to the CureWrap and ensuring clamps are open.

CureWrap Hose Compatibility

CureWrap 500-03500 Hose Usage

Other CureWrap Hose Usage

Targeted Temperature Management (TTM) Set Point

Default Set Points for TTM Mode

Specifies default Set Point temperatures for Adult (33.0°C) and Neonatal (33.5°C) modes.

Changing TTM Set Point Temperature

Instructions on how to adjust the Set Point temperature using the screen interface.

Securing the CureWrap Around the Patient

Securing the CureWrap Around the Patient: Diagrams

Main Operation Screen Layout

CritiCool Touchscreen Interface

Selecting Set Point Temperature

Set Point Definition and Adjustment Process

Explains Set Point as target temperature and how to change it using the +/- buttons and OK.

Settings Screen Access

Settings Screen Configuration: Part 1

Settings Screen Configuration: Part 2

Settings Screen Passcode

Standby Mode Operation

Mode Selection

Overview of TTM, Controlled Rewarming, Normothermia

Explains the different operational modes and the process to select or change them.

Targeted Temperature Management (TTM)

TTM Mode Purpose and Use Cases

Explains the purpose of TTM mode: reaching preset points, maintaining temperature, and manual re-warming.

Controlled Rewarming Mode

Initiating Controlled Rewarming Process

Steps to select Controlled Rewarming, confirm probe placement, and start the rewarming process.

Controlled Rewarming Mode Details

Rewarming Parameters and Settings Adjustment

Information on rewarming step per hour, default ranges, and how to select a different target temperature.

Normothermia Mode

Normothermia Mode Usage and Characteristics

Description of the Normothermia mode for fast warming, its lack of rewarming steps, and goal.

Messages and Troubleshooting

CritiCool Message Types

Alarm Messages: Informative

Alarm Messages: Error Type 1

Alarm Messages: Error Type 2

Alarm Messages: Error Type 3

Patient Mode Differences

Neonatal Patient Mode

Adult Patient Mode

Water Temperature Settings

Power Interrupts Handling

Service Screen Options

Emptying CritiCool

Procedure for Draining Water Tank

Step-by-step instructions for draining the water from the CritiCool unit, including hose connection and receptacle.

Thermal Disinfection Procedure

Password Protected Thermal Disinfection Mode

Details on accessing and performing thermal disinfection, which is password protected and requires a trained technician.

After Use Cleaning Procedures

Packing CritiCool for Shipment: Initial Steps

Packing CritiCool for Shipment: Final Steps

Important Operational Points

Belmont Criticool 6.3 Specifications

General IconGeneral
BrandBelmont
ModelCriticool 6.3
CategoryMedical Equipment
LanguageEnglish

Related product manuals