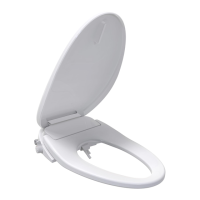
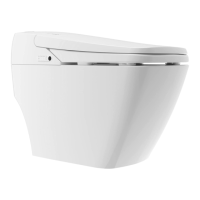
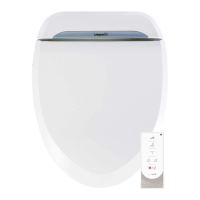
The USPA PRO is a personal hygiene appliance, specifically a bidet toilet seat, designed to enhance personal cleanliness and comfort. It offers a range of washing, drying, and convenience features, all controllable via a remote or side panel buttons.
Function Description
The primary function of the USPA PRO is to provide posterior and feminine washing using water, followed by warm air drying. It integrates seamlessly with an existing toilet, replacing the standard toilet seat and lid. The unit features a heated seat for added comfort, a deodorizing filter to minimize odors, and an occupancy sensor to ensure functions only operate when the seat is occupied.
Usage Features
Washing Functions:
- Cleansing (Posterior Wash): Activated by pressing the "Cleansing" button, this function provides a posterior wash for 3 minutes. It operates only when the user is seated.
- Bidet (Feminine Wash): Activated by pressing the "Bidet" button, this function provides a feminine wash for 3 minutes. It also operates only when the user is seated.
- Auto Mode: When "Auto" is pressed during a "Cleansing" or "Bidet" operation, it initiates a sequence of cleansing wash (27 seconds), oscillating wash (20 seconds), oscillating massage (80 seconds), and finally, a dry cycle (3 minutes).
- Aerated Spray: This feature provides a gentle yet strong spray with additional aeration, available during "Cleansing," "Bidet," "Kids," or "Auto" modes.
- Nozzle Position Adjustment: The nozzle position can be adjusted to 5 levels using the "FRONT" or "REAR" buttons. This adjustment is available during "Cleansing," "Bidet," "Auto," and "Kids" modes.
- Water Pressure Adjustment: The water pressure can be adjusted to 5 levels using the "HIGH" or "LOW" buttons during "Cleansing," "Bidet," and "Kids" modes.
- Auto Nozzle Cleansing (Front): Pressing "FRONT" for 2 seconds activates a 3-minute automatic cleansing of the front nozzle. This function operates only when standing up.
- Auto Nozzle Sterilization (Rear): Pressing "REAR" for 2 seconds activates a 3-minute automatic sterilization of the rear nozzle. This function also operates only when standing up.
Drying Function:
- Dry: Pressing the "Dry" button activates the warm air dryer for 3 minutes. Pressing it again activates "Turbo mode," indicated by the water pressure LED turning on. The dryer strength is saved between uses. The dryer only operates when the user is seated.
Comfort and Convenience Features:
- Heated Seat: The seat temperature can be adjusted through 4 levels: Off, Low (33°C/91.4°F, LED Green), Middle (36°C/96.8°F, LED Orange), and High (39°C/102.2°F, LED Red).
- Deodorization: The deodorizing filter unit automatically activates when the appliance is in use, working for up to 20 minutes. It stops after 1 minute if the user stands up. The deodorization can be turned on/off with a dedicated button.
- Sound: A button allows enabling or disabling the beeping sound of the unit.
- LED (Night Light): A button controls the night light, turning it on or off.
- Eco Mode: Pressing "Eco" activates a power-saving mode. In Eco Mode, the water pressure for cleansing/bidet is set to Auto level 2, and the seat temperature is set to approximately 28°C (82.4°F).
- User Settings: The unit allows saving two personalized settings (Cleansing, Bidet) using the "User 1" and "User 2" buttons. To set, press a User button (LED blinks), then Cleansing or Bidet, adjust water pressure and nozzle position, and press the User button again to save (LED stays on for 2 seconds). To use, press Cleansing or Bidet, then the desired User button.
- Kids Mode: Pressing "Kids" adjusts all functions for children, automatically operating from Cleansing to Dry with adequate water pressure (Level 1) and nozzle position (Level 5). This feature only operates when seated and should be used under adult supervision.
- Stop Function: The "Stop" button immediately halts any current operation.
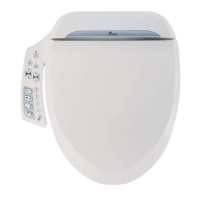
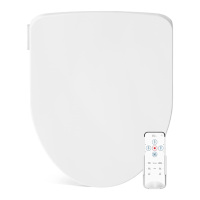
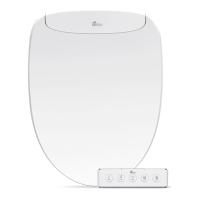
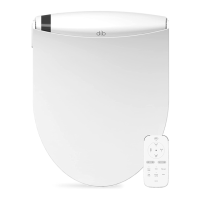
Control Options:
- Remote Control: The primary method of control, powered by 3 AAA batteries.
- Side Control Buttons: Located on the unit, these buttons provide essential functions (Cleansing, Stop, Power, Bidet) in case the remote control is broken or its batteries are dead. The power button turns the appliance ON or OFF when standing. The Bidet and Cleansing buttons activate their respective washes when seated and stop them when pressed again.
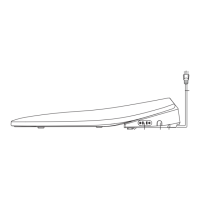
Installation and Setup:
- Mounting: The unit is installed by placing a mounting plate over the toilet's mounting holes, inserting bolts, and securing them with cone packings, washers, and nuts. The bidet seat then slides onto this plate until it clicks.
- Water Connection: Involves closing the shutoff valve, flushing the toilet, removing the existing water supply hose, installing a T-valve on the water tank, connecting water supply hoses from the T-valve to the shutoff valve and to the bidet seat, and finally opening the shutoff valve.
- Trial Operation: After installation, plug in the power cord, allow the water tank to fill, and then test all functions by covering the toilet bowl with plastic wrap to prevent water spray.
- Remote Control ID Setting: The remote control ID can be set by pressing "HIGH" for 3 seconds, then using "HIGH" or "LOW" to change the ID number. While holding the "Stop" button on the side of the seat until it powers off, continue holding "Stop" and set the remote control ID. The appliance will beep when saved.
- Factory Reset: The unit can be reset to factory default values for water temperature, seat temperature, cleansing/bidet water pressure, nozzle position, dry temperature, deodorization, LED, user settings, remote controller ID, and sound.
Maintenance Features
Cleaning the Product:
- Nozzle Cleaning (Manual): To clean the nozzles manually, ensure the occupancy sensor is not activated. Press the "Front" button for 2 seconds to extract the bidet nozzle, then press it again to extract the cleansing nozzle. Use a toothbrush or soft cloth to clean. Press "Stop" to retract the nozzle.
- Nozzle Cleaning (Auto): Press the "Rear" button for 2 seconds to initiate a 30-second automatic cleaning of the nozzle, after which it retracts automatically. The "Stop" button can be used to retract the nozzle during auto cleaning. Avoid forcefully pushing or pulling the nozzles.
- Strainer Maintenance: The strainer should be cleaned regularly to prevent clogging, which can impair the appliance's operation. This involves closing the shutoff valve, unscrewing the hose nut, cleaning the strainer with a small brush, re-screwing the hose nut, and opening the shutoff valve.
- Body Cleaning: The unit's body should be wiped regularly with a dry soft cloth, sponge, or a damp cloth with mild detergent. Only neutral cleansers should be used to protect the plastic unit; harsh cleaners like toilet cleaners, bleach, benzene, paint thinner, or cresol (Lysol) are prohibited.
Long-Term Maintenance:
- Draining Water: If the unit will not be used for an extended period, the water should be drained. This involves unplugging the power cord, closing the shutoff valve, and pressing the drain/remove button to drain the tank.
- Detaching Unit: After draining, the unit can be detached by pressing and holding the drain/remove button and pulling it forward.
- Preventing Freezing: To prevent freezing, ensure the power cord is plugged in and set the water temperature to low or middle. If the toilet area lacks a heating system, wrap pipes with a cloth or other insulating materials. For long-term non-use during winter, unplug the unit and thoroughly drain water from the tank and pipes.
Troubleshooting Guide:
The manual provides a comprehensive troubleshooting guide for common issues such as the unit failing to power on, nozzle not extending, low water pressure, seat not heating, the unit stopping mid-use, water coming out unexpectedly, and continuous water leakage. Solutions range from resetting the GFI outlet, checking connections, cleaning components, replacing batteries, adjusting settings, to contacting customer support for persistent issues.