15
1) LIMITS FOR USE
Do not use the automation on leaves with dimensions / weights above the values indicated in the below enclosed table chart:
Door leaf width
(m)
Door leaf weight
(kg)
1
1,5
2
2,3
300
250
215
200
2) OVERALL DIMENSION (FIG.1)
On Fig 1 main overvall dimensions are indicated, value to be in millimiters.
3) INSTALLATION DIMENSIONS (FIG.2)
On Fig. 2 and enclosed table chart , different installation dimensions are indicated.
Any change on the A, B, E dimensions, C and D dimensions changes accordingly.
Verify to have enough space to guarantee the necessary articulated arm movement before proceeding with the installation.
4) TOOLS AND MATERIALS
Make sure that there are all tools and materials necessary for installation (fig.5). Also check that they are in compliance with Stand-
ards and in perfect working order.
Use suitable individual protection devices I.P.D. (goggles, gloves, etc)
The length and type of connection cables depend on the accessories installed (see “Electric connections” paragraph).
The fixing screws for the gear motor are not supplied as they depend on the features of the materials used for the pillars
and the leaves.
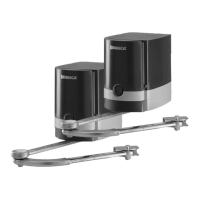
5) STANDARD INSTALLATION (FIG.3)
On Fig. 3 a standard installation complete with the main accessories is showed.
Keys
1 MBE.24 with control unit CP.MBY24
2 MB.24
3 Wall Photocell transmitter TX1
4 Wall Photocell receiver RX1
5 Opening leaf stop
6 Internal Photocell transmitter TX2
7 Internal Photocell receiver RX2
8 Closing leaf stop
9 Key selector
10 Flashing signal light connection with aerial
11 Safety edge Left leaf
12 Safety edge Right leaf
6) ANCHORING OF BRACKETS (FIG.6-7)
Once the fixing value “E”(fig.2) it taken from the relevant table, and considering a minimum height from floor of 100mm, fit the bracket
to the pillar by means of the screws M8 with relevant screw anchors.
Once the fixing value “B” is calculated, fit the articulated bracket to the gate with the same screws M8 and relevant screw anchors
or weld it to the gate by aligning the articulation bracket to the fitting bracket for the pillar, as shown in the drawing. Reinforce the
fitting areas which are not sufficiently thick, or in any case not strong enough.
7) POSITIONING THE GEARED MOTOR (FIG.10)
Place the geared motor in the fitting bracket for assembly to pillar by using the special nuts and screws supplied.
8) POSITIONING THE ARTICULATED ARM BA (FIG.11)
- Release the gear motor (see paragraph “Emergency manual operation”)
- Insert pin P in the hole of the motor shaft A
- Join arm B1 to arm B2 and lock them by means of pin T1 and lock ring S1
- Fix the arms to the motor shaft A and lock them by means of nut D by inserting washer R and ring N
- Hook the arm to bracket SN and lock it by means of pin T1 and release ring S1.
- Apply cover C and fix it by means of the two screws V.
The gear motor can be installed on the other gate leaf (Fig. 6) in a similar way. The only difference between right-hand and left-hand
leaves relies in the position of arm B2.
With released gear motor, completely open the gate and check the operating clearances of the two arms.