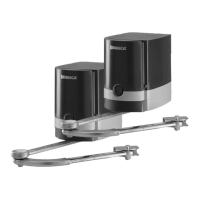
16
9) MANUAL AND EMERGENCY OPERATION (FIG.12)
To manually open or close the door in case of power failure or faults, two solutions are possible:
• Built-in release
Introduce the customized key C, turn it clockwise and pull lever L. At this point the geared motor is released and the gate can be
manually pushed.
To reset the normal operation, close lever L again and turn key C anticlockwise. Manually move the gate until the geared motor
is engaged again.
• Rope external release: optional
It is available for fitting to external wall or with accessory to be mounted flush (see MB.SE).
10) WIRE CONNECTIONS (FIG.3)
The cables necessary for the installation can vary according to the accessories installed.
No connection cable is supplied.
Fig. 3 indicates the cables for standard installation.
List of cables
Connection Type Maximum length and notes
A Mains power supply (MBE.24 with control unit CP.MBY24) 3x1,5mm
2
30m - [1]
B Motor connection (MB.24 without control unit) 5x1,5mm
2
15m - [2]
C Wall Photocell transmitter connection 2x0,5mm
2
20m
D Wall Photocell receiver connection 4x0,5mm
2
20m
E Column Photocell transmitter connection 2x0,5mm
2
20m
F Column Photocell receiver connection 4x0,5mm
2
20m
G Key selector connection for external command 4x0,5mm
2
20m
H Flashing signal light connection 2x1,0mm
2
10m
I Connection of the aerial built-in the flashing light RG 58
L Connection for safety edge Right leaf 2x1,0mm
2
10m
M Connection for safety edge Left leaf 2x1,0mm
2
10m
Note
[1]
An omnipolar switch should be provided with the contact opening of at least 3 mm, provided with overload protec-
tion and able to cut off the system from the mains.
Means for disconnections must be incorporated in the fixed wiring in accordance with the wiring rules.
The MBE24 gear motor can be installed indifferently on the right of left leaf.
It is preferable to install it on the leaf that is most easily reached by the electricity line.
[2]
It is recommended not to exceed 15 m in length. If it is indispensable to exceed this limit, increase the section of the
cable.
The cables used must be suitable for the type of connection. For example, for connection protected by raceways
use H03VV-F cables, for cables in the outdoor environment always use the H07RN-F type.
11) ADJUSTING THE LIMIT SWITCHES (FIG.15)
N.B.: The position of the cams referring to micro-switches varies according whether the installation of the geared motor is
lefthand or righthand, view from inside. Pay attention to diagrams.
• Closing limit switches
Release the geared motor and manually close the door.
Turn the related cam to the position shown by using the special key supplied, until the micro-switch is activated. Lock the cam
by tightening the central screw supplied.
• Opening limit switches
Release the geared motor and manually open the door.
Turn the related cam to the position shown by using the special key supplied, until the micro-switch is activated. Lock the cam by
tightening the two screws supplied.
12) CHECKS
12.1) CHECKS INSTALLING POSITIONS
1) Check that the arms are perfectly horizontal using a spirit level (fig.8).
If the arms are not perfectly horizontal, malfunctioning and breakage can occur. The shape of the holes on the fixing plate allows
any minimum adjustments.
2) With both gear motors released, take the leaves into the completely open position and check that the arms do not strike any
obstacle during movement.
Fig.9 represents the two motors installed, the dotted line indicates the two arms with the leaves in the opening position.
Control the presence and functionality of the mechanical block in closing “A”.