17
12.2) CHECK MOTOR AND LIMIT SWITCHES CONNECTIONS
1) Cut-off power supply.
2) Manually release the wings, move them to approx. half-stroke and lock them again.
3) Restore power supply.
4) Send a step-by-step control signal by pressing the <-> push-button.
5) The leeaves must move in OPENING.
In case this does not happen, it is sufficient to invert among them the motor run wires. (1<>2 for M1 motor, and 3<>4 for M2
motor) and, if used, the relative Limit switch inputs (14<>15 for M1 motor, and 16<>17 for M2 motor).
13) SAFETY DEVICES (FIG.16)
IMPORTANT!
READ CAREFULLY!
Measure opening and closing forces (by means of the special instrument required by the standard EN 12445).
If the values of the forces are higher, install a protective device in accordance with the standard EN 12978 (for example
a sensitive edge) and repeat the measurement.
The dynamic forces can be reduced, for example, by reducing the speed of the leaf or using a sensitive edge wit high
elastic deformation.
BENINCÀ can provide all the devices necessary for your installation and relative accessories , contact your trusted
supplier for any further information.
On fig.16 an example of application on the primary closing edges.
To prevent the impact in the area of closure (figure 4, risk C) install a pair of photocells (recommended height 500 mm) so as to sense
the presence of the test paralleledpipe height 700 mm (in according to MD).
To reduce further the possibility of impact in the area of opening (figure 4, risk B) install a pair of photocells (recommended height
500 mm) in the area of movement of the gate, so as to sense the presence of the test paralleledpipe height 700 mm (in according
to MD).
We suggest to connect photocells in phototest mode (see Fig.18 and set logics TST1=ON e TST2=ON), or check the if photocell
working correctly at least every 6 months.
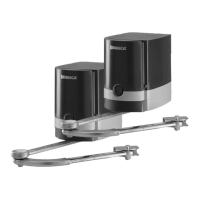
14) CP.MBY24 CONTROL UNIT
14.1) AUTOSET FUNCTION
IMPORTANT:
The control unit is equipped with the Autoset function to automatically set the main functioning values based on the
type of installation.
The AUTOSET function must be repeated at every function parameter change or upon change of automation conditions. See the
AUTO menu for further information.
The first and most important function to program is the self-regulation of the parameters, which allows the control unit to automa-
tically set the end run points, the torque applied to the leaf and the slowing phases*.
During the autoset operations, the control unit automatically performs several opening and closure manoeuvres.
Before proceeding, check that no person, animal or obstacle is or can be in the door manoeuvre area.
All the accessories provided for the system should be already connected to the control unit. If further accessories should
be added, self-adjustment must be repeated.
To carry out autoset, proceed as follows:
a) Ascertain that no obstacles of any nature are present in the manoeuvre area, if necessary, block off the area in order to prevent
access from people, animals, vehicles, etc.
During autoset phase, the anti-crushing function is not active.
b) Select the AUTO function and press OK.
c) Select with the <+> or <-> button the submenu LSW.
LSW: if the motor is equipped with Limit switch.
d) once selected press OK to begin the autoset phase.
The control unit carries out a series of manoeuvres for learning of the run of the leves and for parameter configuration.
Perform an autostop procedure after every maintenance intervention or modification of the door.
After every autoset procedure and/or PMO/PMC,PSO/PSC parameters changing, measure opening and closing forces (by means
of the special instrument required by the standard EN 12445).