English
Using the DC E600 7
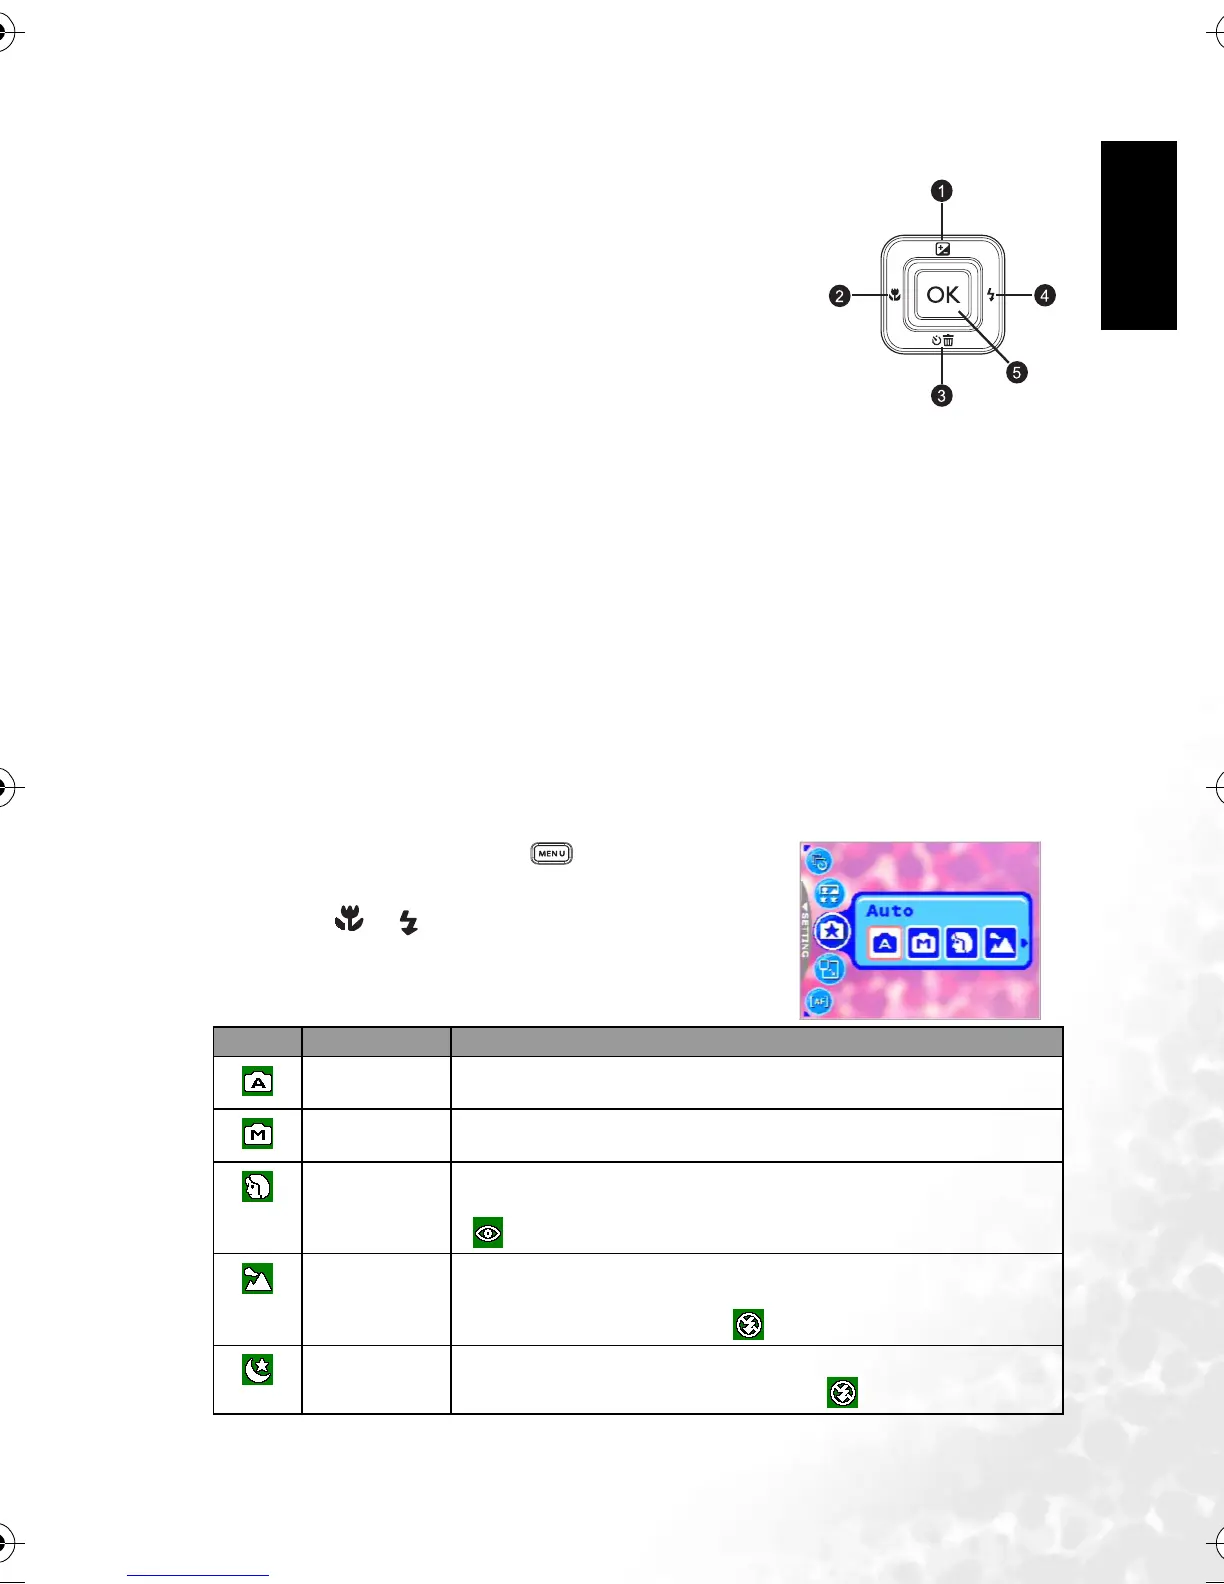
3.1.3 Changing Camera Settings
Camera settings can be changed with the following four-way
and OK buttons.
1. Up/EV:
• Scrolls upwards in menus.
• Enables you to adjust the EV settings.
2. Left/Focus:
• Scrolls left in menus.
• Enables you to choose the appropriate focus settings.
3. Down/Self-Timer/Interval shoot/Delete
• Scrolls downwards in menus.
• Toggles the self-timer settings.
• Triggers Interval shoot.
• Delete images, video clips or voice memos.
4. Right/Flash:
• Scrolls right in menus.
• Enables you to choose the appropriate flash settings.
5. OK: Confirms the chosen setting.
3.1.4 Setting Shooting Mode
You can set Shooting Mode for capturing images according to the following steps.
1. In Snapshot Mode, press the [ ] button.
Shooting Mode menu is displayed.
2. Use the [ ]/[ ] buttons to select the desired mode,
and then press the OK button to confirm.
The table below will help you choose appropriate Shooting
Mode:
Icon Shooting Mode Description
[]
Auto Select this mode when you want to leave the settings up to the camera to
capture images with ease.
[]
Manual Select this mode when you want to adjust the settings of White Balance,
Metering, and ISO. These menus are only available in Manual mode.
[]
Portrait Select this mode when you want to capture an image that makes the person
stand out against a defocused (blurred) background. The flash is fixed at
[ ], which is effective in reducing the red-eye phenomenon.
[]
Landscape Select this mode to enhance the color saturation in mountains, forests and
other landscape scenery or to take portraits that feature a landmark in the
background. The flash is fixed at [ ].
[]
Night Scene Select this mode when you want to take a photograph with an evening or
night scene background. The flash is fixed at [ ].
DC_E600_UM.book Page 7 Wednesday, February 8, 2006 10:04 AM