English
Using the DC E60014
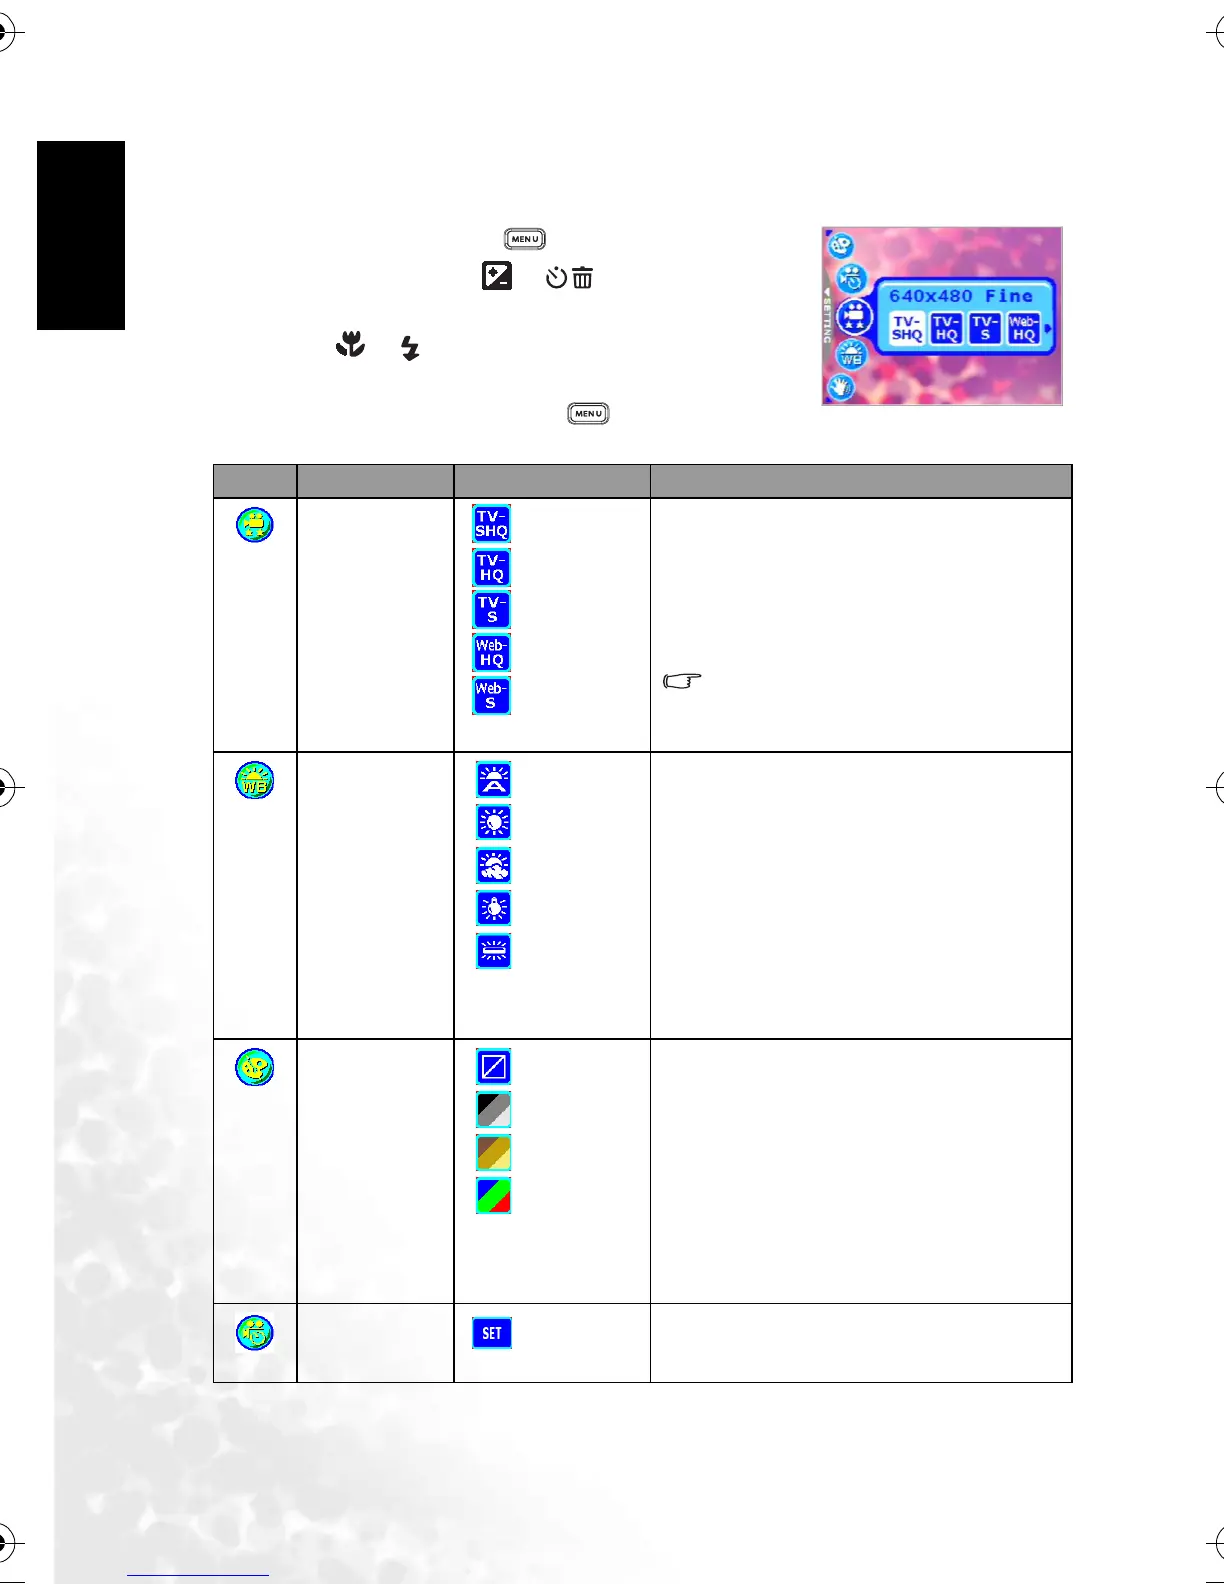
3.2.2 Movie Mode Menu Settings
3.2.2.1 Movie Mode Menu
1. In Movie Mode, press the [ ] button to access the
menu, and then use the [ ]/[ ] buttons to select
the menu settings you want to change.
2. Use the [ ]/[ ] buttons to select the desired item in
the menu, and then press the OK button.
3. To exit from the menu, press the [ ] button.
Icon Item Option Functional Description
[]
Movie Quality
[] TV-SHQ
[] TV-HQ
[] TV-S
[] Web-HQ
[] Web-S
Sets the quality and size of the video clip that will
be recorded.
– TV-SHQ: 640 x 480 Fine
– TV-HQ: 640 x 480
– TV-S: 320 x 240 Fine
– Web-HQ: 320 x 240
– Web-S: 160 x 128
“SHQ” refers to “super high quality”.
“HQ” refers to “high quality”. “S” refers to
“standard”.
[]
White Balance
[] Auto WB
[] Sunny
[] Cloudy
[] Tungsten
[ ] Fluorescent
Sets the white balance when recording subjects
under specific lighting conditions.
– Auto WB: Automatically adjust the white
balance.
– Sunny: Suitable for bright daylight condi-
tions.
– Cloudy: Suitable for cloudy, twilight, or
shady conditions.
– Tungsten: Suitable for subjects lit by tung-
sten (incandescent) lighting.
– Fluorescent: Suitable for subjects lit by flu-
orescent lighting.
[]
Effect
[] Normal
[] B & W
[] Sepia
[] Vivid
Sets the color of the video clip that will be
recorded.
– Normal: Standard RGB color settings suit-
able for general recording.
– B & W: Black and white video clips with
shades of grey.
– Sepia: Produces a warm, old-fashioned
style of video clips, in which the colors are
more brown and orange.
– Vivid: Produces sharper and more vibrant
colors.
[]
Timer REC
[] Set
Allows you to set recording session in advance. For
more information on setting Timer Recording,
refer to 3.2.3 “Timer Recording” on page 15.
DC_E600_UM.book Page 14 Wednesday, February 8, 2006 10:04 AM