36
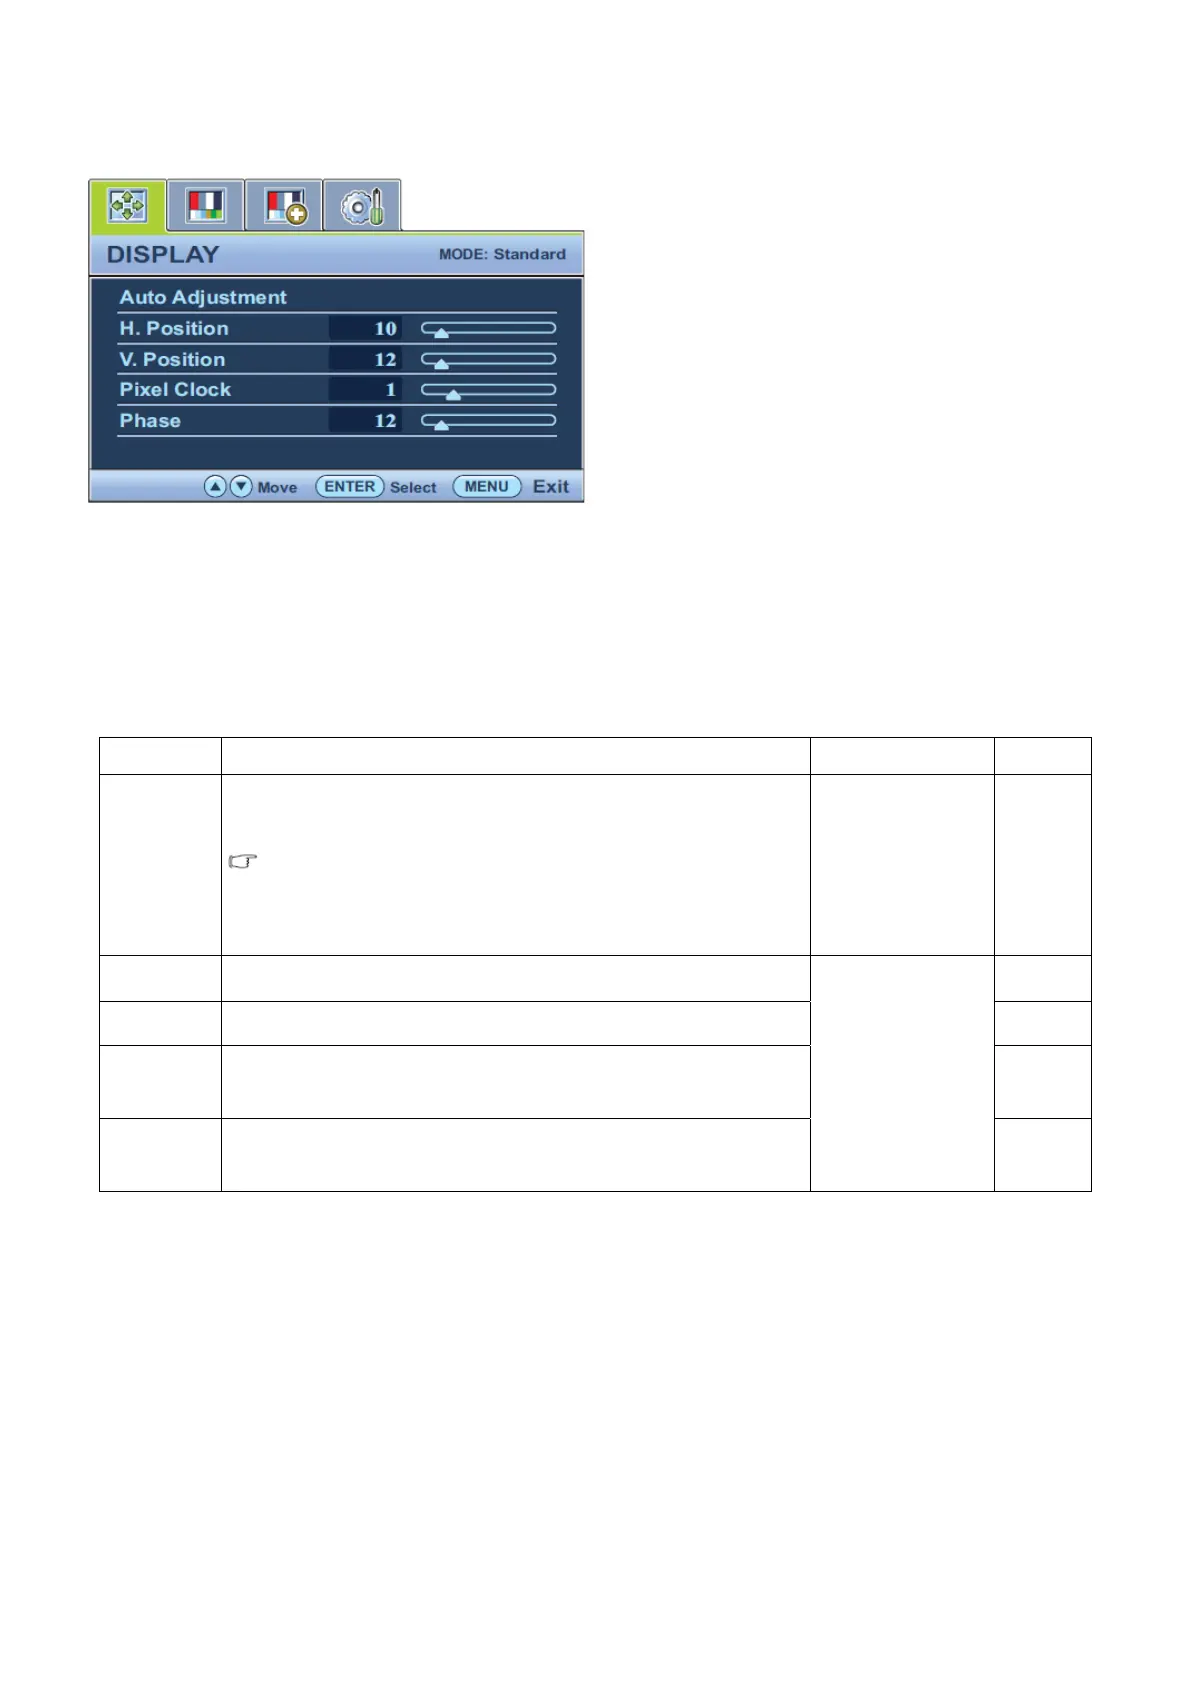
Display Menu
Available menu options may vary depending on the input sources, functions and settings.
1. Press the MENU key to display the main menu.
2. Press the ▲ or ▼ keys to select DISPLAY and then press the ENTER key to enter the menu.
3. Press the ▲ or ▼ keys to move the highlight to a menu item and then press the ENTER key to select that item.
4. Press the ▲ or ▼ keys to make adjustments or selections.
5. To return to the previous menu, press the MENU button.
Item Function Operation Range
Auto
Adjustment
Optimizes and adjusts the screen settings automatically for you.
The AUTO key is a ‘hot key’ for this function.
When you connect a digital video output using a digital (DVI)
cable to your monitor, the AUTO key and the Auto
Adjustment function will be disabled.
Press the ENTER
key to select this
option and make
adjustment.
H. Position Adjusts the horizontal position of the screen image.
Press ▲ or ▼
keys to adjust the
value.
0 to 100
V. Position Adjusts the vertical position of the screen image.
0 to 100
Pixel Clock
Adjusts the pixel clock frequency timing to synchronize with the
analog input video signal. Not applicable to a digital input signal.
0 to 100
Phase
Adjusts the pixel clock phase timing to synchronize with the
analog input video signal. Not applicable to a digital input signal.
0 to 63