26 Operation
10. The IP Address, Subnet Mask, Default Gateway, and DNS Server settings will be
displayed. Note down the IP address displayed in the IP Address row.
If you are in a non-DHCP environment:
1. Repeat steps 1-4 above.
2. Press / to highlight DHCP and press / to select Off.
3. Contact your ITS administrator for information on the IP Address, Subnet Mask, Default
Gateway, and DNS Server settings.
4. Press / to select the item you want to modify and press OK.
5. Press / to move the cursor and then press / to enter the value.
6. To save the setting, press OK. If you do not want to save the setting, press BACK.
7. Press BACK to return to Wired LAN page, press / to highlight AMX Device
Discovery and press / to select On or Off.
8. Press BACK to exit the menu.
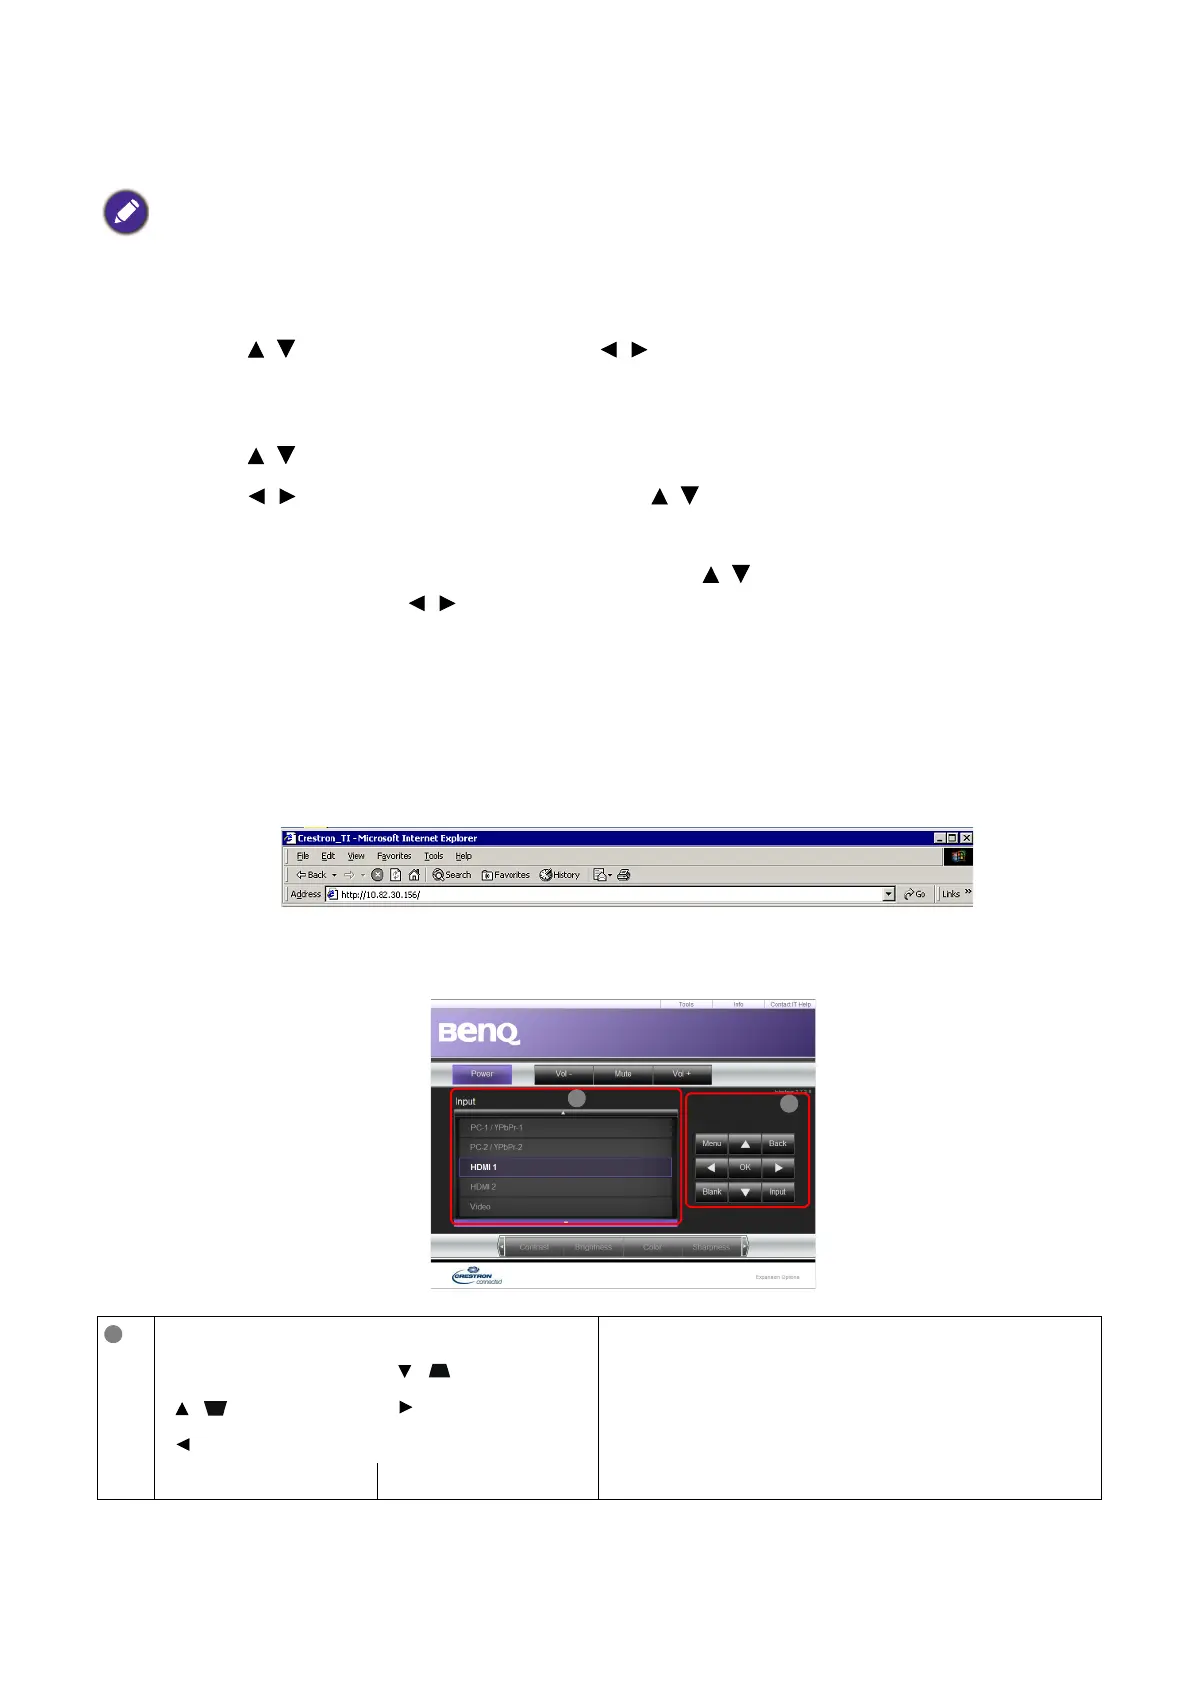
Controlling the projector remotely through a web browser
Once you have the correct IP address for the projector and the projector is on or in standby
mode, you can use any computer that is on the same local area network to control the projector.
1. Enter the address of the projector in the address bar of your browser and click Go.
2. The remote network operation page opens. This page allows you to operate the projector as
if you were using the remote control or control panel on the projector.
If the IP Address still does not display, contact your ITS administrator.
• Menu (MENU)• Auto PC (AUTO) See Projector & Remote control on page 9 for
details.
• OK
• ( )
• ( )
•
•
• Blank (BLANK) • Input (SOURCE)