Then screw the Alloy Nose Cone onto the Main Alloy Body.
Your Handpiece is now complete and ready to use.
Should you have any problems or questions,
do not hesitate to contact
on
Melb. Metro 8586 7800
Toll Free 1800 33 4142
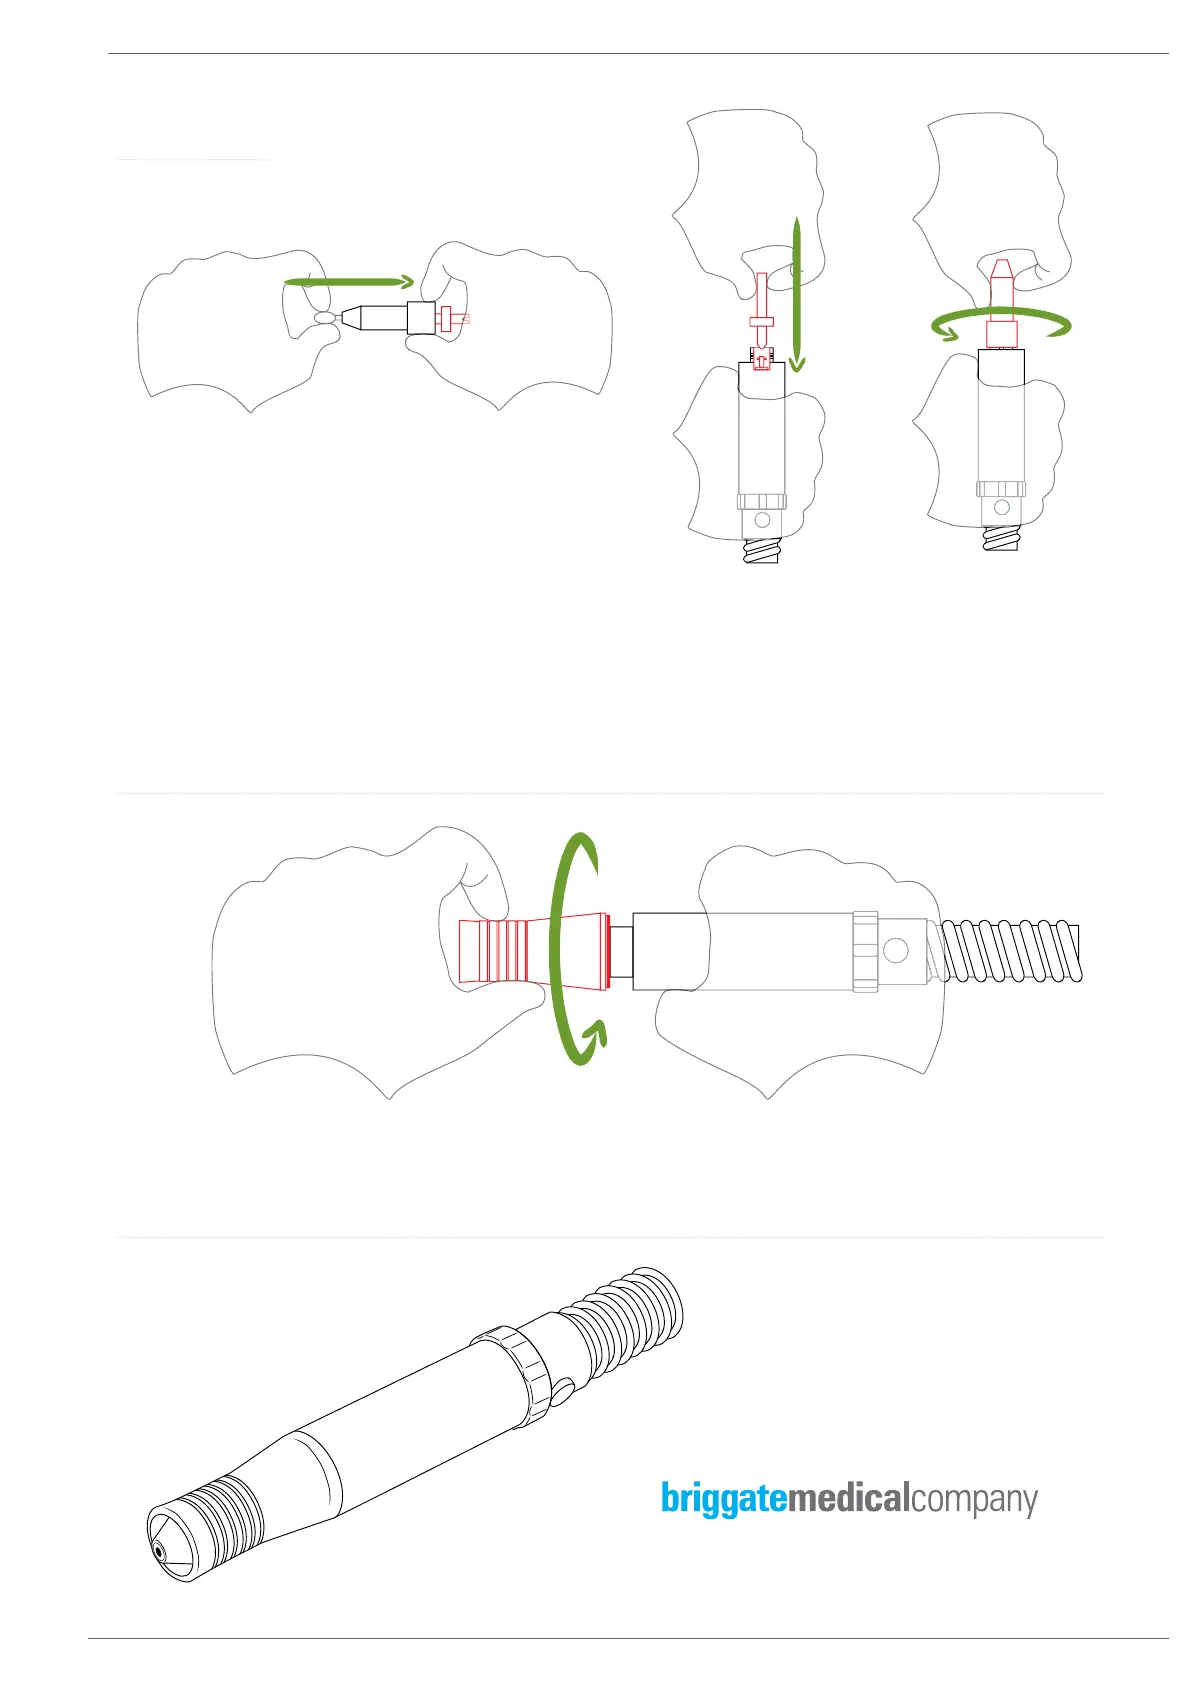
Before screwing the Burr Clutch Housing onto the Micro-motor, use a burr or mandrel to
push the Burr Clutch Assembly from it’s housing. Now hold the Handpiece vertically and
place the Burr Clutch Assembly into the Micro-motor ensuring the nylon slotted drive
coupling nestles comfortably onto the “T” bar drive on the motor. Then screw the Burr
Clutch Housing onto the Micro-motor.
Then screw the Alloy Nose Cone onto the Main Alloy Body.
Your Handpiece is now complete and ready to use.
Should you have any problems or questions,
do not hesitate to contact
on
Melb. Metro 8586 7800
Toll Free 1800 33 4142
Before screwing the Burr Clutch Housing onto the Micro-motor, use a burr or mandrel to
push the Burr Clutch Assembly from it’s housing. Now hold the Handpiece vertically and
place the Burr Clutch Assembly into the Micro-motor ensuring the nylon slotted drive
coupling nestles comfortably onto the “T” bar drive on the motor. Then screw the Burr
Clutch Housing onto the Micro-motor.
Step 9
Then screw the Alloy Nose Cone onto the Main Alloy Body.
Your Handpiece is now complete and ready to use.
Should you have any problems or questions,
do not hesitate to contact
on
Melb. Metro 8586 7800
Toll Free 1800 33 4142
Before screwing the Burr Clutch Housing onto the Micro-motor, use a burr or mandrel to
push the Burr Clutch Assembly from it’s housing. Now hold the Handpiece vertically and
place the Burr Clutch Assembly into the Micro-motor ensuring the nylon slotted drive
coupling nestles comfortably onto the “T” bar drive on the motor. Then screw the Burr
Clutch Housing onto the Micro-motor.
Step 10
Step 11
10