21
Note: To facilitate replacing the tines, you must remove
the tiller from the tractor and turn it upside down.
-Park the tractor safely.
-Raise the tiller as high as it will go and put some blocks
under the tiller.
Note: Each group of tines must have two left tines and
two right tines.
For reference purposes:
-Alternate left and right tines in each group.
-A bolt with no spacer is 3/8 x 1 1/4" long.
-A bolt with one spacer is 3/8 x 1 3/4" long.
-A bolt with two spacers is 3/8 x 2 1/4" long.
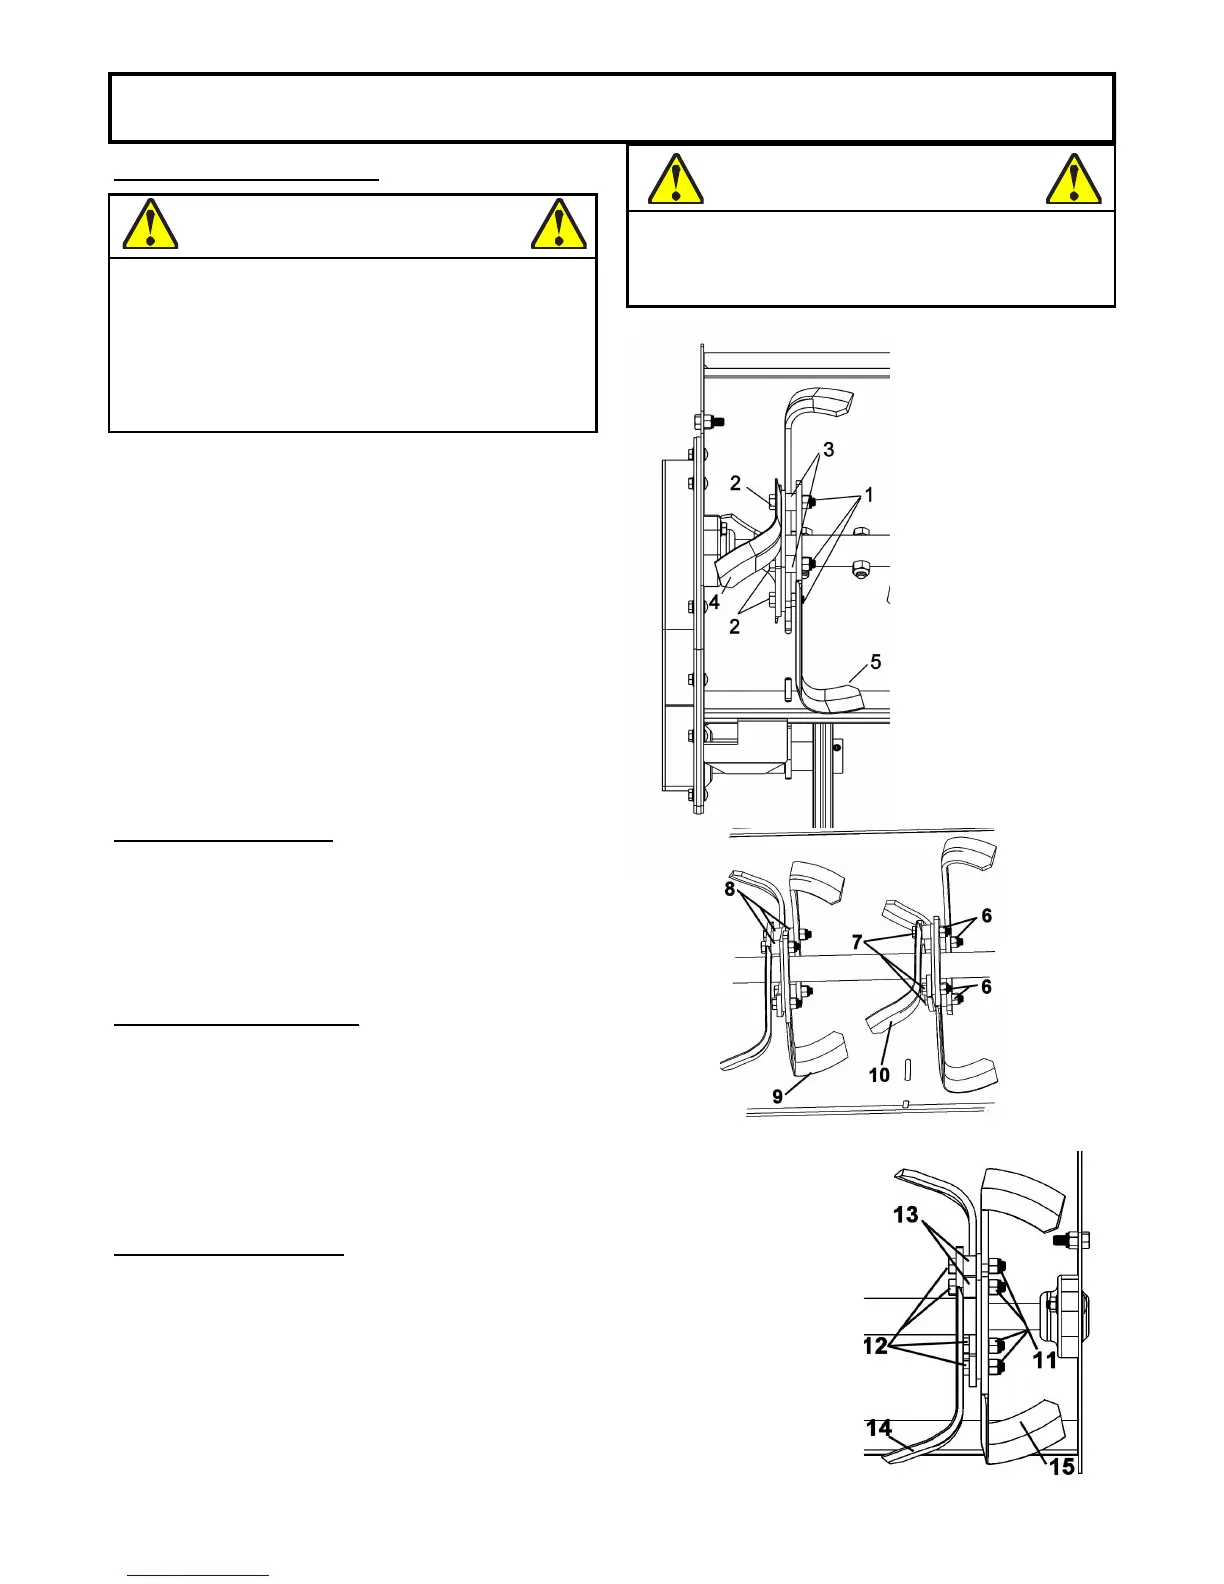
LEFT GROUP OF TINES:
Remove the nuts (item 1), bolts (item 2) spacers (item
3), two left tines (4) and two right tines (item 5).
Install the new tines with same hardware in exactly the
same position as the old ones were installed.
MIDDLE GROUP OF TINES:
Remove the nuts (item 6), bolts (item 7), spacers (item
8), two left tines (item 9) and two right tines (item 10).
Install the new tines with same hardware in exactly the
same position as the old ones were installed.
RIGHT GROUP OF TINES:
Remove the nuts (item 11), bolts (item 12) spacers (item
13), two left tines (item 14) and two right tines (item 15).
Install the new tines with same hardware in exactly the
same position as the old ones were installed.
MAINTENANCE
REPLACING THE TINES
CAUTION
TO PREVENT INJURIES:
Always safely block the tiller. Never work under
the tractor nor under the accessory.
WARNING
TO PREVENT INJURIES:
Stop the motor.
Apply parking brake.
Remove the ignition key.
Disconnect the wire from the spark plug(s) and
keep away from spark plug(s) to prevent accidental
starting.
Left group of tines
Right group of tines
Middle group of tines