10
OPERATION
INSTALL THE CONTROL BOX IN ITS SUPPORT
Put the control box in the support previously installed.
Attach the electrical cable and the engine control
cable to the equipment and to the vehicle, if
necessary use cable ties. The control wire must go
under the axle support.
NOTE: Be careful to secure the cables to avoid any
damage caused by a contact with the vehicle,
equipment itself or any other object that can be found
in the area of these cables.
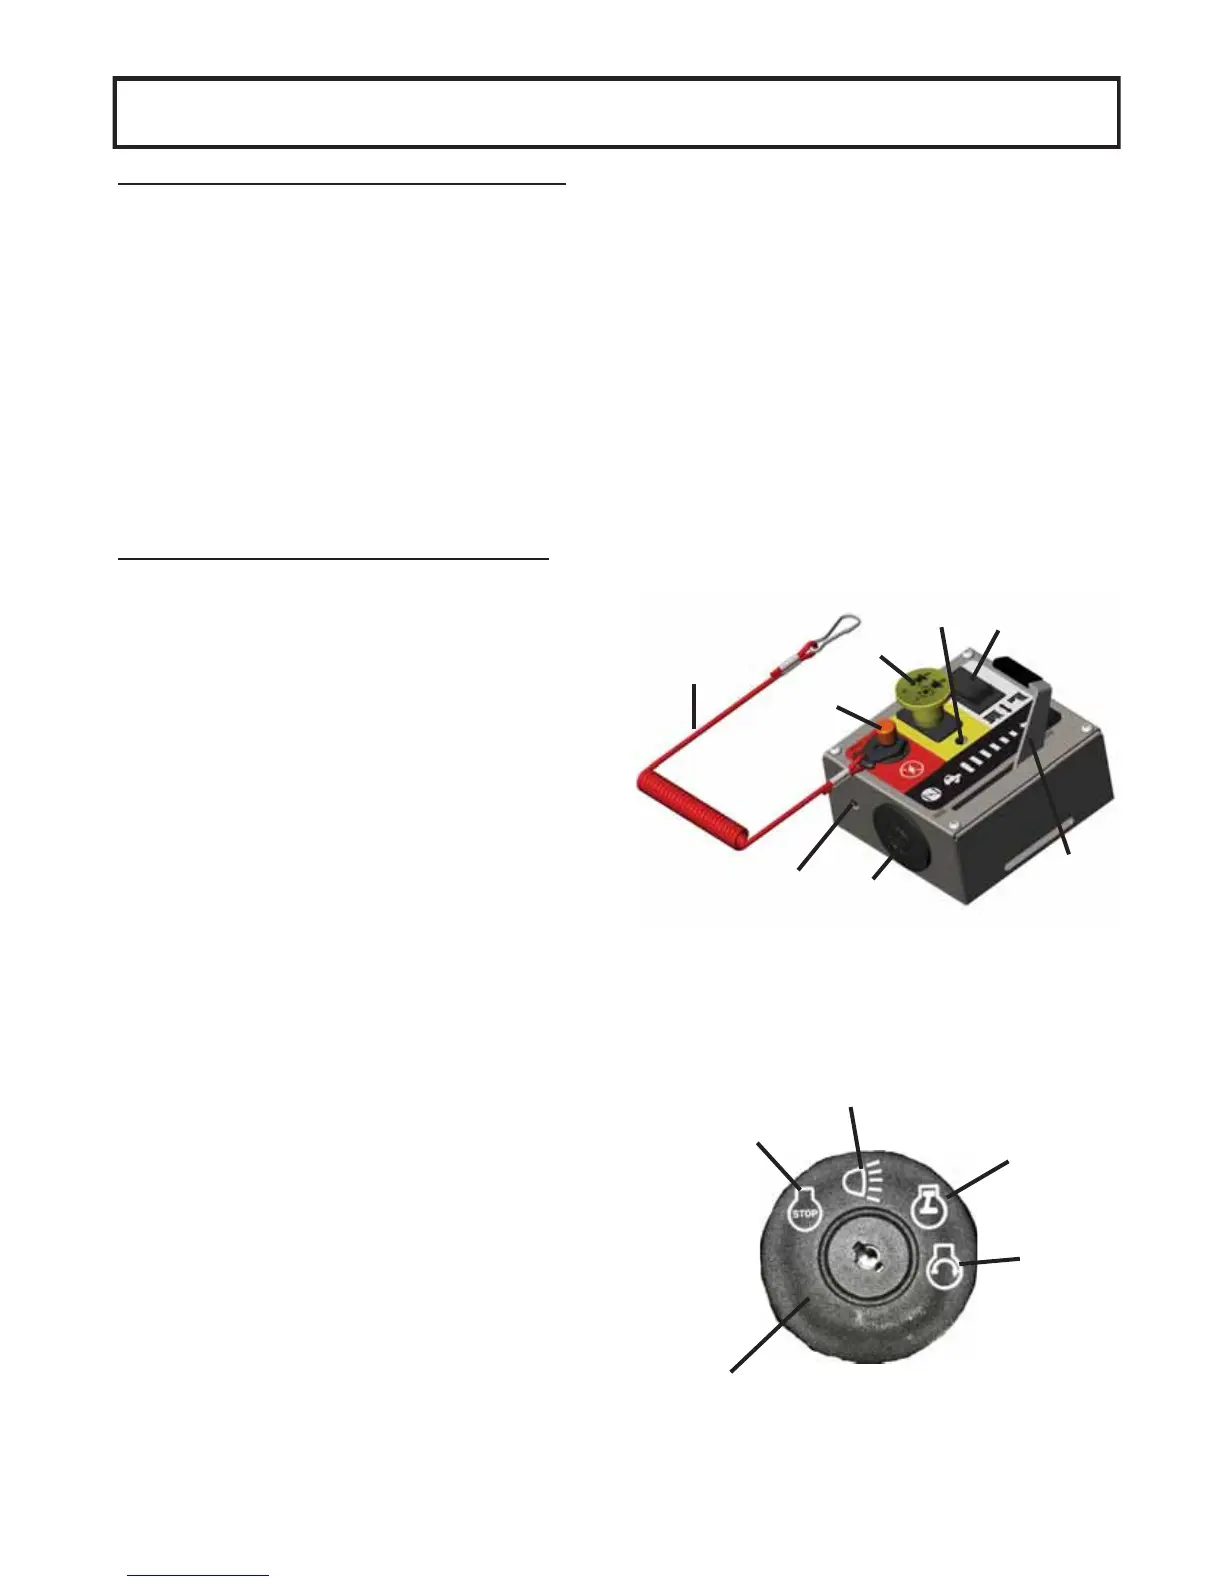
FAMILIARIZATION WITH THE CONTROL BOX
Item 1: Ignition switch.
Using the key: Allows to start the engine or you may
turn the key to the accessory setting to activate the
controls without starting the engine. The light (item 7)
is on when the key is turned to the accessory or start
setting.
Always remove the key when the equipment is left
without surveillance.
Item 2: Throttle lever
Push towards the front to increase engine speed,
push completely to the end to ‘’start’’
Item 3: Emergency switch
Push to stop equipment quickly.
Item 4: Safety lanyard:
Links the operator to the control box. If the operator
leaves the driver’s seat without stopping the
equipment, the equipment will stop (the cable will
disconnect itself from the control box).
Item 5: Engagement switch
Pull to engage, push to disengage. The light (item 8)
is on when equipment is engaged.
Item 6: Height adjustment switch.
Allows to adjust the cutting height.
7
3
5
8
4
2
1
6
front
back
1
Stop
Accessory
Engine start
Engine running