P
age | 10
R
ECOMMENDED GROUNDING METHOD
POWER SUPPLY CORD - NOT INCLUDED.
MUST HAVE A 3-PRONG GROUNDING PLUG.
F
or your personal safety, this appliance must be grounded. To minimize possible shock hazard, the
cord must be plugged into a mating 3-pronged and grounding-type wall receptacle, grounded in
accordance with the National Electrical Code and local codes and ordinances. If a mating wall
receptacle is not available, it is the personal responsibility of the customer to have a properly
grounded, 3-prong wall receptacle installed by a qualified electrician.
CON
NECTING THE POWER SUPPLY LINE
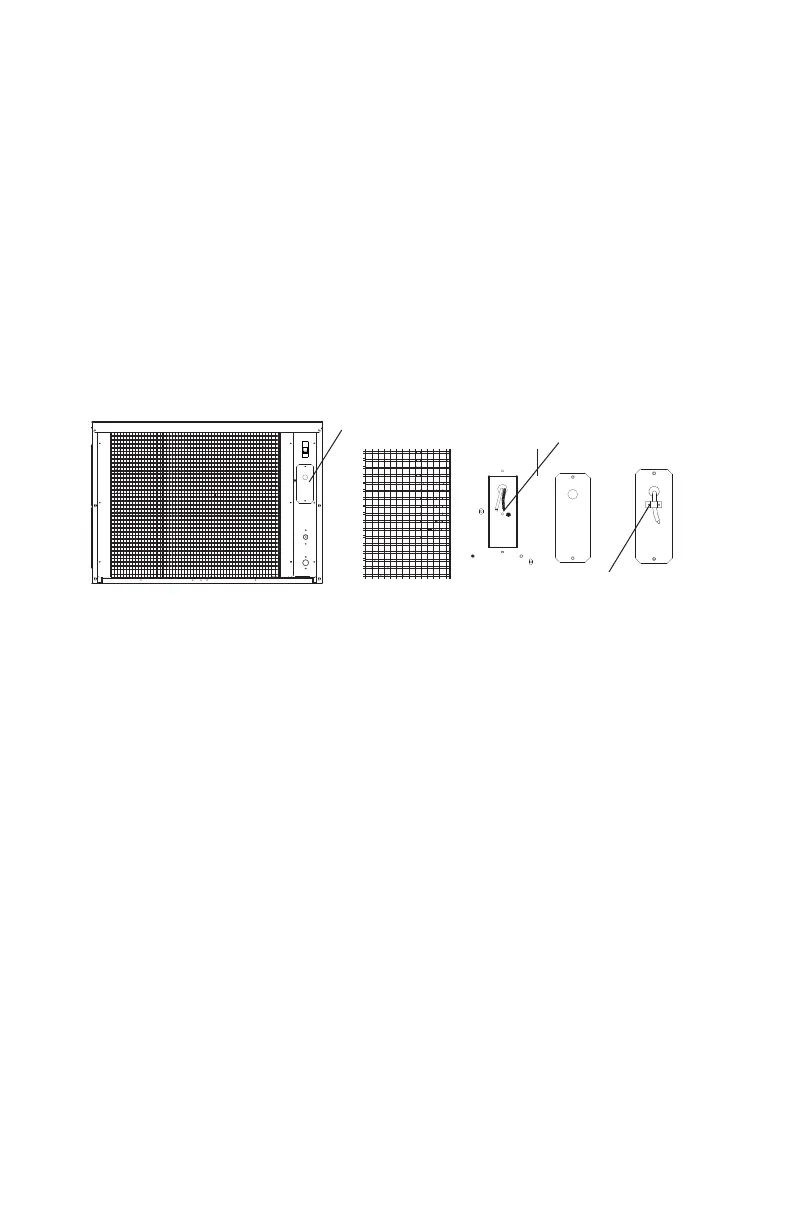
1
. Unscrew the two screws holding the access cover and remove the cover. You will find two leads
(black and white.) See drawing below.
2. Feed a power supply cord (not included) through the access cover and connect it with the two
leads. The ground line should be connected to the grounding screw. The two connectors must be
insulated Put the access cover back in place.
3. You will find a strain relief bracket in the accessory package. Fix the power supply cord below the
bracket, as shown in the previous illustration.
4. The other end of the power supply cord should be connected to an outlet that is in accordance
with the local electrical code.
Note: This machine is stackable on any of the machines in this manual. If the machine is to be stacked
on top of another machine, a stacking kit will need to be installed. Refer to the installation instructions
included with the stacking kit.
W
ATER SUPPLY
T
he water supply should be ready at the point of installation. The water supply pressure should be a
minimum of 15 psig with a static pressure not more than 80 psig. (A wall outlet directly behind the ice
maker will make installation easier. )
T
ools required: 3/8” open-end wrench and Phillips screwdriver
I
MPORTANT:
1
A
ll installations must be in accordance with local plumbing code requirements.
Professional installation is recommended.
2
W
ater inlet fitting: 3/8” FPT (Female Pipe Thread); drain line connection: 1/2” FPT.
3
M
ake certain you have a suitable water supply hose and two suitable drain hoses, and that the
hoses are not pinched, kinked or damaged during installation.
4
C
heck for leaks after connection.
Connecting the water line:
1
T
urn off main water supply.
2
F
ind a water supply line near the installation location. The distance should be less than the length
of the water supply hose.
3
A
shut-off valve must be installed to the main water supply.
4
C
onnect the water supply hose to tap and water inlet valve. Tighten firmly by hand, then one-half
turn with wrench.
5
C
onnect the water drain hose to drain line connection. Tighten firmly by hand, then one-half turn
with wrench.
6
T
urn on main water supply and tap. Check for water supply connection leaks. Tighten every
connection (including connections at the water inlet.)
Access Cover
Gr
ounding Screw
Stain Relief Bracket