Chef Machine
Juicing Extension Accessory
Instruction
Manual
UYARI!
Thank you for purchasing this product, please read the contents of
this manual carefully before use.
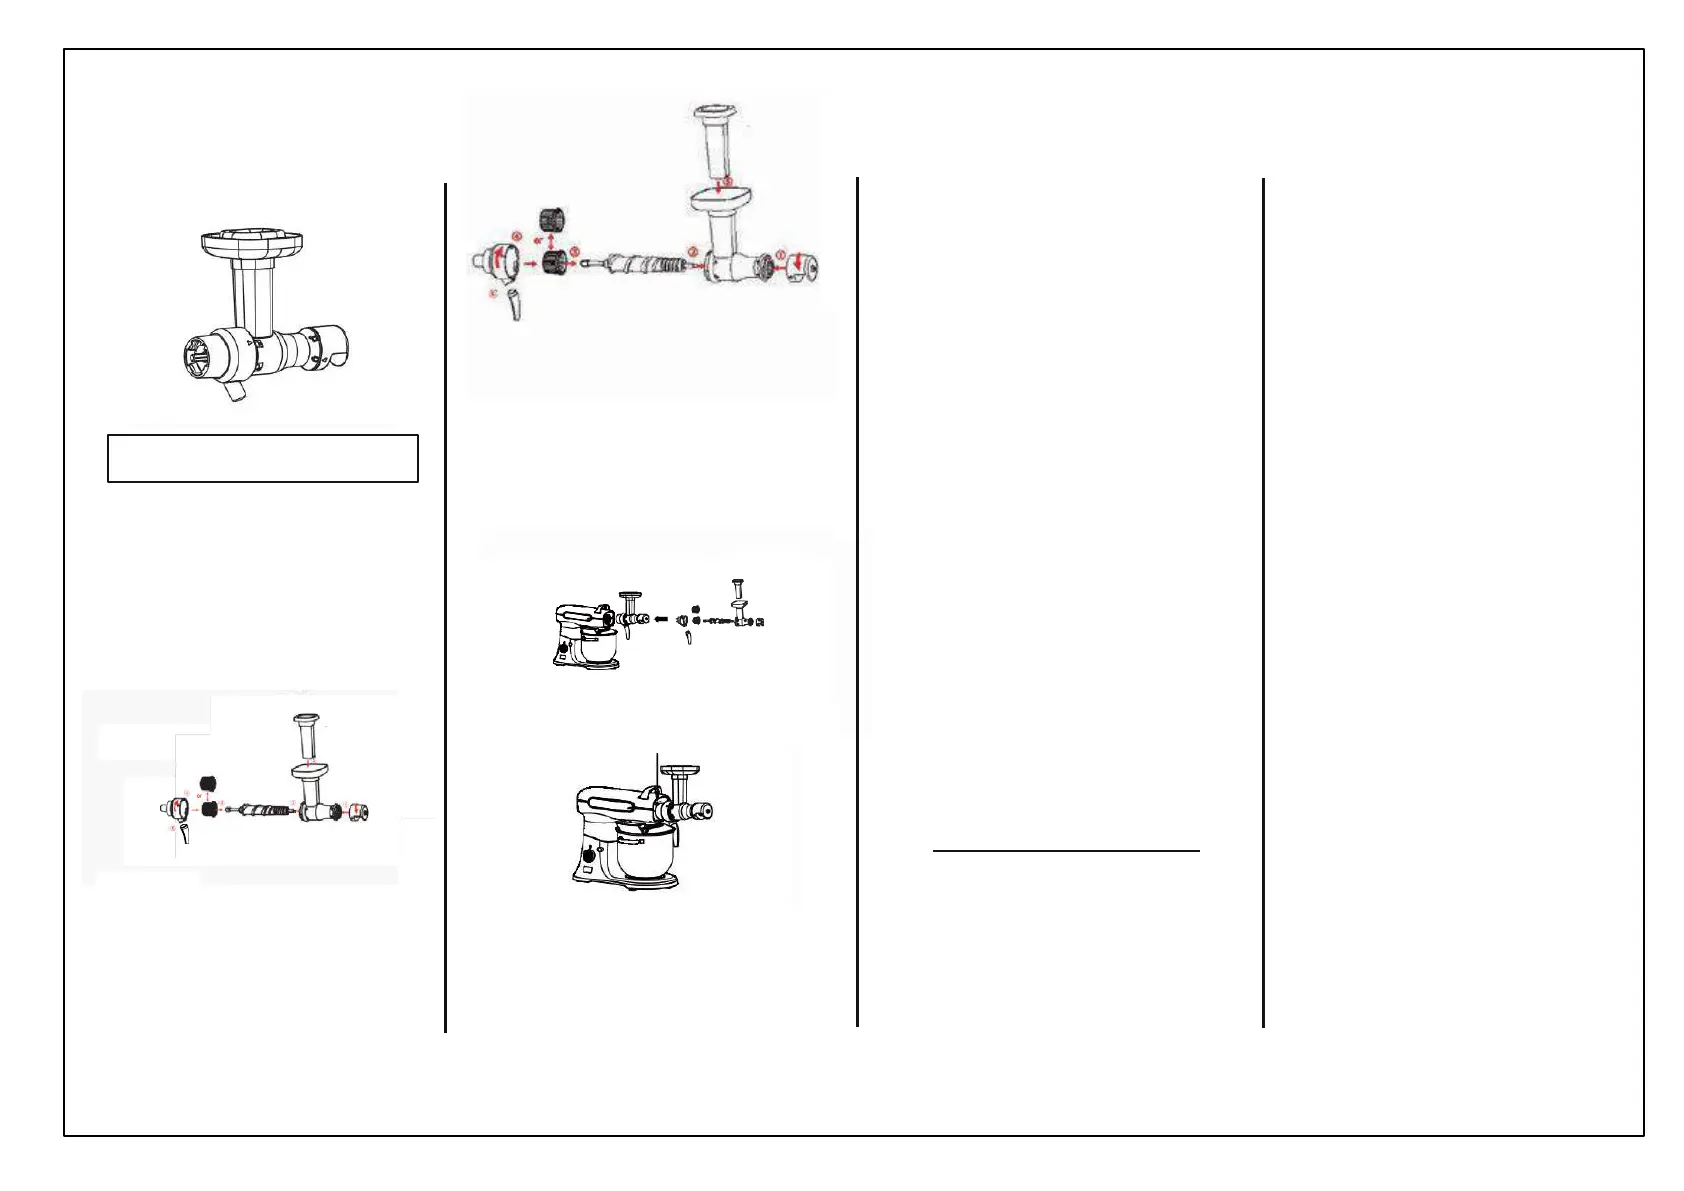
(1)
Please
assemble
the
accessories
according
to
the
assembly
sequence shown in Figure 1;
(2)
lnstall
the
accessories
on
the
chef
machine
to
ensure
that
the
accessories are not loose before turning on the power;
(3)
Wash fruits or vegetables. lf necessary, cut it into small pieces that
can be put into the feed port;
(4)
it is recommended to use low-gear operation when connecting the
power;
(5)
Put
small
pieces
of
fruits
or
vegetables
into
the
feeding
port
and
gently press down to the juicing screw with a pusher rod;
(6)
When the juice no lenger flows out, turn off the power and wait until
the juicing screw stops rotating.
(7)
Take
out
the
front
cover
of
the
machine,
Align
the
lock
with
a
45
degree
Angle
and
insert
the
attachment
into
the
machine
interface,
and
1.
Before
disassembling, moving, repairing, cleaning and replacing
accessories, please cut off the power supply and unplug the power plug of
the cooking machine.
2.
Please use the push stick to push the ingredients into the upper push
port, and do not use your fingers or other utensils to push the ingredients.
3.
Before adding the ingredients, cut the large pieces into small pieces that
can be put into the feeding port.
4.
Before
juicing,
please
remove
the
hard
core,
heart
seeds
and
thick
skin
of fruits or vegetables.
5.
In order to optimize the life of the accessory, please use it continuously
for no more than 30 minutes.
6.
The
color
of
the
ingredients
may
change
the
color
of
some
parts,
which
is normal and will not affect the performancof the accessories.
4.
Clean
and
maintain
The accessories should
not be cleaned by the dishwasher and disinfected
by
the
disinfection
cabinet,
so
as
not
to
cause
the
loss
of
accessories
and
affect the use of accessories. Some components can be disassembled and
cleaned, after cleaning, please wait for complete drying before reassemb-
ling to avoid rust of the product.
DIRECTORY
1.
The
name
of
each
part
2.Operation instructions
3.
Warnings
and
precautions
4.
Clean
and
maintain
5.
Product
warranty
card
turn
the
attachment
anticlockwise
into
place.
EJECT
BUTTON
Clean
and
maintain
Accessories
Display
Note: When removing attachment, you need to press the eject button
of
the
machine
bt
hand
first,
and
then
turn
the
attachment
clockwise.
Juice
end
cap
Juice
duct
Operation
instructions
1.
First
use
( 1)Unpack, count the accessories and read the instruction manual in
detail.
(2)
Before using it for the fırst time, please check that the accessories
are not damaged before starting to use.
(3)
Before
fırst
use,
please
clean
it
before
use.
Procedure
3.
Warnings
and
precautions!
1.
Do
not
wash
accessories
in
the
dishwasher.
2.
Keep
accessories
out
of
the
reach
of
infants
and
toddlers
to
avoid
injury.
3.
Never
allow
children
to
use
this
accessory
unattended.
4.
Do not place the accessories in a damp or watery place to avoid rusting
the metal parts of the product.
5.
Do not place the accessories near the heat source, so as not to cause
failure due to product damage.
6.
Accessories are only for indoor use at home, please do not use for
commercial or industrial purposes, so as not to cause product damage.
7.
The
chef
machine
can
only
use
one
function
at
each
time,
please
do
not
use two or more accessories to run at the same time, so as not to cause
danger due to overload.
 Loading...