4.
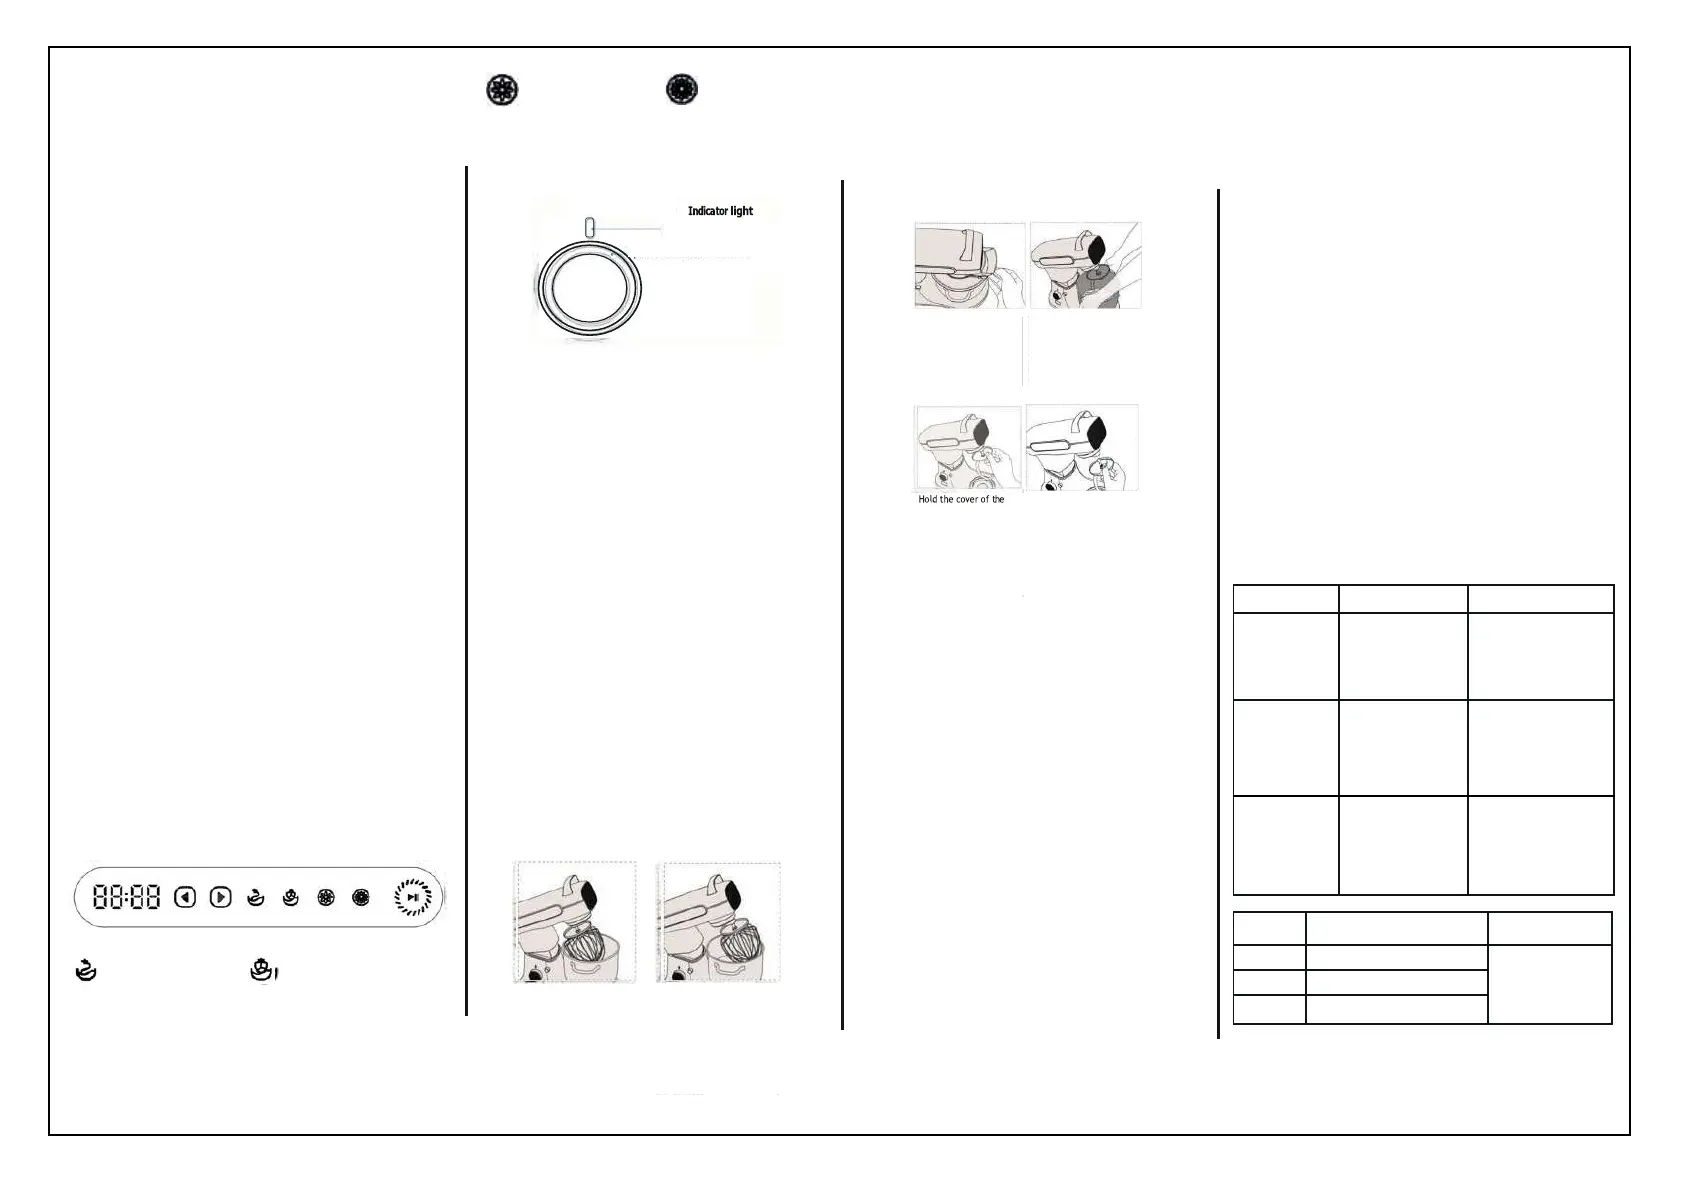
Timer
Soft
mixing
Fast
mixing
Attention:
When low down the head, make sure the head is well locked before
The height of the hook has been well adjusted and does not require any
further human adjustment.
Can record the time and set countdown time, with a maximum time
of 60 minutes.
1)
Record
time:
After selecting the function, rotate the rotary knob directly, the timer
starts to record time, the machine automatically stops running after
60 minutes. To start the machine again, rotate the rotary knob to
speed 0 and repeat the process.
2)
Set
countdown
time:
After
selecting
the
function,
set
the
countdown
time
first
and
then
choose the speed by rotating the rotary knob. The machine
automatically stops running when the timer displays 00:00.
5.
Timing
Button
Press the button each one time, it increase 30 seconds. Press button
without releasing, time increases quickly. The maximum time is 60
minutes.
6.
Function
button
First press the corresponding function button needed, and then
rotate the knob to choose speed. If you rotate the rotary knob directly
1~9
(when chose speed over
speed
9,
machine
will
run
at
speed 9 at most)
1. For large qua ntity of
cream,
egg
white,
butter,
etc (egg whisk)
Kind
reminder:
1~11
1.
For
moderate
cream,
egg
white, butter, etc (egg
whisk)
running the machine (the head lift button is completely protruded, or
else, it is concave). If the head is not well locked, the machine can still
work, but there is a safety risk.
Disassembly
of
the
attachment:
For dough hook, beater, egg whisk, silicone beater (to purchase
separately)
Do
not
press
down
the
head,
to
avoid
excessive
force,
resulting
in
deformation of the housing, machine failure, personal injury.
Cleaning
and
care
Always
switch
off
and
unplug
before
cleaning.
1.
Mixing
Bowl,
dough
hook,
beater,
whisk:
Wash by hand, then dry thoroughly or wash in the dishwasher.
Never use a wire brush, steel wool or bleach to clean them. Use
vinegar to remove limescale.
2.
Main
Unit
and
plug:
Wipe with a damp cloth, then dry. Never use abrasives or immerse
in water.
Note:
1.
Do not use cleaning agents and cleaning accessories containing
strong acids and alkalis, so as not to damage the oxidation layer of
without choosing the Function, the machine defaults to the "Slow
Mix" function.
7.
Pause/Re-start
Button
Simply press "Pause/Re-start" button when the Kitchen machine is
running, it will immediately pause; then press "Pause/ Re-start"
button for 1.5 seconds to resume operation.
8.
Handle
Easy to lift the head, put down the head; convenient to move the
machine.
9.
Front
outlet
Remove the front cover to reveal the front outlet. Then install the
optional front attachment like pasta maker, meat mincer and salad
maker, etc, in a correct angel.
10.
Eject
button
for
front
attachment
Pressing this button and holding it, you can release the front
attachment from the machine, then rotate the front attachment
clockwise, you can take it out.
11.
Drive
connector
Can install dough hook, beater, egg whisk, silicone beater (to be
purchased separately) or other accessories.
12.
Suction
feet
Contains
2
base
suction
feet,
when
placing
the
Kitchen
machine
on
a stable and smooth countertop, the base suction feet will automati-
cally
suck
the
countertop
to
make
it
more
stable
during
operation.
When the machine needs to be moved, lift up the head handle.
Function
Button
&
Speed
control
Slow
mixing
Normal
mixing
1.
Choose correct function according to your actual needs, to avoid
misuse of function or speed causing the machine damage or
ingredient overflow.
2.
Kneading
dough,
use
flour
no
more
than
1000g,
first
use
Speed
1 running for 30 seconds and Speed 2 running for 30 seconds, then
use Speed 3, to prevent machine from damage for over use.
3.
The
speed
of
AE
Kitchen
machine
is
designed
as
below.
A.
After Kitchen machine plugged in the power supply, if rotate the
rotary knob directly to choose speed, the Kitchen machine default
to use “Slow mixing” function, then the Kitchen machine will
actually run at speed 4 maximumly;
B.
The
number
on
the
side
of
the
rotary
knob
is
the
speed;
C.
Under “Slow Mixing” function, the highest speed is Speed 4.
Even if to choose speed over 4 (i.e. 5, 6, 7, 8, 9, 10, 11), the actual
operating speed will be still Speed 4;
D.
Under “Normal Mixing” function, the highest speed is Speed 6.
Even if to choose speed over 6 (i.e. 7, 8, 9, 10, 11), the actual
operating speed will be still Speed 6;
E.
Under “Soft Mixing” function, the highest speed is Speed 9. Even
if
to
choose
speed
over
9
(i.e.
10,
11
gears),
the
actual
operating
speed will be still Speed 9.
Assembly of attachments
For dough hook, beater, egg whisk, silicone beater (to purchase
separately)
Precautions
for
use
Note:
If precautions are violated, the wrong operation may result
in personal injury or equipment damage.
Do not put your hands in the mixing bowl while the machine is
running to avoid personal injury.
Do not allow long hair to approach the mixing bowl to avoid
personal injury caused by being caught by the drive shaft.
When making dough, do not use flour more than 1000g. Excessive
amounts of flour can cause dough to overflow, machine dumps,
damage to machine parts, and even personal injury.
Please strictly follow the use of machine restrictions, kneading the
dough, first use Speed 1 running for 30 seconds and Speed 2
running for 30 seconds, then use Speed 3 , the speed is prohibited
to over speed 3, so as not to encounter excessive resistance to the
machine caused the machine to dump or parts damage. Machine
damage caused by incorrect use of the Kitchen machine is a
man-made fault.
Before
use,
place
the
machine's
splash
guard
and
chute
on
the
top
the
accessories,
resulting
in
damage
to
the
parts.
2.
After each use of the Kitchen machine, you can clean the drive
shaft of the Kitchen machine with a damp cloth or tissue paper for
next use.
3.
The connector of the optional accessory (like pasta maker, meat
mincer, salad maker, etc, to be purchased separately) is die-cast
aluminum material and cannot be cleaned in the dishwasher to
avoid oxidization.
Trouble
shooting
guide
 Loading...