7
bernette OVERLOCKER WORKBOOK
ADJUSTING TENSION SETTINGS FOR BALANCED STITCH
Examine your 4-thread sample. The illustrations below show
examples of unbalanced stitches and how to correct the settings to
balance the stitch. When making corrections in the tension settings,
increase or decrease the settings as needed, moving the dial ½ to
1 number at a time. Stitch a seam using the new settings and then
evaluate the new stitch. Continue in this manner until the stitch is
balanced.
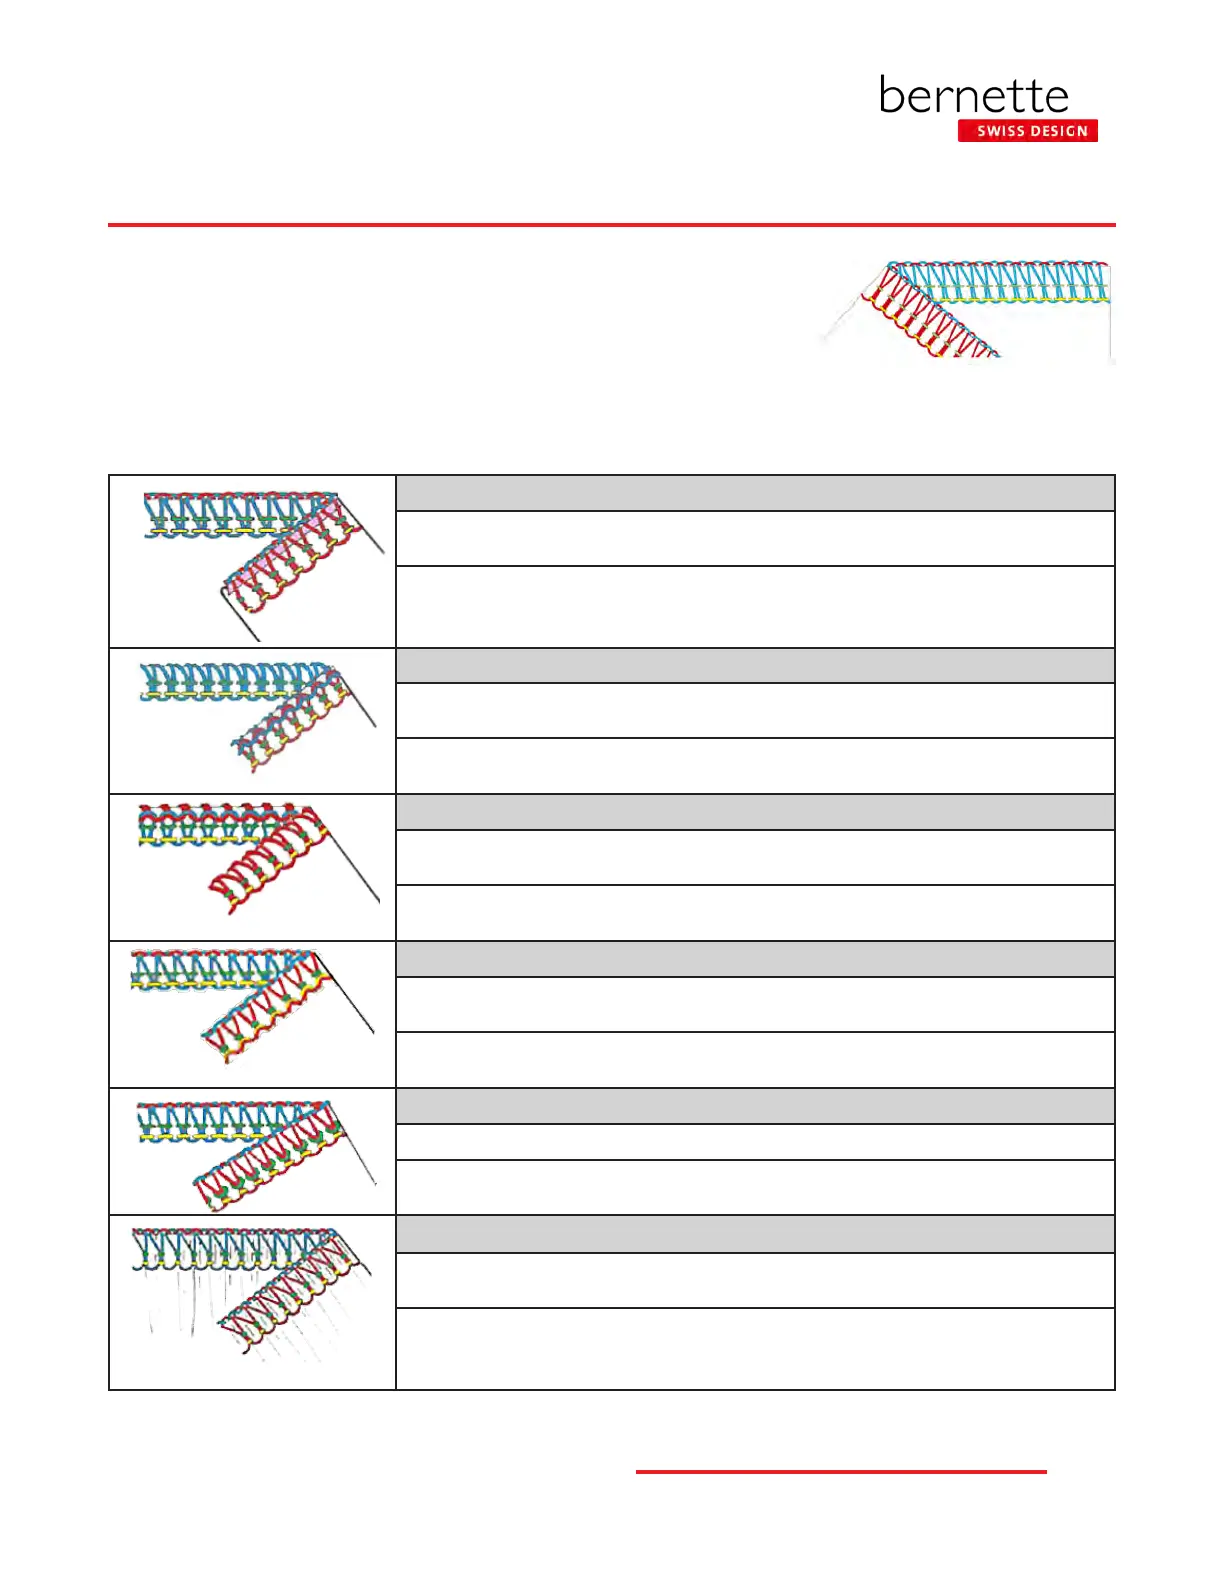
Upper aNd Lower Loopers - TighT TeNsioN
Unbalanced: The looper threads cause the thread to roll at the edge of the fabric and/or
the seam allowance is folded inside the stitch.
Correction: Decrease (lower number) one or both looper tensions until the seam allowance
is at and loopers meet at the edge. Note: This problem might also result from an incorrect
cutting width setting.
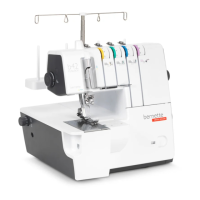
Upper Looper - Loose TeNsioN
Unbalanced: The looper threads are not at the edge of the fabric. Upper looper thread
is visible on the back of the fabric and the looper threads are very loose.
Correction: Make sure the thread is seated in the tension guides. If it is, tighten the
upper looper thread (higher number).
Lower Looper - Loose TeNsioN
Unbalanced: The looper threads do not lock on the edge of the fabric. Lower looper
thread is visible on the face of the fabric. The looper threads are very loose.
Correction: Make sure the thread is seated in the tension guides. If it is, tighten the
lower looper thread (higher number).
LefT NeedLe - Loose TeNsioN
Unbalanced: The yellow needle forms loops on the underside of the fabric. The seam is
not secure and the yellow thread may show in the seam line.
Correction: Make sure the yellow thread is seated in the tension guide. If it is, tighten
the left needle tension (higher number).
righT NeedLe - Loose TeNsioN
Unbalanced: The green needle thread forms loops on the underside of the fabric.
Correction: Make sure the green thread is seated in the tension guide. If it is, tighten the right
needle tension (higher number).
RighT aNd LefT NeedLes - TighT TeNsioN
Unbalanced: The green and yellow needle threads are pulled taut, causing puckers in the
fabric at the seam line.
Correction: Make sure the threads are seated in the tension guides or have not double-
wrapped around a threading guide. If they have, unwrap or loosen appropriate needle
tension (lower number).