EasyManua.ls Logo

Bernina 1130 Service Manual

Bernina 1130
73 pages
To Next Page IconTo Next Page
Page #1 background imageLoading...
Page #1 background image

Table of Contents

Question and Answer IconNeed help?

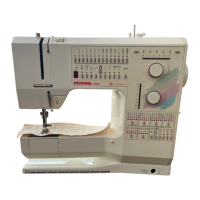
Do you have a question about the Bernina 1130 and is the answer not in the manual?

Bernina 1130 Specifications

General IconGeneral
Free ArmYes
Built-in Needle ThreaderNo
TypeMechanical
Maximum Stitch Width5 mm
Maximum Stitch Length5 mm
Bobbin TypeCB Hook
Presser FeetButtonhole

Summary

BERNINA 1130 Service Manual

Adjustment of Models 1130-1120

Using the Special Gauge for Carrier Adjustment

Sideways Feed-Dog Positioning

Adjusting the lateral position of the feed-dog and thrust fork.

Feed-Dog Height Adjustment

Checking or adjusting the feed-dog height as described in section 23.

Complete Chassis Removal with L PCB

Adjustments with the Rigidity Plate

Checking Presser Foot Height

Presser Foot Fixation and Height Check

Thread Take-Up Lever Adjustment

Thread Take-Up Lever Correction

Procedure to adjust the thread take-up lever and guide against the crank.

Zig-Zag Stitch Distribution Adjustment

Synchronization Disc Position Check

Feed-Dog Adjustment in the Machine

Checking Feed-Dog Height

Feed-Dog Height Correction

Adjusting the feed-dog height to the specified range using a gauge.

Hook Adjustment

Hook Adjustment Correction

Adjusting the hook driver stem for correct spacing.

Driver Position in Hook Race

Checking Radial Play of the Driver

Rack and Toothed Gear Play Adjustment

Hook Adjustment (Loop Lift)

Hook Drive Crank Correction

Adjusting the hook drive crank to match marked points.

Needle-Hook Tip Correction

Aligning the hook tip flush with the needle's right-hand edge.

Checking Needle Height

Needle-Hook Distance Check (No Plate)

Basting Device and Automatic Long Stitch

Release Pin Latch Adjustment

Checking Decoupling Instant

Lower Thread Tension Adjustment

Lower Thread Tension Check

Checking lower thread tension using a weight gauge and adjusting screw.

Upper Thread Tension Basic Adjustment

Upper Thread Tension Check

Checking upper thread tension by aligning the adjusting dial.

Upper Thread Tension Correction

Adjusting upper thread tension using the tensioning spindle.

Forward and Reverse Feed Equalization

Upper Thread Tension Adjustment with Weight

Adjusting upper thread tension using an 85-gram weight.

Upper Thread Tension Weight Correction

Adjusting the tension spindle using an Allen key with a weight attached.

Automatic Buttonholing Foot Adjustment

Buttonhole Potentiometer Equalization

Equalizing the buttonhole foot using a potentiometer and sensor.

Buttonhole Automatic Correction

Adjusting the buttonhole sensor for correct operation.

Feed-Dog and Hook Drive Synchronization

Checking the Feed-Dog

Motor Adjustment for Stitch Length

Motor Stitch Length Adjustment Correction

Magnet Support and Hall-Sensor Distance Check

Axial Play in Stitch Length Crank and Toothed Segment

Zero Position of Stitch Length Crank

Zig-Zag Stepping Motor Zero Equalization

Zig-Zag Motor Equalization Correction

Adjusting magnet support and motor for zero equalization.

Post-Disassembly Adjustments

Rigidity Plate Post-Adjustment Checks

List of adjustments required after reassembling the rigidity plate.

Head Frame Post-Adjustment Checks

List of adjustments required after reassembling the head frame.

Carrier Post-Adjustment Checks

List of adjustments required after reassembling the carrier.

Description of Electronic Components

Block Diagram Model 1130

Print A-4200 Layout

Print S-4200 Layout

Print L-4200 Layout

Diagnosis Instructions

Diagnosis Repair Procedure

Steps for isolating defective parts using diagnosis and test instructions.

Electrical Safety Warnings

Warnings about connecting the machine and working on plugged-in components.

High Voltage Danger

Information regarding dangerous voltages on power print L-4200 and main motor.

Protection Against Electrostatic Discharge (ESD)

Antistatic Work Bench Requirements

Criteria for an antistatic workbench surface for component handling.

Antistatic Wristband Usage

Guidelines for using an antistatic wristband for personnel protection.

Test Adapter L-4200 Operation

Test Adapter LED Indicators (A-E)

Interpreting LED indicators for power supply checks.

Test Adapter Motor Operation (ON)

Checking motor operation and drive signal (LED F) in ON position.

Test Adapter Motor Operation (OFF)

Checking motor stop and drive signal (LED F) in OFF position.

Testing Print L-4200 with Adapter

Testing S-4200 to L-4200 Connection

Testing Step Motor and S-4200 Print

Testing the Hall-Sensor

Power Supply Apparatus 4200

Buttonhole Automatic Adjustment

Buttonhole Adjustment for Print S-4200

Adjusting the buttonhole sensor on S-4200 for automatic function.

Buttonhole Adjustment for Print Ret-4200

Adjusting for buttonhole automatic function on Ret-4200 print.

Sewing a Buttonhole

Procedure for sewing a buttonhole using automatic function.

Related product manuals