EasyManua.ls Logo

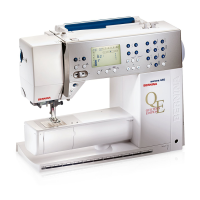
Bernina Artista 170 User Manual

Bernina Artista 170
40 pages
To Next Page IconTo Next Page
Page #1 background imageLoading...
Page #1 background image
When using an electrical machine, basic safety
precautions should always be followed, including the
following.
Read all instructions before using this sewing computer.
When the sewing computer is not in use, it should be
disconnected from the electricity supply by removing the
plug from the outlet.
To reduce the risk of electric shock:
1. A sewing computer should never be left unattended
when plugged in.
2. Always unplug this sewing computer from the electric
outlet immediately after using and before cleaning.
To reduce the risk of burns, fire, electric shock or injury to
persons:
1. Do not allow to be used as a toy. Close attention
is necessary when this sewing computer is used by or
near children.
2. Use the sewing computer only for its intended use as
described in this manual. Use only attachments
recommended by the manufacturer as contained in
this manual.
3. Never operate this sewing computer if
· it has a damaged cord or plug
· it is not working properly
· it has been dropped or damaged
· it has fallen into water
Return the sewing computer to the nearest autho-
rized BERNINA dealer or service centre for examina-
tion, repair, electrical or mechanical adjustment.
4. Never operate the sewing computer with any air
openings blocked. Keep ventilation openings of
the sewing computer and foot control free from
accumulation of lint, dust and loose cloth.
5. Keep fingers away from all moving parts. Special
care is required around the sewing needle.
6. Always use the BERNINA original stitch plate.
The wrong plate can cause the needle to break.
7. Do not use bent needles.
8. Do not pull or push fabric while stitching. It may
deflect the needle causing it to break.
9. Turn power switch to «0» when making any adjust-
ments in the needle area, such as threading or chang-
ing the needle, threading the bobbin or changing
the presser foot.
10. Always unplug the sewing computer from the electri-
cal outlet when removing covers, lubricating or when
making any other user servicing adjustments men-
tioned in this instruction manual.
11. Never drop or insert any object into any opening.
12. Do not use outdoors.
13. Do not operate where aerosol (spray) products are
being used or where oxygen is being administered.
14. Before disconnecting, turn all controls to the off («0»)
position then remove the plug from the outlet.
15. Do not unplug by pulling on the cord but grasp the
plug before pulling.
16. No responsibility will be taken for any damage caused
as the result of misuse of the sewing and embroidery
computer.
17. Under no circumstances should the sewing computer
be left unattended when using the embroidery
module.
18.For the protection of the electronic components: Do
not remove the embroidery card from the embroidery
module while embroidering.
In a double-insulated product, two systems of insulation
are provided instead of grounding. No grounding means
is provided on a double-insulated product nor should a
means for grounding be added to the product. Servicing
a double-insulated product requires extreme care and
knowledge of the system and should only be done by
qualified service personnel. Replacement parts for a
double-insulated product must be identical to those
parts in the product. A double insulated product is
marked with the words «DOUBLE INSULATION» or
«DOUBLE INSULATED».
The symbol may also be marked on the product.
This sewing and embroidery computer is intended for
household use only.
Safety Instructions
IMPORTANT SAFETY INSTRUCTIONS
DANGER
WARNING
SERVICING DOUBLE-
INSULATED PRODUCTS
SAVE THESE
INSTRUCTIONS!
1
165_170_180_SM_engl 19.04.2004 8:58 Uhr Seite 1
008904.55.04_EMB_0401_a165 a170 a180_EN
Question and Answer IconNeed help?

Do you have a question about the Bernina Artista 170 and is the answer not in the manual?

Bernina Artista 170 Specifications

General IconGeneral
Stitch Count170
DisplayLCD
MemoryYes
Bobbin SystemDrop-in bobbin
Stitch Width7 mm
Stitch Length5 mm
Number of Stitches170
Needle Stop Up/DownYes
Needle ThreaderAutomatic
Buttonhole StylesMultiple
Speed ControlYes

Summary

Important Safety Instructions

DANGER: Risk of Electric Shock

Precautions to reduce the risk of electric shock when using the sewing computer.

WARNING: Risk of Burns, Fire, Shock or Injury

Safety guidelines to prevent burns, fire, electric shock, or injury to persons.

Servicing Double-Insulated Products

Details of the Embroidery Module

Standard and Optional Accessories

Standard Accessories

Lists standard items for models 2MB (165) and 2MB/4MB.

Optional Accessories

Lists optional items for models 2MB (165) and 2MB/4MB.

Connecting the Embroidery Module

Attaching the Module to the Sewing Computer

Instructions on how to physically connect the embroidery module.

Removing the Module

Instructions on how to detach the embroidery module.

Connecting the Adapter for Free Arm Embroidery

Attaching the Adapter to the Sewing Computer

Steps to attach the free arm adapter to the sewing computer.

Attaching the Module to the Adapter

Steps to connect the embroidery module to the adapter.

Removing the Adapter

Instructions to detach the free arm adapter.

Preparing the Sewing Computer for Embroidery

Basic Embroidery Setup Steps

Essential steps: presser foot, needles, feed dog, threading.

Optional Accessories for Preparation

Using straight stitch plate and thread stand.

Adjusting the Thread Tension

Upper Thread Tension

Guidance on adjusting the upper thread tension.

Bobbin Thread Tension

Guidance on adjusting the bobbin thread tension.

Selecting Motifs

Selecting and Activating Embroidery Motifs

Navigating the Menu

Accessing module and card options for motif selection.

Selecting Motifs from the Embroidery Module

How to choose designs from the embroidery module.

Selecting Motifs from an Embroidery Card

How to choose designs from an inserted embroidery card.

Embroidery Functions

Starting and Layout Options

Starting embroidery and switching between layout screens.

Color and Sequence Management

Adjusting color sequences and handling multi-color motifs.

Embroidery Sequence and Speed Control

Managing stitch sequence and sewing speed.

Motif Manipulation Functions

Memory and Starting Position

Saving motifs temporarily and setting the initial embroidery position.

Motif Sizing and Display

Centering, checking size, altering size, and showing motifs.

Image Transformations

Applying mirror image and rotation to motifs.

Advanced Motif Editing

Positioning and Saving Motifs

Moving motifs with arrows, hoop relocation, and temporary save.

Editing and Deleting Motifs

Retrieving, deleting, and adjusting motif width and height.

Motif Adjustments and Screen Symbols

Adjusting Stitch Density and Length

Modifying stitch density and length for different threads.

Converting Stitches

Changing stitch types, e.g., long stitch to straight stitch.

Understanding Screen Symbols

Explanation of icons for presser foot, time, size, and hoop coding.

Messages

Embroidery Stabilizers

Types of Stabilizers

Descriptions of tear-away, cut-away, iron-on, water-soluble, and paper-backed stabilizers.

Stabilizer Applications

Guidance on choosing stabilizers for different fabrics and techniques.

Hooping the Fabric

Hooping Process Steps

Steps including centering, opening, template use, and securing fabric.

Attaching the Embroidery Hoop

Needle and Presser Foot Preparation

Steps before attaching the hoop, including needle position.

Attaching the Hoop

Instructions on how to physically attach the embroidery hoop.

Removing the Hoop

Instructions on how to detach the embroidery hoop.

Adjusting the Embroidery Hoop

Preparation and Setup

Initial steps for hoop adjustment, including module attachment.

Adjusting the Hoop

Calibrating needle position to the hoop center.

Hoop Coding

Embroidering Motifs, Letters, and Numbers

Working with Letters

Selecting, arranging, editing, and coloring letters.

Motif and Letter Embroidery Screens

Display and options on the sewing screen for motifs and letters.

Rotating Letters

Adjusting the orientation of letters for design.

Starting to Embroider

Starting with Quick Reverse Button

Method for initiating embroidery using the head frame button.

Starting with Foot Control

Method for initiating embroidery using the foot pedal.

Completing Color and Threading

Handling color changes and thread management during sewing.

Interrupting and Resuming Embroidery

How to pause and restart the embroidery process.

Using Motifs with Functions

Embroidery Screen Details

Information Displayed on Screen

Explanation of presser foot, design number, time, and size indicators.

Color Sequence Management

Scrolling through and changing the color sequence of a motif.

Manual Color Sequence Adjustments

Step-by-step process for manual color changes.

Single Color Motifs

Layout 1 and 2 Screens

Move Motif to New Position

Motif Editing and Retrieval

Retrieving the Motif

Bringing a moved motif back to its frame.

Setting the Start Position

Positioning the hoop for the first stitch.

Showing the Motif Center

Locating and displaying the exact center of the motif.

Checking and Adjusting Motif Size

Check Size

Verifying hoop and motif size compatibility.

Adjust Motif Size

Reducing or enlarging motif dimensions.

Retrieving the Motif

Restoring a motif after size adjustments.

Mirror Image and Rotation Functions

Horizontal Mirror Image

Flipping motifs horizontally for design.

Rotate Motif

Rotating motifs by specific degrees.

Retrieving the Motif

Restoring a motif after rotation.

Horizontal and Vertical Adjustments

Adjusting Motif Width

Compressing or widening motifs horizontally.

Adjusting Motif Height

Shortening or lengthening motifs vertically.

Retrieving the Motif

Restoring a motif after size adjustments.

Altering Stitch Density

Altering Stitch Length

Convert Stitches

Convert Long Stitch to Straight Stitch

Changing stitch types, e.g., long stitch to straight stitch.

Straight Stitch as Fill Stitch

Using straight stitch for fill patterns.

Long Stitch as Fill Stitch

Using long stitch for fill patterns.

Combining Motifs and/or Letters

Selecting Embroidery Letters

Choosing and preparing letters for combination.

Working with Letters on Screen

Arranging, editing, and coloring letters on the screen.

On-Screen Editing Operations

Temporary Save Function

Saving motifs temporarily in memory.

Switching within Motif Combination

Managing and editing combined motifs.

Saving the Combined Motif

Duplicating Motifs

Arched Lettering

Saving Motifs in the Embroidery Module

Saving Motifs on Memory Cards

Deleting Data

Delete Complete Contents of Memory

Free-Arm Embroidery (Optional Accessory)

Preparation for Free-Arm

Initial setup and insertion of the free-arm adapter.

Adapter Recognition

Process for the machine to recognize the adapter.

Thread Breakage During Embroidery

Upper Thread Breaks

Actions to take when the upper thread breaks or runs out.

Lower Thread Runs Out

Actions to take when the lower thread runs out.

Stitch Sequence Control

Managing the stitch sequence after thread breakage.

Beginning Embroidery Again

How to restart embroidery after a thread break.

Embroidery Threads

Summary of Embroidery Motifs

Optional Accessories

Embroidery Software

Descriptions of CPS, Artlink, and Artista embroidery software.

Hoops and Adapters

Details on small hoop, free arm adapter, and medium hoop.

Memory and Data Devices

Magic box, Reader/Writer box, and Embroidery cards.

Thread Management

Description of the multi spool thread stand.
Related product manuals