Table
Supports
M5 X 8mm
SBHCS
Pg.7
Step 6: Track Runners Assembly
Parts Needed:
4- Track Runners
2- Track Couplers
8- M5 X 8mm SBHCS
20- M5 X 15mm SBHCS
Tool Required:
3mm Allen Wrench
Note: For crib assembly only do Steps 6-5
through 6-6.
6-1: Slide a Track Coupler half way into a Track Runner.
M5 X 8mm
SBHCS
Track Coupler
Fig. 6-1
Track
Runner
*Note: If you are setting the frame up in Crib Size you only need (1) Table Surface.
5-1: Lay the plastic table approximately centered, with the textured surface side UP on the
Table Supports as shown in Fig. 5-1.
5-2: Repeat Step 5-1 so that both plastic Table Surfaces are laying centered on the table assembly.
Step 5: Table Surface Assembly
Parts Needed:
2- Table Surface*
Fig. 5-1
Table Surface
Fig. 4-1
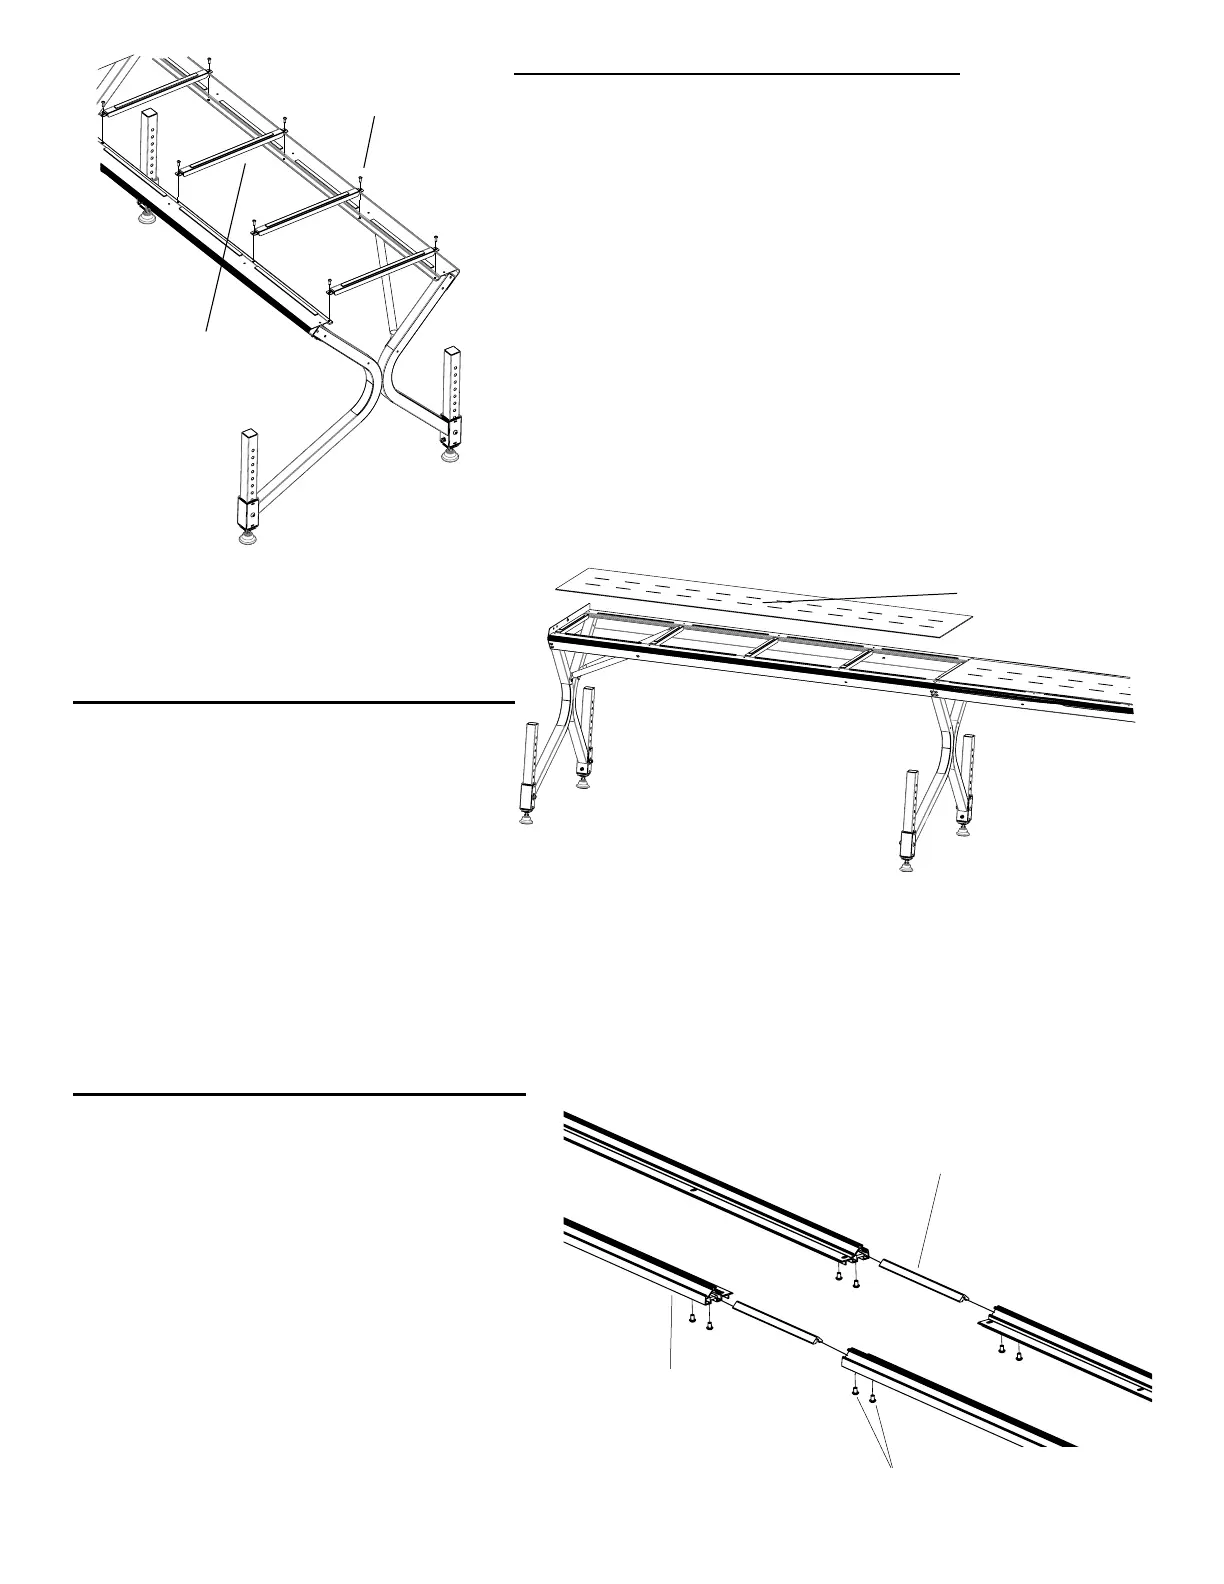
Step 4: Table Support Assembly
Parts Needed:
8- Table Supports*
16- M5 x 8mm SBHCS*
Tools Required:
3mm Allen Wrench (Provided)
4-1: Take (1) of the Table Supports and place it on the lip of
the Track Support, as shown in Fig. 4-1.
4-2: Attach the Table Support to the frame by tightening an
M5 X 8mm SBHCS, from above, into each end of the support.
*Note: If you are setting the frame up in Crib size you will
only need to use (4) Table Supports and (8) M5 x 8mm SBHCS.
4-3: Follow Step 4-1 and 4-2 for
the other (7) Table Supports.



 To Next Page