10
3. CARE AND MAINTENANCE
3.1 LED light replacement instructions
NOTE:
The LED light is intended to be non-
replaceable by the user; it needs to be
replaced by a service professional.
Lighting parameters: 12V / 10W
1. Unplug the power plug.
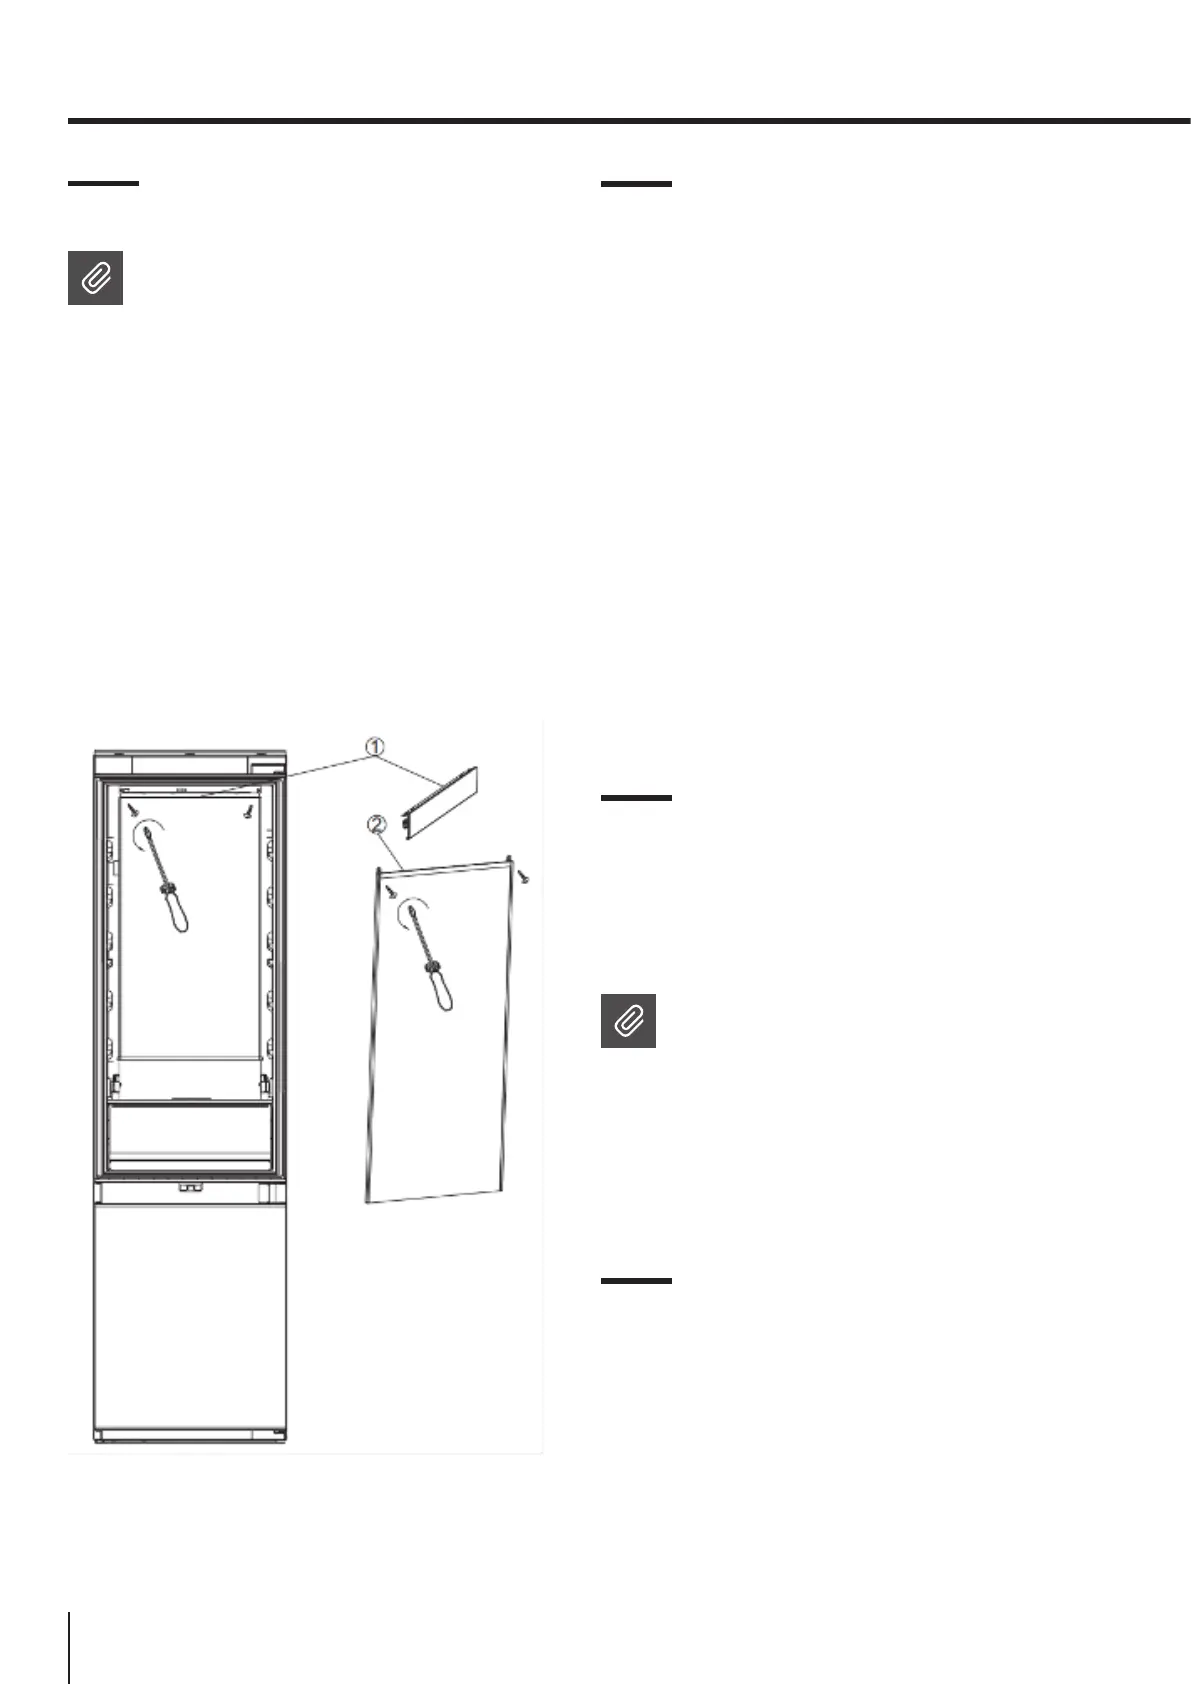
2. Remove the aluminium alloy trim strip on the top
of the LED surface light source, then remove the
left and right mounting screws.
Steps 1 and 2 are shown below.
3. Install the new LED light board.
4. Finally, replace the aluminium alloy trim strip.
3.2 Care and Cleaning
Always disconnect the appliance from the
mains power before performing any cleaning or
maintenance.
The fridge and freezer sections should be cleaned
using a solution of bicarbonate of soda and
lukewarm water. Do not use abrasive products
or detergents. After washing, rinse and dry
thoroughly.
Clean the shelves and door bins separately by
hand with a mild solution of washing-up liquid and
water. Do not put them in the dishwasher.
If the appliance is not going to be used for an
extended period of time, unplug and clean the
appliance. The doors should be left slightly ajar to
prevent the formation of mildew and unpleasant
odours.
3.3 Defrosting
The product has a No Frost system, which is
designed to prevent heavy build-up of ice. Under
normal conditions of use, there should be no need
to regularly defrost the freezer system.
NOTE:
If you are regularly finding a heavy build-
up of ice or puddles of water in the freezer
section, then it is likely that the door is not
sealing properly. This could be due to a
defective door seal or an incorrectly fitted
or overly heavy cabinet door panel. For
more information, see the troubleshooting
section about ice.
3.4 Troubleshooting
If you have any problems with your appliance, you
should check this troubleshooting section prior to
calling Customer Care.
If the appliance is not working, check that:
> The appliance is receiving electrical power.
> The fuses in the home are intact and the fuse in
the plug has not blown.




 To Next Page