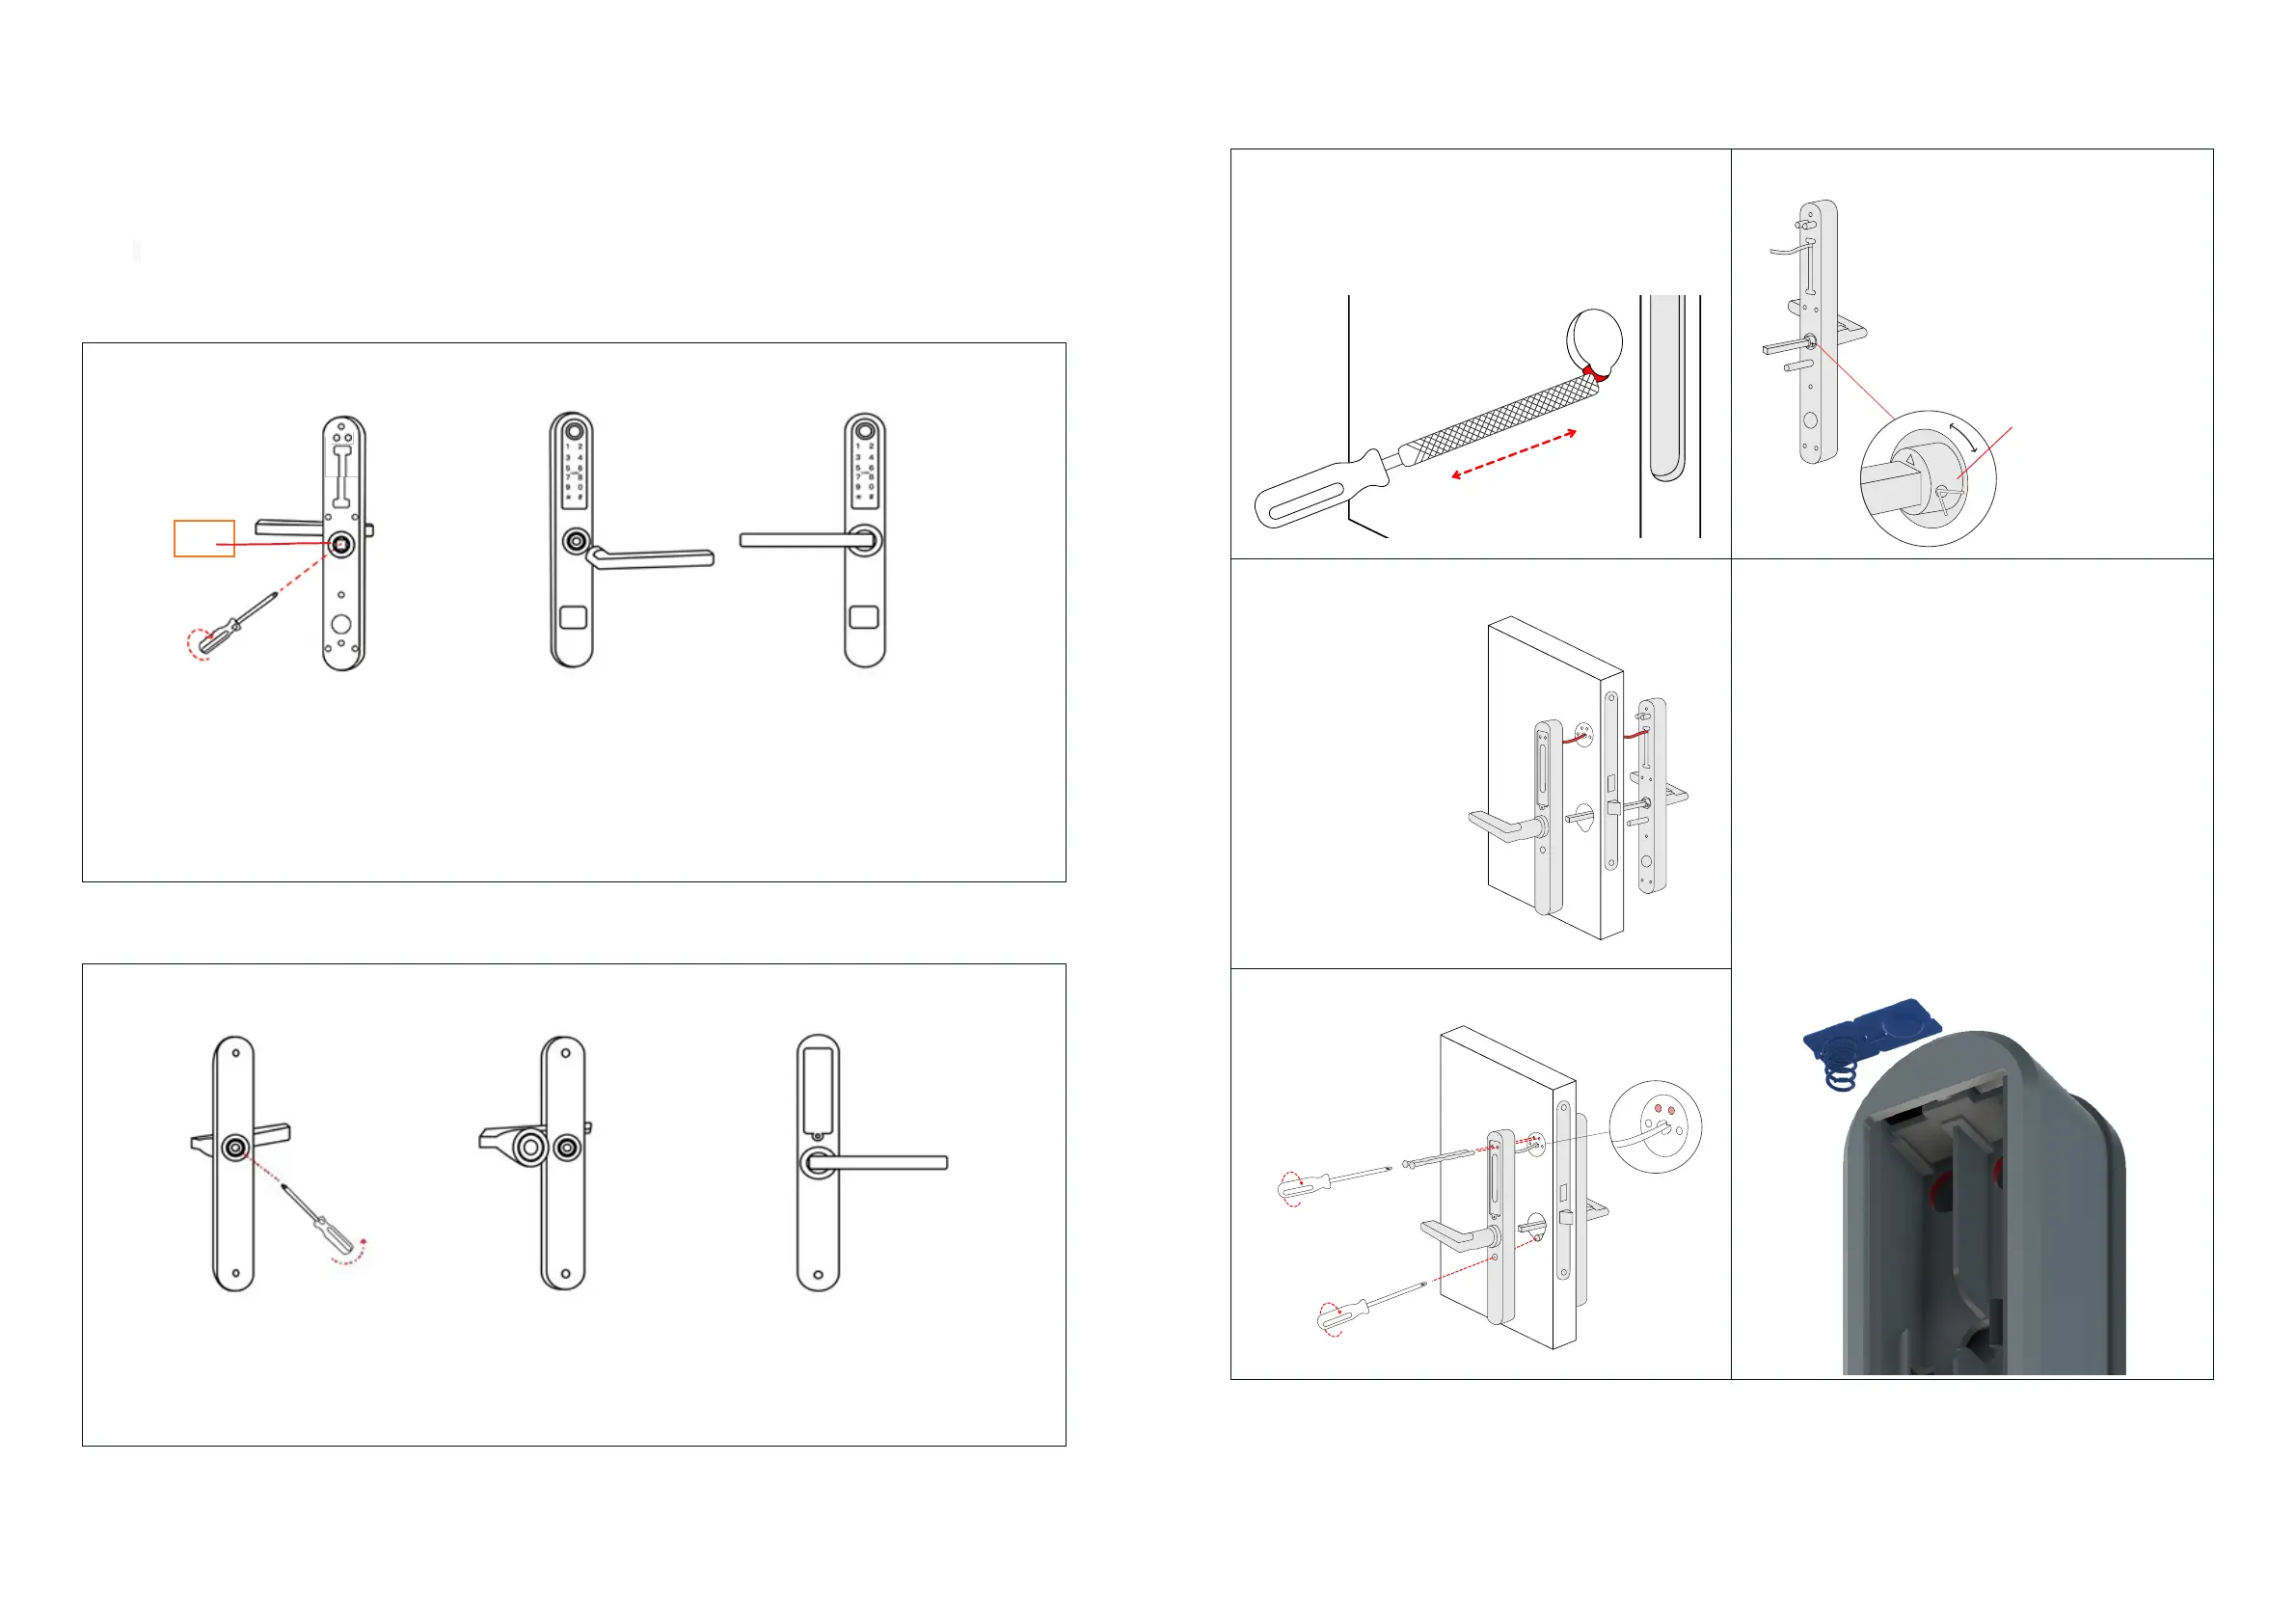
1 – Disassemble handle by
loosening the screw inside,
using a Phillips screwdriver.
3 – Push handle back in
place and tighten rmly with
screwdriver.
Make sure that arrow is
pointng in the correct
direction.
2 – Carefully remove
handle and change
direction.
3 – Repeat steps above.
No arrow on back part to
check.
2 – Repeat steps above.
1 – Repeat the steps above for
back part.
3. Installation
3.1 Change of handle direction (if needed)
Note: Adjust direction according to door opening direction.
Arrow must be pointing in the same direction as handle.
4 5
1 - Make room for bushing
3.2 Installation
2 - Insert square shaft
3 - Connect wires
4 - Connecting panels
Turn arrow to point in
the same dirction as
handle.
Insert the U-clip in
the hole and bend its
front end to x the
square shaft.
First attach rubber
gaskets.
Then connect cables,
front and back panels.
Push together.
Make shure that front
and back are paralell to
each other to ensure
smooth function.
Additional info to point 4
For easier mounting of the two screws inside the
battery case:
Open battery cover by loosening the screw (be
careful not to lose it)
Carefully remove upper battery pole using a slotted
screwdriver. Place screwdriver behind the pole and
push outwards.
Measure and cut screws.
Screw together front and back parts.
Push battery pole back in place. Make sure it is
placed as picture shows with the spring to the left.
Loosen the mortise and le with a suitable le (round
le), so that the bushing can pass underneath.
Screw the mortise back in place and check that the
bushing can pass freely.
Measure and cut the
waist screws to their
correct length.
Tighten securely.
 Loading...