EasyManua.ls Logo

BIG ASS FANS Essence User Manual

BIG ASS FANS Essence
72 pages
To Next Page IconTo Next Page
Page #1 background imageLoading...
Page #1 background image
Essence
®
INSTALLATION
GUIDE
For help, call 1-877-BIG-FANS
or visit www.bigassfans.com

Table of Contents

Questions and Answers:

BIG ASS FANS Essence Specifications

General IconGeneral
Energy EfficiencyEnergy Star Certified
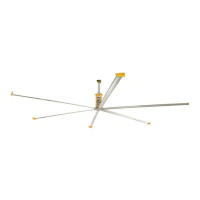
Number of Blades6
MotorEC Motor
MountingStandard Mount, Extension Mount
ControlWall Control
Light KitOptional LED
BladesAluminum Airfoils
Power ConsumptionVaries with size and speed

Summary

Installation Guide

Installation Checklist

Important Safety Instructions

Reference Guide

Reference Guide: Mounting

Introduction

About this Fan

Details the fan's specifications, voltage, and power requirements.

Power Requirements

Lists input power, circuit size, and rated current for different fan models.

Pre-Installation

What's in the Box

Details all components included in the fan packaging for installation.

Parts Included

Lists and illustrates hardware and mounting components provided with the fan.

Tools Needed

Lists recommended mechanical and electrical tools required for fan installation.

Alternative Mounting Methods

Fan Diagram

Preparing the Work Site

Mechanical Guidelines

Provides mechanical considerations for installation, including clearance and safety.

Electrical Guidelines

Outlines electrical requirements and safety precautions for installation.

Mounting Structure: Bar Joists

Select Proper Angle Irons

Guides selection of angle iron dimensions and quantity for bar joist mounting.

Pre-drill Angle Irons

Instructions for drilling pilot holes in angle irons for mounting.

Secure Angle Irons

Details on fastening angle irons together and to the structure.

Fasten Single Angle Irons

Steps for attaching single angle irons to roof structure mounting points.

Fasten Double Angle Irons

Steps for attaching double angle irons to roof structure mounting points.

Mounting Structure: Wood Frame

Identify Mounting Location

Guidance on selecting the correct mounting location on wood framing.

Fasten Brackets (to Vaulted Ceiling Beams)

Instructions for attaching mounting brackets to vaulted ceiling beams.

Fasten Brackets (to Floor Joists)

Instructions for attaching mounting brackets to floor joists.

Fasten Brackets (to Ceiling Joists)

Instructions for attaching mounting brackets to ceiling joists.

Mounting Structure: Solid Beam

Pre-drill Suitable Mounting Beam

Procedure for drilling pilot holes in a solid beam for mounting.

Determine Bracket Orientation

Guidance on orienting L-brackets based on beam thickness.

Attach L-Brackets

Steps for attaching L-brackets to the mounting structure, with or without safety clips.

Hanging the Fan

Route Wiring and Safety Cable

Procedure for routing electrical and safety cables through the extension tube.

Attach Upper Mount and Brace

Steps for assembling the upper mount and brace onto the extension tube.

Attach Upper Mount (to Angle Irons)

Securing the upper mount to angle irons using mounting hardware.

Attach Upper Mount (to Wood Framing Channels)

Attaching the upper mount to wood framing channels.

Attach Upper Mount (to L-Brackets)

Securing the upper mount to L-brackets using mounting hardware.

Fasten Wood Framing Channels

Securing wood framing channels to brackets for wood frame mounting.

Secure Safety Cable (to Main Fan Unit)

Attaching the safety cable to the main fan unit.

Attach Main Fan Unit (to Extension Tube)

Securing the main fan unit to the extension tube.

Tighten Hardware

Instructions for torquing various hardware components after fan assembly.

Secure Safety Cable (to Angle Irons)

Procedure for securing the safety cable to angle iron mounting points.

Secure Safety Cable (to Solid Beam)

Steps for securing the safety cable to a solid beam mounting.

Connect Power and Wall Controller Wiring

Connecting power supply and controller input cables to the fan.

Install Cover Plate Assembly

Connecting and attaching the cover plate assembly to the extension tube.

Install Lower Cover

Attaching the lower cover to the main fan unit.

Installing Guy Wires

Attach Guy Wire Clamps

Positioning and securing guy wire clamps to the extension tube.

Attach Locking Carabiners

Securing locking carabiners to the guy wire clamps.

Attach Beam Clamp (Bar Joist Mounting)

Mounting a beam clamp to the structure for bar joist installation.

Attach Eyebolt (Wood Frame Mounting)

Attaching an eyebolt to the wood frame for guy wire attachment.

Route Guy Wire Through Gripple®

Guiding guy wires through the Gripple for tensioning and securing.

Install Three Remaining Guy Wires

Completing the installation of the remaining guy wires for fan stability.

Installing Airfoils

Attach Winglets or Airfoil Tips

Attaching winglets or airfoil tips to the fan airfoils.

Position Airfoils

Sliding the airfoils onto the mounting tabs on the fan hub.

Attach Airfoils (to Main Fan Unit)

Securing the airfoils to the main fan unit using airfoil retainers.

Wiring the Fan

Power Requirements

Details fan voltage, input power, and circuit size requirements.

Wire Color Chart

Provides a guide to fan power supply wire colors for different regions.

Wiring the Fan (Wired Wall Controller)

Diagram and instructions for wiring the fan with a wired wall controller.

Wiring the Fan (Wireless Wall Controller)

Diagram and instructions for wiring the fan with a wireless wall controller.

Wiring: Fire Signal Relay

Instructions for wiring the fire relay for sprinkler system integration.

Wiring: 0-10 VDC Automation

Details for wiring the fan for 0-10 VDC speed control automation.

Wired Wall Controller Installation

Dimensions

Provides the physical dimensions of the wired wall controller.

Mounting to a Junction Box

Steps for mounting the wired wall controller to a junction box.

Mounting Directly to a Wall

Instructions for mounting the wired wall controller directly to a wall surface.

Wireless Wall Controller Installation

Set the Wall Controller Address (Single Fans)

Procedure for setting controller address for single fan control.

Set the Wall Controller Address (Linked Fans)

Procedure for setting controller address for multi-fan synchronization.

Locate Fan RF Board

Instructions for accessing and locating the fan's RF board.

Set the RF Board Address (Single Fans)

Matching fan RF board address to controller for single fan setup.

Set the RF Board Address (Linked Fans)

Matching fan RF board address to controller for linked fan operation.

Wire the Wall Controller and Fan

Wiring the wireless wall controller to the fan, including diagrams.

Mount the Wall Controller

Instructions for mounting the wireless wall controller to a wall plate.

Test the Fan(s)

Procedure to test fan operation after controller installation and address setup.

Fan Operation

Wired Wall Controller

Instructions for operating the fan using the wired wall controller.

Wireless Wall Controller

Instructions for operating the fan using the wireless wall controller.

Wireless Wall Controller Maintenance

Guidance on maintenance for the wireless wall controller.

Changing the Fan Direction

Procedure to reverse the fan's rotation direction.

Preventive Maintenance

Annual Preventive Maintenance

Annual inspection steps to ensure safe and efficient fan operation.

General Preventive Maintenance

General checks for fan rotation, cleaning, and stability.

Annual Maintenance Checklist

Troubleshooting

General Troubleshooting

Common fan issues and their potential solutions.

Electrical Troubleshooting

Diagnosing electrical issues using fan status LED codes.

Fan Status LED Definitions

Explanation of fan status LED codes and their meanings.

Wireless Wall Controller Troubleshooting

Steps to resolve wireless controller issues, including address changes.

Change the RF Board Address

Procedure to change the fan's RF board address to resolve communication issues.

Replacing Fuses

Instructions on how to safely replace fuses in the main fan unit.

Optional Parts Order Form

Warranty Return Instructions

Replacement of Products Under Warranty

Process for obtaining replacement parts under warranty.

Instructions for Returning the Original Item

Steps for packaging and shipping the original part for warranty evaluation.

Warranty Claim Form Instructions

Detailed steps for completing and submitting warranty claim forms.

Warranty Claim Form

Responsibility Agreement

Check-In Procedure

Close-Out Procedure

Related product manuals