6.3.1. EDID Mode Settings
6.3.2. Learning EDIDs
In most cases, EDIDs will not require learning from the display. Only perform learning
if the EDIDS available using the Mode dial do not provide the desired outcome.
1. Set the EDID Mode dial to “7”.
2. Connect the HDMI display to “HDMI IN” on the Transmitter with a HDMI cable.
3. Set “MODE” on the transmitting unit to “7”.
4. Power on the Transmitter by connecting the 5V Power Supply.
5. The LED on the RJ45 of the transmitter will ash On and Off once to learn the
EDID. Keep the mode dial on “7” at all times to use the learned EDID.
6. Unplug the HDMI cable from the display and follow the installation instructions
in section 6.1 B-200-1CAT-HDIR Transmitter Installation.
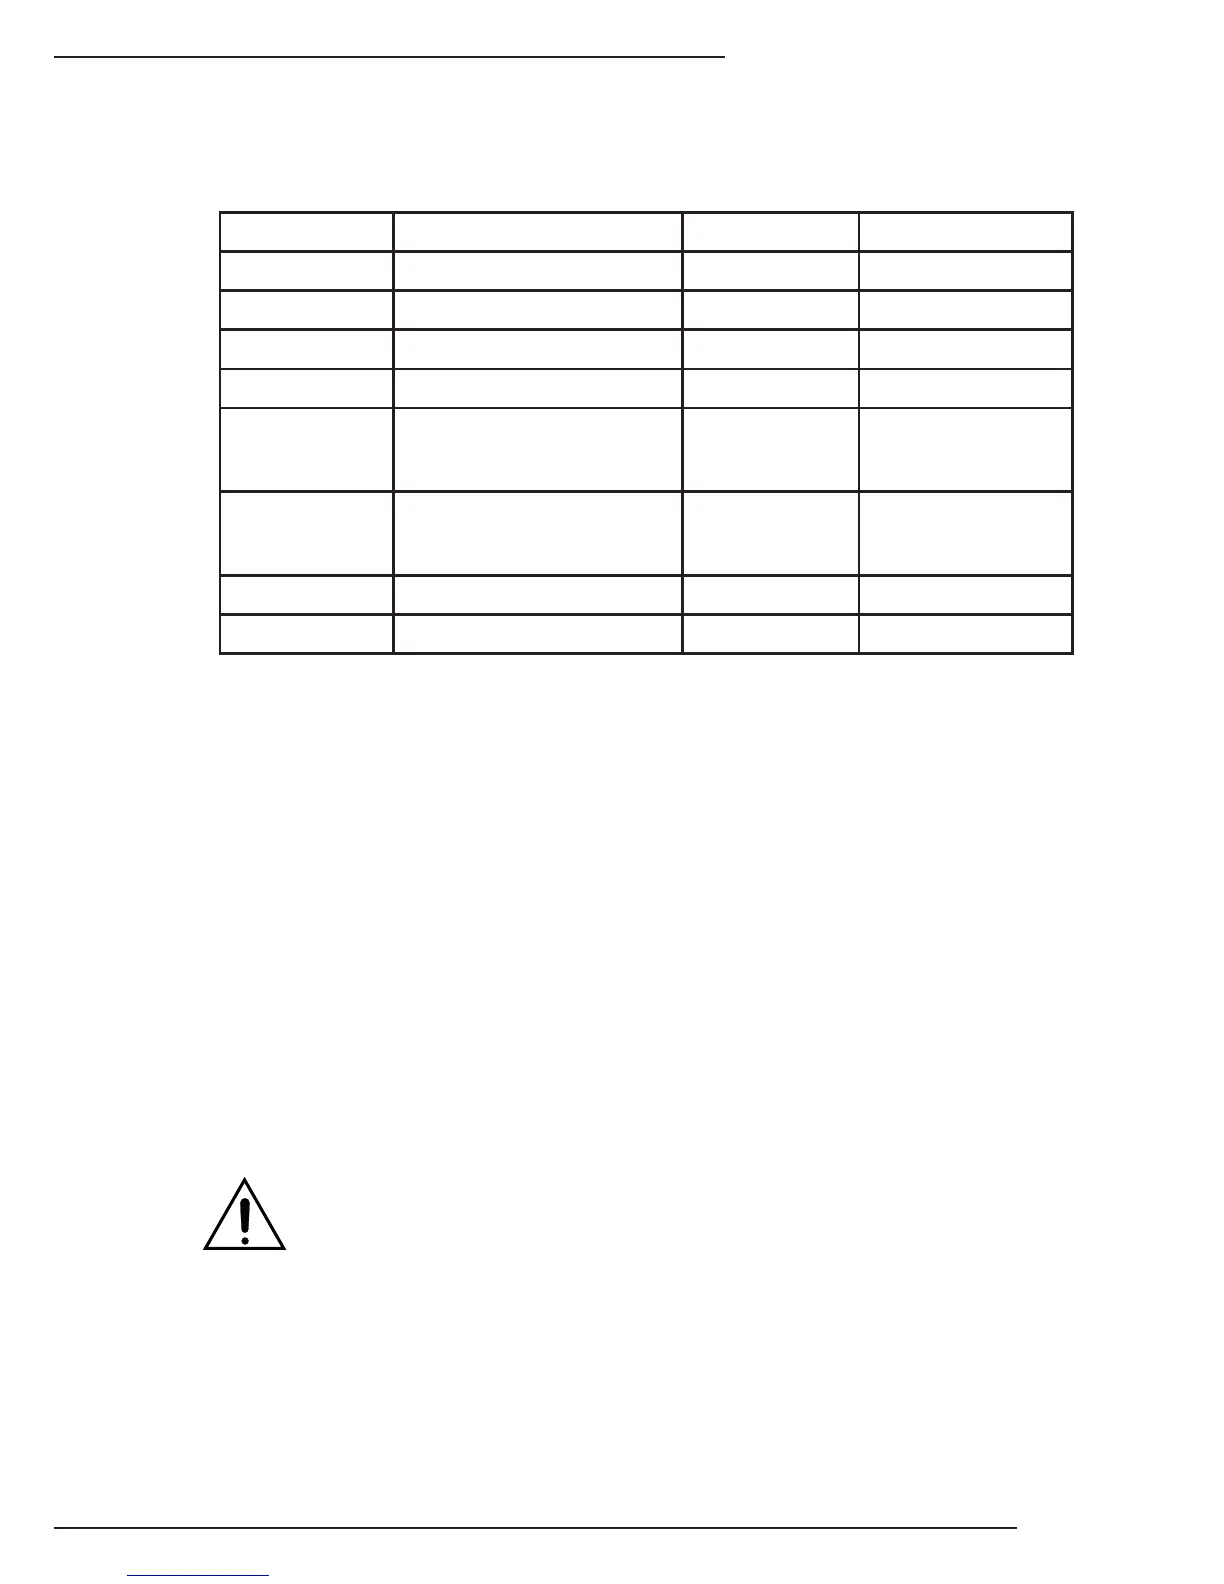
EDID Setting Supported Resolutions Color Depth Audio Channels
0 1080p @60Hz 24-Bit 7.1 ch
1 1080p @60Hz 24-Bit 2 ch
2 1080p @60Hz 36-Bit 7.1 ch
3 1080p @60Hz 24-Bit 3D 7.1 ch
4 1080p @30Hz
1080i @60Hz,
720p @60Hz
24-Bit 7.1 ch
5 1080p @30Hz
1080i @60Hz
720p @60Hz
24-Bit 2 ch
6 1080p @60Hz 24-Bit 3D 2 ch
7 Learning Mode
6.3. EDID Conguration
6.4. Distance Calibration
CAUTION: Inappropriate signal level setting may cause an overpowering issue that
may shorten the product life. Follow the steps below to adjust the distance setting
in order to avoid overdriving.
1. Set the distance control to 7 (Weakest).
2. Select a source that is outputting the highest-quality video that will be
transmitted to the receiver.
A. If you see a ickering or blinking images on the display:
A-1. Adjust the signal level from 7 to 0 one step at a time, and stop turning the
rotary switch when the audion/video is playing normally.