9
2. PREPARE FOR TREATMENT
2.1 Place the device on a at and sturdy surface in close proximity to where the
paent will be resng.
2.2 Plug the power cord aached to the back of the pump into a safe 120 VAC, 60 Hz
outlet. A grounded outlet is not required.
2.3 Note the LATCH CONNECTORS, numbered 1—4, located at the end of the tubing
on your garment (See Figure 2). With one hand squeeze the LATCH CONNECTOR
with numbers facing up and push into the Receptor Ports (7) with matching num-
bers located on the front panel of the device. You should hear a click when fully
engaged.
2.4 If two garments are used, remove the Blocker Bars (see Figure 3) and aach the
LATCH CONNECTORS from the second garment to the auxiliary ports (8).
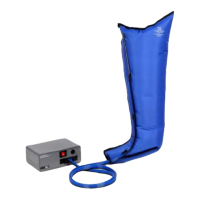
2.5 Pung the garment on
LEG GARMENTS, unzip the garment gently all the way down to the boom and
stop (zipper does not separate). Place the foot at the boom end of the garment
and pull on garments straps to help guide the garment up and onto your leg.
Once garment is in place pull up the zipper while supporng the garment to wrap
around the leg.
ARM GARMENTS, slide the arm through the internal cavity of the garment.
Note: Do not wear the garments directly over skin. Always wear light clothing
underneath garments for hygienic reasons and to avoid irritaon. It is
recommended that light bandages, clean hosiery or stockinees be worn
under garments. Clothing should be free of zippers, buons or other items
that could rub and chafe the skin or damage the garment.
3. Turning Pump On
3.1 Seat yourself comfortably in a reclined posion, within easy reach of the pump.
Legs should be elevated.
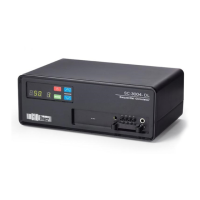
3.2 Powering on your device - Press the “Power On/O” (1) buon to turn your pump
on and o.
3.3 When rst turned on, the “LED Display” (5) will show the total hours the pump
has been used. Aer 5 seconds the pump will start to blow air. The air pressure
will be the same as the previous treatment. Factory default pressure is 50 mmHg
in the chamber #1, decreasing to 47 mmHg in chamber #4. To change the
pressure, see Secon 5.
3.4 As the pump starts to run through its cycle, the number that shows in the “LED
Display” (5) is the 60 minute countdown mer. The SC-3004-DL includes a one
hour automac shuto mer. To run the pump in connuous (unmed) mode,
see Secon 6.