3
4. ELECTRICAL SPECIFICATIONS
AC-adaptor for Charging Stand or direct charging
- Input voltages and main plug according to local requirements
- Output voltage 7.5 VDC, 300 mA
AC-adaptor for Charging Carousel
- Input voltages and main plug according to local requirements
- Output voltage 9 VDC, 1200 mA
Note: To guarantee optimal charging, do not use any other than the original
AC-adaptor supplied by the manufacturer!
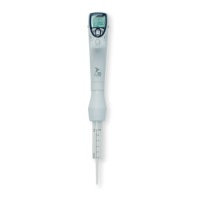
5. CHARGING OF THE eLINE PIPETTE
The Biohit eLINE Charging Stand or Carousel are intended to be used only
with Biohit eLINE electronic pipettes. However, the Biohit eLINE also features
direct charging by using the Biohit eLINE AC-adaptor supplied with the Biohit
eLINE Charging Stand.
The Biohit eLINE pipettes leave the factory fully
charged. The battery is protected against discharging
during the storage with a plastic protector strip,
which must be removed before operating the pipette.
However, should the battery become discharged
during storage and recharging is required, a battery
symbol will be observed in the bottom right corner of
the display (Fig. 2.).
Note: If the battery is fully discharged, the display will be empty and there will
be no response from the operating buttons. After a few minutes on charge,
the battery symbol will be displayed and the + and – symbols will continue
to blink until the battery is fully charged.
5.1. Charging with the Biohit eLINE Charging Stand Carousel
The eLINE Charging Stand and Carousel operates through the metal contacts
situated on the sides of the pipette (Fig. 3A) and in the head of the Charging
Stand/Carousel (Fig. 3B and Fig.3C).
1. Check that the battery protector strip is removed and the battery cover
properly closed.
2. Place the pipette into the Charging Stand/Carousel. Ensure that the metal
contacts on the sides of the pipette are properly fi tted to the tracks of the
metal contacts in the top of the Charging Stand/Carousel.
3. When charging, the battery symbol will be displayed with the + and
symbols fl ashing. The charging time for completely discharged batteries
is 4 hours.
Fig. 2