Do you have a question about the BIONIME GM300 and is the answer not in the manual?
Read all instructions, use quality control, use only Rightest strips and meter.
Avoid arterial testing, consider temperature changes, avoid moisture, and proper sample size.
Calibrates the meter for test strip performance and contains the test strip port.
Calibrates meter for strip performance and stores necessary information for accurate results.
Instructions on how to replace the Dummy Code Key with a new Smart Code Key.
Assemble key before testing, change with new strips, use only provided key.
Danger of explosion if replaced incorrectly. Use correct type and dispose properly.
Configure year, month, day, time format, and measurement units (mg/dL or mmol/L).
Turn on by pressing the button or inserting a test strip.
Meter, test strips, control solution, lancing device, lancet, and alcohol swab.
Ensure the Smart Code Key is assembled in the meter before starting any test.
Wash hands with soap and water, or use alcohol swab for accurate measurement.
Prepare the lancing device by removing the cap and hub.
Load the lancing device carefully to avoid accidental needlesticks.
Remove test strip, recap vial, insert strip into meter, check code.
Do not apply blood before the meter indicates readiness to avoid wasting strips.
Verify meter code matches strip vial code for accurate test results.
Lancing the finger and forming a blood drop for testing.
Press the release button to obtain a tiny blood sample from the fingertip.
Ensure fingertip is dry; water or alcohol can affect testing accuracy.
Obtain a small blood drop; discard the first drop for more accurate measurement.
The second blood drop is recommended for accurate measurement.
Avoid excessive blood (over 4.0µl) to prevent Smart Code Key contamination.
Less than 1.4µl may cause inaccurate results or test failure; repeat test.
Applying blood sample to the test strip for measurement.
Touch the blood drop to the strip's sample entry for automatic drawing.
Avoid squeezing too much blood to prevent polluting the Smart Code Key.
Hold finger until beep and view window is filled; repeat if insufficient.
Check expiration, use immediately, do not reuse, and follow environmental guidelines.
Repeat test or run control test for abnormal results; contact professional if issues persist.
'Lo' appears for results below 0.6 mmol/L (10 mg/dL); repeat test or contact professional.
'Hi' appears for results above 33.3 mmol/L (600 mg/dL); repeat test or contact professional.
Tests to ensure the monitoring system (meter and strips) works properly.
Checks strip and meter compatibility using control solution.
Perform both check key and control solution tests for a complete quality check.
Perform before first use, with new strips/key, after damage, or when results are doubted.
Write discard date on new control solution; it's good for 3 months after opening.
Error during Check Key test indicates potential meter or Check Key defect.
Steps to perform a quality control test using control solution.
Perform Check Key test first; meter shows '' symbol and 'CTL' for control solution.
Always perform Check Key test before control solution test to avoid 'Error'.
Gently touch the strip's sample entry with the control solution on the cap.
Compare your control result to the range printed on the strip vial label.
Result must fall within the control solution range for correct system operation.
Refer to page 54 for understanding and actions if results are out of range.
Always perform Check Key test before control solution test for accurate QC.
Results within the specified range indicate correct system operation.
Out-of-range results suggest system malfunction; repeat QC or contact support.
Errors related to operating temperature outside recommended ranges (0-50°C).
'LO' indicates low battery; 'Error' with ' ' indicates critically low battery.
Error during Check Key test indicates potential meter or Check Key defect.
Error indicates faulty or improperly assembled Smart Code Key; reinsert or contact service.
Er1 indicates a used or damaged test strip; use a new strip.
Er2 indicates meter malfunction; perform QC or reinstall batteries.
Er3 indicates unreasonable signal; redo the test with a new test again.
System is not validated for use on neonates.
Contact via phone or email for questions or advice regarding the product.
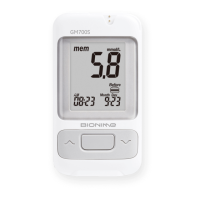
| Brand | BIONIME |
|---|---|
| Model | GM300 |
| Category | Blood Glucose Meter |
| Language | English |