22
7 Perifusion Operation (Protocol Wizard)
Continuing our effort to make Perifusion experiments more streamlined, and reduce the chance of error during
setup, we have developed a “Wizard” type interface to set-up and run your experiments. The wizard will guide you
step by step through the setup of the machine, setup of the sample, execution of your protocol, reporting of the
results, and even post-experiment maintenance of the machine.
Enter the wizard from the Main Menu screen by pressing the Protocol Wizard button (see 6.3).
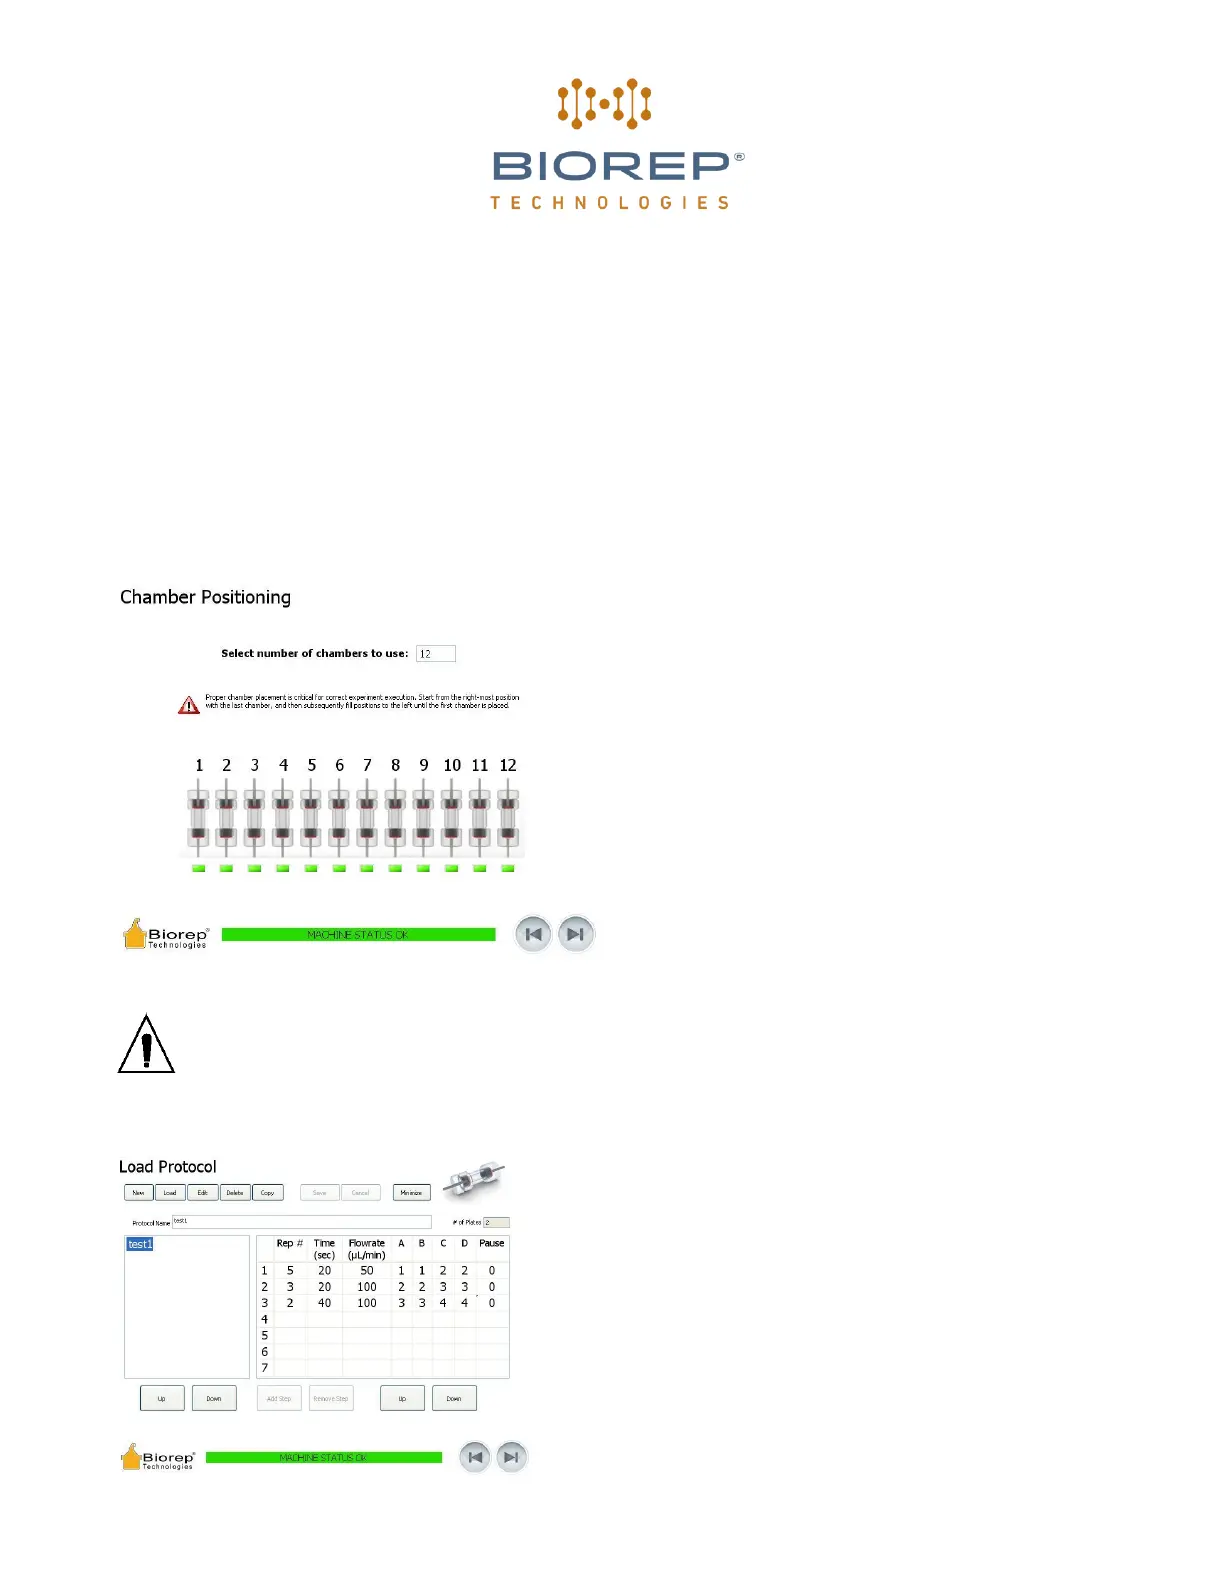
7.1 Chamber positioning
On the first screen of the wizard you will tell the
machine how many chambers you plan to use on your
experiment. You can use any number from 1 to 12.
Select the chambers to be used by changing the value
on the top field. The Green indicators under the
chamber icons will light up, confirming your choice,
and reminding you the positions of the chambers in the
chamber rack inside the incubator. As a general rule,
chambers should be placed on the rack, starting from
the right-most position and adding more chambers to
the left. Chamber number one (1) will always be the
left-most chamber.
Figure 27: Chamber positioning page
Misplacing the chambers will cause the collection sequence to fail. Please make sure the chambers are
numbered and located on the rack as shown by the wizard.
7.2 Protocol
On this screen you will be able to select or create a protocol
for the machine to run automatically. A list of previously
created protocols will be shown as a list on the left pane. The
right pane shows the contents of the protocol. A protocol is
divided into a series of steps, which are identified by the rows
of the table.
Each Step has the following attributes: Rep# is the times the
step is consecutively repeated before changing to the next
step. Time (sec) determines the duration of each repetition
(Rep) of the step.
 Loading...