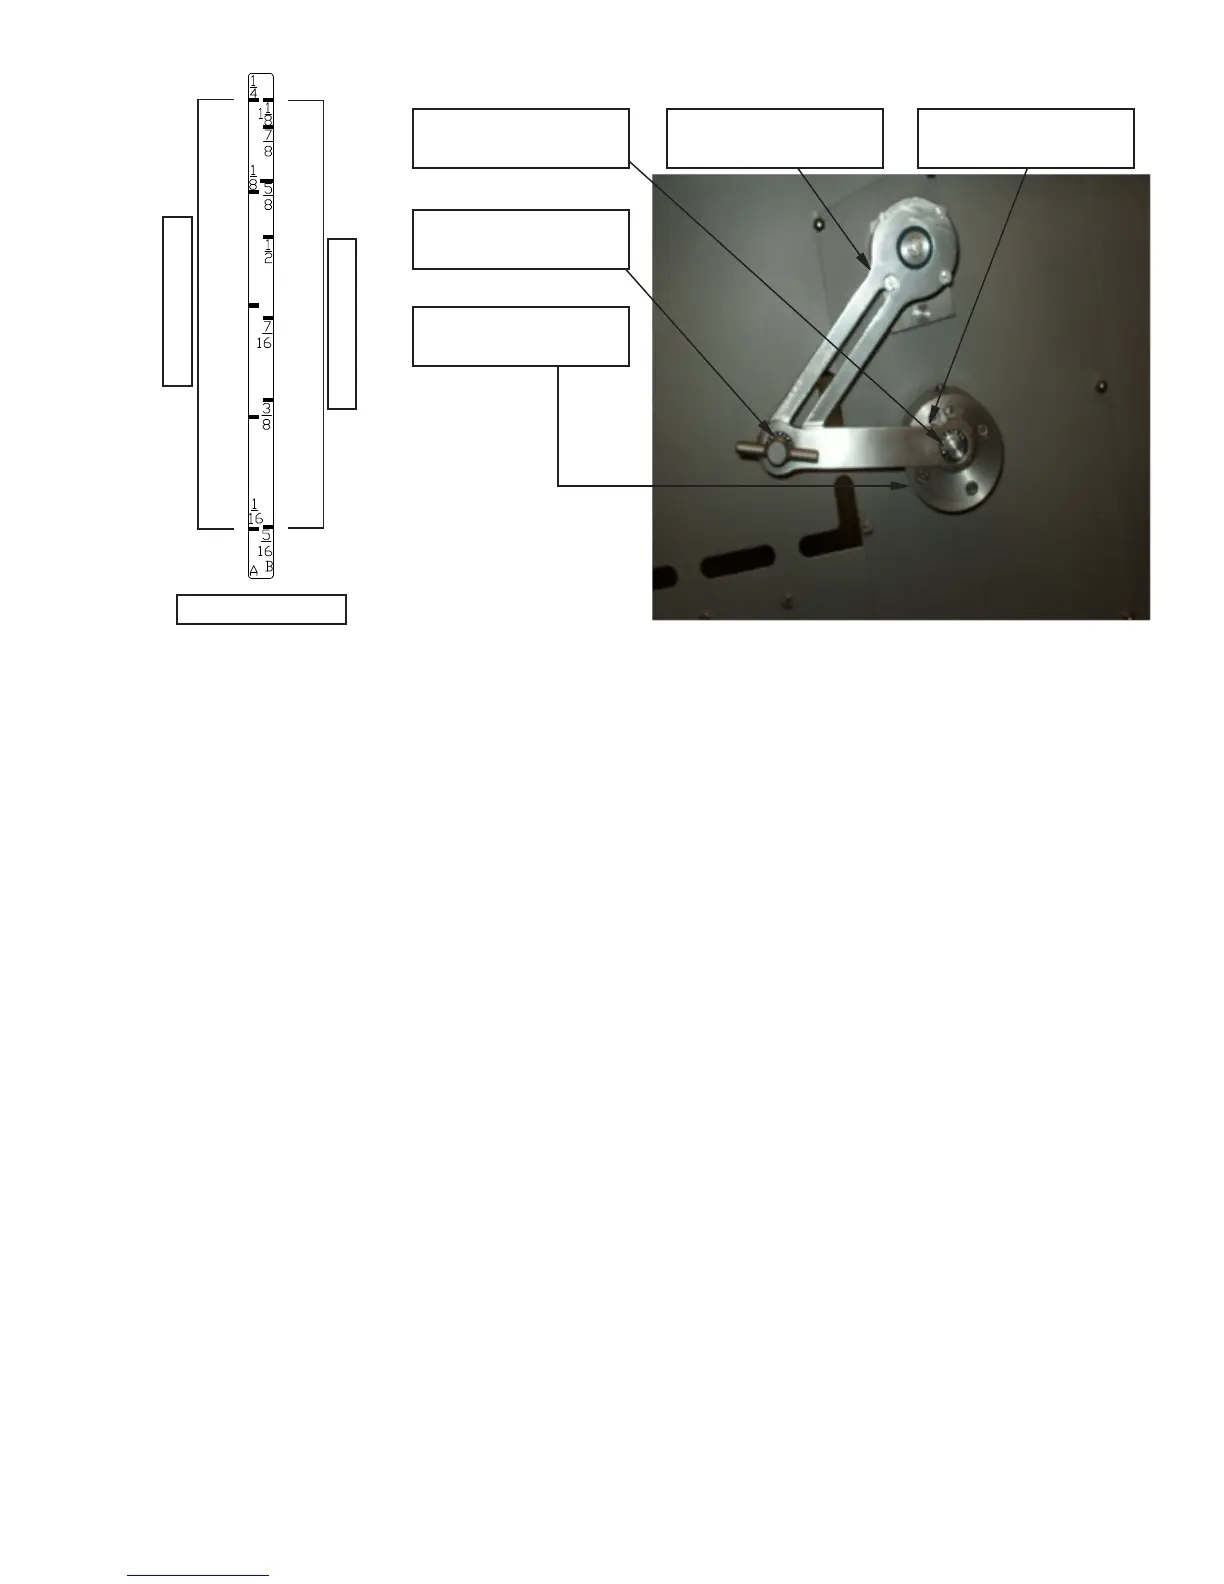
5
Adjustment Handle
Item No. PCM600
9
/16” Hex Head Screw
Item No. PCM607
Eccentric Hub
Item No. PCM588
Linkage Arm
Item No. PCM567
Draw Lever
Item No. 31-14
EXAMPLE B: To obtain a ⅞” (22.2mm) Thickness on the “B” scale, loosen the
9
/16” hex head screw, item
number PCM607 located on the eccentric hub, item number PCM588. Move the
9
/16” hex head screw to the
threaded hole marked “B” on the Eccentric Hub and retighten. Loosen the Linkage Arm Adjustment Handle,
item number PCM600, slide the handle with the indicator to the ⅞” (22.2mm) mark on Scale “B” and retighten
the adjustment handle. The Slicer is now ready to cut product at ⅞” (22.2mm) thick.
Press the Green Start Button.
Product will advance toward the blade automatically in thickness increments as adjusted above. When the
Product Pusher Assembly has completely advanced to the left, the slicer will shut off.
Open the Loading Chamber Cover. Squeeze the hand-lever and move the Product Pusher Assembly to the right
to the desired location for reloading the next product to be processed.
Open the Receiving Chamber Cover and remove the cut product.
Close the Receiving Chamber Cover.
Clean the Product Gripper of any product end surplus.
Load more product, and repeat the previous steps.
“JOG” Mode- This selection is used for a single-rotation (stroke) of the blade. It is used for a specic cut-off
length without using the Product Pusher.
MACHINE OPERATION
Scale “B”
Scale “A”
PCM603