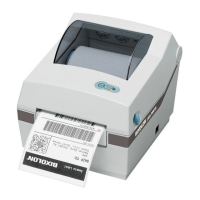
This document provides a comprehensive guide for diagnosing, troubleshooting, and maintaining the Bixolon DX420 sticker printer. It covers various aspects from its physical components to operational procedures and error resolution.
Function Description:
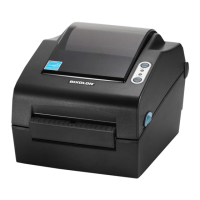
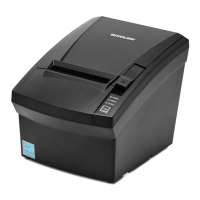
The Bixolon DX420 is a sticker printer designed for various labeling tasks. It is capable of printing on sticker rolls and is equipped with sensors to ensure proper paper handling and print quality. The printer supports different connectivity options for integration into various systems.
Important Technical Specifications:
While specific technical specifications like print resolution, speed, or memory are not explicitly detailed in the provided pages, the document highlights several key components and functionalities:
- Connectivity: The printer supports RS-232C (Serial), IEEE1284 (Parallel), and USB connections, offering flexibility for integration with different host devices.
- Paper Handling: It accommodates sticker rolls and features a Paper Holder, Paper Cover, and Paper Guide. It also supports fan-fold or external paper covers. Sensors include an Upper Gap Sensor, Black-Mark & Notch Sensor, and Lower Gap Sensor, which are crucial for accurate label detection and printing.
- User Interface: The printer includes a Pause Button and a Feed Button for manual control, along with a Power Switch and Power Jack. LED indicators (LED 1 and LED 2) provide visual feedback on the printer's status and error conditions.
- Internal Components: Key internal parts include the Printer Head, Cover STD, Platen Roller, and Peel-off Roller (optional).
Usage Features:
- Sticker Roll Installation: The document provides clear, step-by-step instructions for installing a sticker roll. This involves opening the paper cover, spreading the paper holder, inserting the paper roll, and pulling the paper through the paper guides. It emphasizes ensuring the printing surface faces up, regardless of whether the label is wound inwards or outwards.
- Self-Test Function: The printer includes a self-test function to check for problems, including firmware version, configuration information, printing quality patterns, and peripheral configuration. To initiate the self-test, users must turn on the power while pressing the feed button until printing begins. This function is not available if the label peel-off option is in use.
- Factory Reset: A factory reset function is available to restore the printer to its default settings. This is performed by pressing the Pause button for two seconds during Print Standby Mode, waiting for both LEDs to turn orange (indicating Stand-Alone Configuration Mode), and then pressing the Feed button during the third LED sequence (Status LED green, LED 2 blinking red four times). This action also executes Smart Media Detection.
Maintenance Features:
- Troubleshooting with Error Lights: A detailed table correlates the status of LED 1 and LED 2 (color and status like On, Blink, Off) with specific printer conditions or errors. This allows users to quickly identify issues such as:
- Print standby mode
- Paper jam (gap/black mark not recognized)
- Printer head overheating
- Paper Cover open
- No paper
- Media calibration failure
- Auto-Cutter error
- Mode switching notification
- Print paused temporarily (waiting for button input)
- Cover Close Mode (waiting for button input)
- Print Cancel Mode (waiting for button input)
Red indicators generally signify more critical issues, while orange indicates less likely but still important problems.
- Cleaning the Unit: The document provides instructions for cleaning the printer to maintain print quality and prevent degradation due to dust, foreign substances, or adhesive residue.
- Procedure:
- Open the paper cover and remove the paper.
- Remove dust or foreign substances with a dry cloth or cotton swab.
- Soak a cloth or cotton swab in medical alcohol to remove adhesive or other pollution materials.
- Do not use the printer until the alcohol has completely evaporated (1-2 minutes) and the printer is dry.
- Cautions:
- Always turn off the printer before cleaning.
- Allow 2-3 minutes for the print head to cool down if it was recently used, as it gets very hot during printing.
- Avoid touching the heated portion of the print head.
- The print head is sensitive to static electricity and damage; handle with care to prevent scratches or damage.
- Frequency: Cleaning is recommended when there is a degradation in printing quality or paper detection.
For issues that cannot be resolved using the provided troubleshooting steps, users are advised to contact the Onsite Support Team via email (support@onsitetrackeasy.com.au) or phone (1300 131 194). The website pegasus.net.au is also provided for further information.