Do you have a question about the BIXOLON SRP352III and is the answer not in the manual?
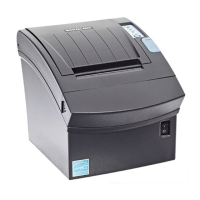
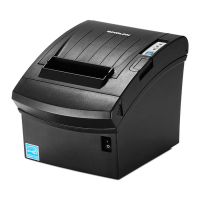
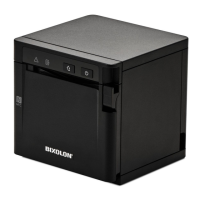
The Bixolon SRP-350/352III is a thermal printer designed for use with electronic instruments such as Electronic Cash Registers (ECR), Point Of Sales (POS) systems, and computer peripheral equipment. This manual outlines the setup, operation, and maintenance of the device, emphasizing safety precautions and proper usage to ensure longevity and optimal performance.
The SRP-350/352III is a high-speed thermal printer capable of printing at a maximum speed of 250mm/s. It utilizes thermal printing technology, which is known for its low noise operation, making it suitable for various environments where quiet operation is desired. The printer supports multiple interface options, including an embedded USB port, serial (RS-232C), parallel (IEEE1284), and Ethernet ports, allowing for flexible connectivity with different host systems.
A key feature of this printer is its embedded data buffer, which enables it to receive print data even while actively printing. This helps prevent data loss and ensures a smooth workflow, especially in busy operational settings. The printer also includes a peripheral units drive circuit, which allows for the control of external devices, such as a cash drawer, directly from the printer. This integration simplifies system setup and operation for POS applications.
The SRP-350/352III is capable of printing various types of content, including bar codes, which is essential for retail and inventory management. It also offers different print densities, which can be adjusted through internal switches, allowing users to customize print quality based on their specific needs or paper types.
Setting up the SRP-350/352III involves several steps, starting with unpacking and verifying all included items: the printer unit, cable cover, CD, paper roll, installation guide, AC/DC adaptor, and power cord.
Connecting the printer to a host computer (POS/ECR) requires the appropriate interface cable. The manual provides detailed pinout diagrams and color codes for USB, serial (RS-232C), parallel (IEEE1284), and Ethernet cables, ensuring correct connections. It is crucial to turn off both the printer and the host before connecting any cables to prevent damage.
For cash drawer integration, the printer features a dedicated connector. Users must ensure they use a cash drawer that meets the printer's specifications to avoid malfunctions. Connecting a telephone line to the drawer kick-out connector is strictly prohibited as it can damage both the telephone line and the computer.
The printer's functionality can be customized using DIP switches. For serial interfaces, DIP Switch 1 controls settings like auto line feed, flow control, data length, parity check, parity selection, and baud rate. DIP Switch 2 manages internal bell control, auto cutter selection, printing density, near-end sensor control, and auto external buzz. For parallel, USB, and Ethernet interfaces, DIP Switch 1 is mostly reserved, while DIP Switch 2 offers similar controls for internal bell, auto cutter, printing density, near-end sensor, and external buzz. Baud rate and print density settings are further detailed in tables, with print density levels ranging from Level 1 (default) to Level 4 (darkest).
Installing and replacing paper rolls is a straightforward process. Users should ensure the printer is not receiving data before opening the cover to prevent data loss. The paper roll cover is opened by pressing the Cover-Open button. It is important to use paper rolls that meet specifications and do not have paper glued to the core, as this can interfere with paper end detection. The paper must be inserted in the correct direction, and a small amount pulled out before closing the cover firmly to prevent mis-loading.
The printer is equipped with near-end sensors that alert users when the paper is running low. For wall-mounted or desk-locked installations, the location of this sensor can be adjusted using a control lever.
The control panel provides visual feedback on the printer's status. A green LED indicates power is on, while a red LED signifies an error (e.g., no paper, cover ajar). A red LED also lights up when the paper roll is low and blinks in self-test or macro execution standby modes. The FEED button allows users to discharge extra paper with a single press or continuously by holding it down.
The manual provides essential safety precautions, categorized as WARNING (serious injury or death) and CAUTION (slight wound or appliance damage). These include warnings against plugging multiple products into one multi-outlet, using wet or dirty plugs, or using non-supplied adapters. Users are advised not to pull cables to unplug, keep plastic bags away from children, and avoid plugging/unplugging with wet hands. Bending cables or placing heavy objects on them is also prohibited.
In case of unusual smoke, odor, or noise, users must unplug the printer immediately and contact their dealer after the smoke dissipates. The printer should be installed on a stable surface to prevent falls and damage. Only approved accessories should be used, and users are explicitly warned against disassembling, repairing, or remodeling the printer themselves. Touching the auto cutter blade is also prohibited.
Paper jams are addressed with a specific procedure. If a jam occurs, the printer should be turned off and on again, and the cover opened to remove the paper. For slight jams, turning the printer off and on may reset the operating blade. If the cover remains stuck, users can press both sides of the cover-cutter to separate it, turn a knob, and insert a cross-tip screwdriver into a projected blade to open the cover. After removing the jammed paper, the COVER-CUTTER should be reassembled, and the printer turned on.
Regular cleaning of the printer is recommended to maintain print quality. Paper dust can accumulate inside, affecting performance. The cleaning process involves opening the cover, removing any paper, and cleaning the print head with a cotton swab moistened with alcohol solvent. The paper sensor and paper roller should be cleaned with a cotton swab and a dry cloth, respectively. After cleaning, a paper roll is inserted, and the cover is closed.
The printer also features a self-test function to check for proper operation. This is initiated by turning on the power while holding down the FEED button. The self-test prints the current printer status, including the control ROM version and DIP switch settings, followed by a built-in character set. The process automatically ends with a paper cut, indicating the printer is ready to receive data.
For advanced troubleshooting, the hexadecimal dumping function allows experienced users to view raw data sent to the printer in hexadecimal format, which is useful for diagnosing software problems. This mode is activated by turning on the printer while holding down the FEED button with the cover open, then closing the cover. In this mode, the printer prints all received codes in two columns (hexadecimal and ASCII characters), with most commands disabled except DLE EOT and DLE ENQ. The mode is exited by turning the printer off and then on again.
Finally, the manual emphasizes the importance of using reliable original supplies. Bixolon does not guarantee quality or provide after-sales service for damage caused by fake or recycled supplies. The specifications and manual contents are subject to change without prior notice as Bixolon continuously strives to improve product functions and quality.
| Print Method | Direct Thermal |
|---|---|
| Print Resolution | 203 dpi |
| Auto Cutter | Yes |
| Paper Width | 80 mm |
| Interface | USB, Serial, Ethernet |
| Dimensions | 145 x 200 x 145 mm |
| Paper Roll Diameter | 83 mm |
| Power Supply | AC 100V ~ 240V |