6 7
Alternator Check checks to determine that the alternator is keeping up with the electrical load.
Engine Start places the charger in an engine start sequence.
SCROLLING MESSAGE LCD DISPLAY
The Scrolling Message LCD Display (LCD) indicates the various status messages and/or conditions
as described in the Smart Charge Function and Alternator Check sections that follow.
CHARGING GAUGE
The Charging Gauge displays the percentage of charge during the Smart Charge process.
SETTING UP THE UNIT
Ensure that all installation and operating instructions and safety precautions are understood
and carefully followed by anyone installing or using the charger. Follow the steps outlined in the
“Important Safety Instructions” section of this manual.
After turning the Function Control Knob to the desired function position and connecting the charger
clamps correctly to the battery, plug the charger into a functioning 120 volt AC outlet.
Notes:
The LCD displays CHECK CLAMP CONNECTION TO THE BATTERY when the unit is plugged in and there is no
battery connected to the charger or the clamps are not connected properly.
If a problem with the battery is detected at any time in the course of the charging or alternator check process, the
LCD will display a Fault Condition message and the Status LED will light red. Refer to the “Troubleshooting” section
of this Instruction Manual and take the appropriate action.
SMART CHARGE
1. Set up the unit as described in the “Setting Up the Unit” section, selecting the Smart Charge
function before connecting the clamps to the battery.
2. When the unit is done analyzing the battery, it will begin the recharging process. The LCD will
then display the battery voltage (for example: CHARGING / 12.5 VOLTS). As the battery charges,
the arrow on the Charging Gauge will move indicating the current percent of charge in the battery,
from the red zone (0-25% charged) toward the green zone (90-100% charged).
3. When the unit is fully charged, the LCD displays BATTERY IS FULLY CHARGED. The status LED
will light green.
4. Disconnect first the AC cord, then the clamps to shut the unit off. Observe the “Important Safety
Instructions” at the front of this manual when disconnecting.
ALTERNATOR CHECK
Part 1 — No Load (Turn OFF all vehicle’s accessories): The battery must be fully charged before
testing the alternator. Run the engine long enough to achieve normal idle speed and verify there is a
no-load voltage.
1. Set up the unit as described in the “Setting Up the Unit” section, selecting the Alternator Check
function before connecting the clamps to the battery. ANALYZING ALTERNATOR will display on the
LCD.
3. Once the unit has finished checking, the LCD will display either ALTERNATOR GOOD (the status
LED will light green) or ALTERNATOR BAD OR ENGINE NOT RUNNING (the status LED will light red).
Part 2 — Under Load (Accessories ON): Next, load the alternator by turning on as many accessories
as possible (except for A/C and DEFROST) and repeat the above four steps.
After completing both alternator checks, disconnect the AC cord and clamps, observing the “Important
Safety Instructions” at the front of this manual.
If the first alternator check indicates a good alternator and the second indicates the alternator is not
good, the problem could stem from: loose fan belts, an intermittent diode failure or possibly bad
connections between the battery and alternator and/or ground.
ALTERNATOR BAD OR ENGINE NOT RUNNING may display because someone has added a number
of accessory loads on the charging system, thereby increasing current demand from the alternator.
MAKE SURE THAT THE ALTERNATOR IS RATED TO SUPPORT THE APPLICATION.
Notes:
This check may not be accurate for every make, manufacturer and model of vehicle.
Check only 12 volt systems
.
ENGINE START
1. Set up the unit as described in the “Setting Up the Unit” section, selecting the Engine Start
function before connecting the clamps to the battery.
• Check unit periodically for wear and tear. Take to a qualified technician for replacement of worn or
defective parts immediately.
• Read and Understand This Instruction Manual Before Using This Unit.
SAVE thESE inStRuctionS
WARNING: TO REDUCE THE RISK OF INJURY:
Follow these instructions and those published by the battery manufacturer and manufacturer of any
equipment you intend to use with this unit. Review cautionary markings on this product and on
engine.
INTRODUCTION
Thank you for selecting the 25 Amp Battery Charger. With proper care and use, it will give you years
of dependable service. This battery charger has a high charge rate of up to 25amps.
This battery charger features 3-stage, high-efficiency charging technology, built-in microprocessor
control that ensures fast, safe and complete charging of serviceable batteries.
FEATURES
• Unit automatically selects the proper charge rate setting
• 3-stage high-frequency switch mode automatic rapid charging
• 75 amp engine start
• Automatic Temperature Compensation
• Digital diagnostics
• Alternator check
• Digital display shows operating mode, fault conditions and battery voltage
• Charging Gauge shows the status of the battery being charged
• Spark resistant reverse polarity and short circuit protection for user with reverse polarity indication
• Cables wrap around the side ears and clamps clip to the back of unit for convenient storage
• Microprocessor control (Digital Smart Control)/high frequency power
• Compensates for low AC from extension cord use
• Lightweight, high-efficiency design
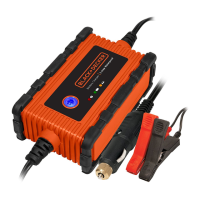
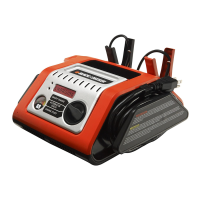
Controls and Functions
BLACK (NEGATIVE, –) CLAMP
SCROLLING MESSAGE
LCD DISPLAY
RED (POSITIVE, +) CLAMP
FUNCTION CONTROL KNOB
CHARGING GAUGE
FUNCTION CONTROL KNOB
The Function Control Knob is used to select either the Smart Charge, Alternator Check or Engine
Start function. This selection must be made BEFORE connecting the battery charger clamps to the
battery.
Smart Charge analyzes the battery and starts the recharging process.
BCS25EB_ManualENFRSP_102110.indd 6-7 10/21/2010 11:42:10 AM