10
11
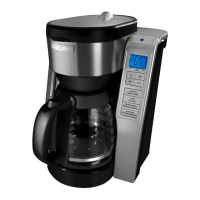
Care and Cleaning
This product contains no user serviceable parts. Refer service to qualified service
personnel.
CLEANING
Caution: Do not overexpose control panel to water. Water may cause permanent
damage and make coffeemaker inoperable.
1. Make sure coffeemaker is unplugged and cooled before cleaning.
2. Open water reservoir cover.
3. Remove filter basket by its handle and lift straight up.
4. Discard filter with grounds.
5. Clean parts as follows:
• Filter basket, carafe and lid are all top-rack dishwasher-safe; or they may be
hand-washed in warm, sudsy water.
• Wipe exterior and adjustable warming plate with a soft damp cloth.
Important: Do not use abrasive cleansers, scouring pads or steel wool. Never
immerse coffeemaker in water or any other liquid.
CARING FOR YOUR CARAFE
• Do not allow all of the liquid to evaporate from the carafe while on the
adjustable warming plate, or heat the carafe when empty.
• Discard the carafe if damaged in any manner.
• Never use abrasive scouring pads or cleansers; they will scratch the glass.
• Avoid rough handling and sharp blows.
AUTO CLEAN
This coffeemaker automatically records number of times coffee has been brewed,
to indicate when full decalcification cleaning is needed. When 60 cycles
of coffee have been brewed, CLeAn light on digital display will be illuminated.
1. Combine 6 cups of white vinegar and 4 cups of cold water in carafe.
2. Pour into water reservoir. Close the lid.
3. Place an 8 to 12 cup basket style paper filter in the removable filter basket.
Insert filter basket into filter basket holder and close lid.
4. Press AUTO CLEAN button to activate cleaning cycle. CLEAN light at bottom
of digital display will be illuminated.
5. Part of the mixture will brew through. Remaining mixture will be held in
coffeemaker for 30 minutes before completing its brew through.
6. Brew fresh water through appliance following instructions given in GETTING
STARTED before brewing coffee again.
Important: Auto Clean may be activated at any time, simply by pressing AUTO
CLEAN button.
ENGLISH
TROUBLESHOOTING
PROBLEM POSSIBLE CAUSE SOLUTION
Coffeemaker does
not turn on.
Coffeemaker is not
plugged in.
Check to be sure
appliance is plugged into
a working outlet and the
power (
) button is
powered on.
Coffeemaker is leaking. Water reservoir may
be overfilled. Carafe
may not be correctly
placed on adjustable
warming plate.
Make sure water
reservoir has not been
filled beyond MAX fill
line. Make sure carafe
is placed correctly on
adjustable warming plate
and is centered
under filter basket holder.
Brewing takes too long. Coffeemaker might
need cleaning.
Follow procedure in CARE
AND CLEANING.
Coffee is not brewing. Water reservoir might
be empty.
Make sure water
reservoir has sufficient
water to brew desired
number of cups of coffee.
Coffeemaker brews
clear water.
There may be no
coffee grounds in
removable filter
basket.
Add sufficient amount of
coffee grounds to paper
filter in removable filter
basket.
Filter basket does not
close.
Removable filter
basket may not be
correctly placed.
Remove filter basket and
replace correctly into
holder.
Filter basket overflows. Carafe may be
improperly placed on
adjustable warming
plate.
Remove carafe and
insert so that carafe
rests comfortably within
grooves on adjustable
warming plate.
Grounds in brewed
coffee.
Filter and/or filter
basket are not
properly placed.
Insert paper liner into
filter basket and insert
basket properly into
holder.
Coffeemaker is brewing
slowly; brewed coffee
tastes bad.
Coffeemaker needs
cleaning; wrong grind
being used.
Follow directions for
cleaning coffeemaker.
Use only coffee ground
for automatic drip
coffeemaker.

 Loading...