8
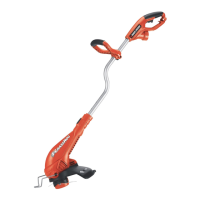
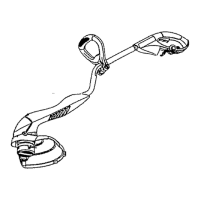
FUNCTIONAL DESCRIPTION (FIGURE A)
1. On/Off Trigger Switch 4. Auxillary Handle 7. Edge Guide Wheel
2.Handle 5.Collar 8.Guard
3. Power Cord Plug 6. Motor Housing 9. Spool
ASSEMBLY
ASSEMBLY TOOLS REQUIRED (NOT SUPPLIED):
Phillips Screwdriver
WARNING:
UNPLUG THE TRIMMER BEFORE ATTEMPTING TO ATTACH THE GUARD,
EDGE GUIDE OR HANDLE. NEVER OPERATE TOOL WITHOUT GUARD FIRMLY IN PLACE. THE
GUARD MUST ALWAYS BE ON THE TOOL TO PROTECT THE USER.
ATTACHING THE GUARD (FIGURES B,C)
WARNING: NEVER OPERATE TRIMMER WITHOUT GUARD FIRMLY IN PLACE.
The guard must always be properly attached on the appliance to protect the user.
• Removethescrewfromtheguard.
• Keepingtheguardsquaretothetrimmerheadslideitintoplaceuntiltheretainingtabclicks
intoplace(Ensurethattheguiderails(B1)ontheguard(B2)arecorrectlyalignedwiththe
guiderails(B3)onthetrimmerhead(B4)(figureB).
• Securetheguardwiththescrew(C1)(figureC).
ATTACHING THE AUXILIARY HANDLE (FIGURES D,E)
•Toattachthehandle,pressinonthebuttons(D1)onbothsidesoftheupperhousing as
shown in figure D.
• PositionthehandleasshowninfigureE(withtheBlack+Deckerlogofacingupward).
Partially push the handle on so that it will hold the buttons in when you release them with
your hand.
• Pushthehandlecompletelyontothehousingandpositionitslightlyuntilit“snaps”into
place (figure E).
• Toadjustthehandleupordown,pressinonthebutton(F1)andraiseorlowerthe
handle.
• Thehandleshouldbeadjustedsothatyourfrontarmisstraightwhenthetrimmerisin
the working position.
ADJUSTING THE HEIGHT OF THE APPLIANCE (FIGURE G)
This appliance has a telescopic mechanism, allowing you to set it to a comfortable height.
To adjust the height setting:
• Releasetheheightadjustlockingclamp(G1).
• Gentlypullthetube(G2)upordowntothedesiredheight.
• Closetheheightadjustlockingclamp(G1).
OPERATION
WARNING: AlwaysusepropereyeprotectionthatconformstoANSIZ87.1(CAN/CSA
Z94.3) while operating this power appliance.
WARNING: Disconnect the plug from the power source before making any assembly,
adjustments or changing accessories. Such preventive safety measures reduce the risk of
starting the trimmer accidentally.
CAUTION: Beforeyoubegintrimming,onlyusetheappropriatetypeofcuttingline.

 Loading...