10
HINTS FOR OPTIMAL HAND HELD USE
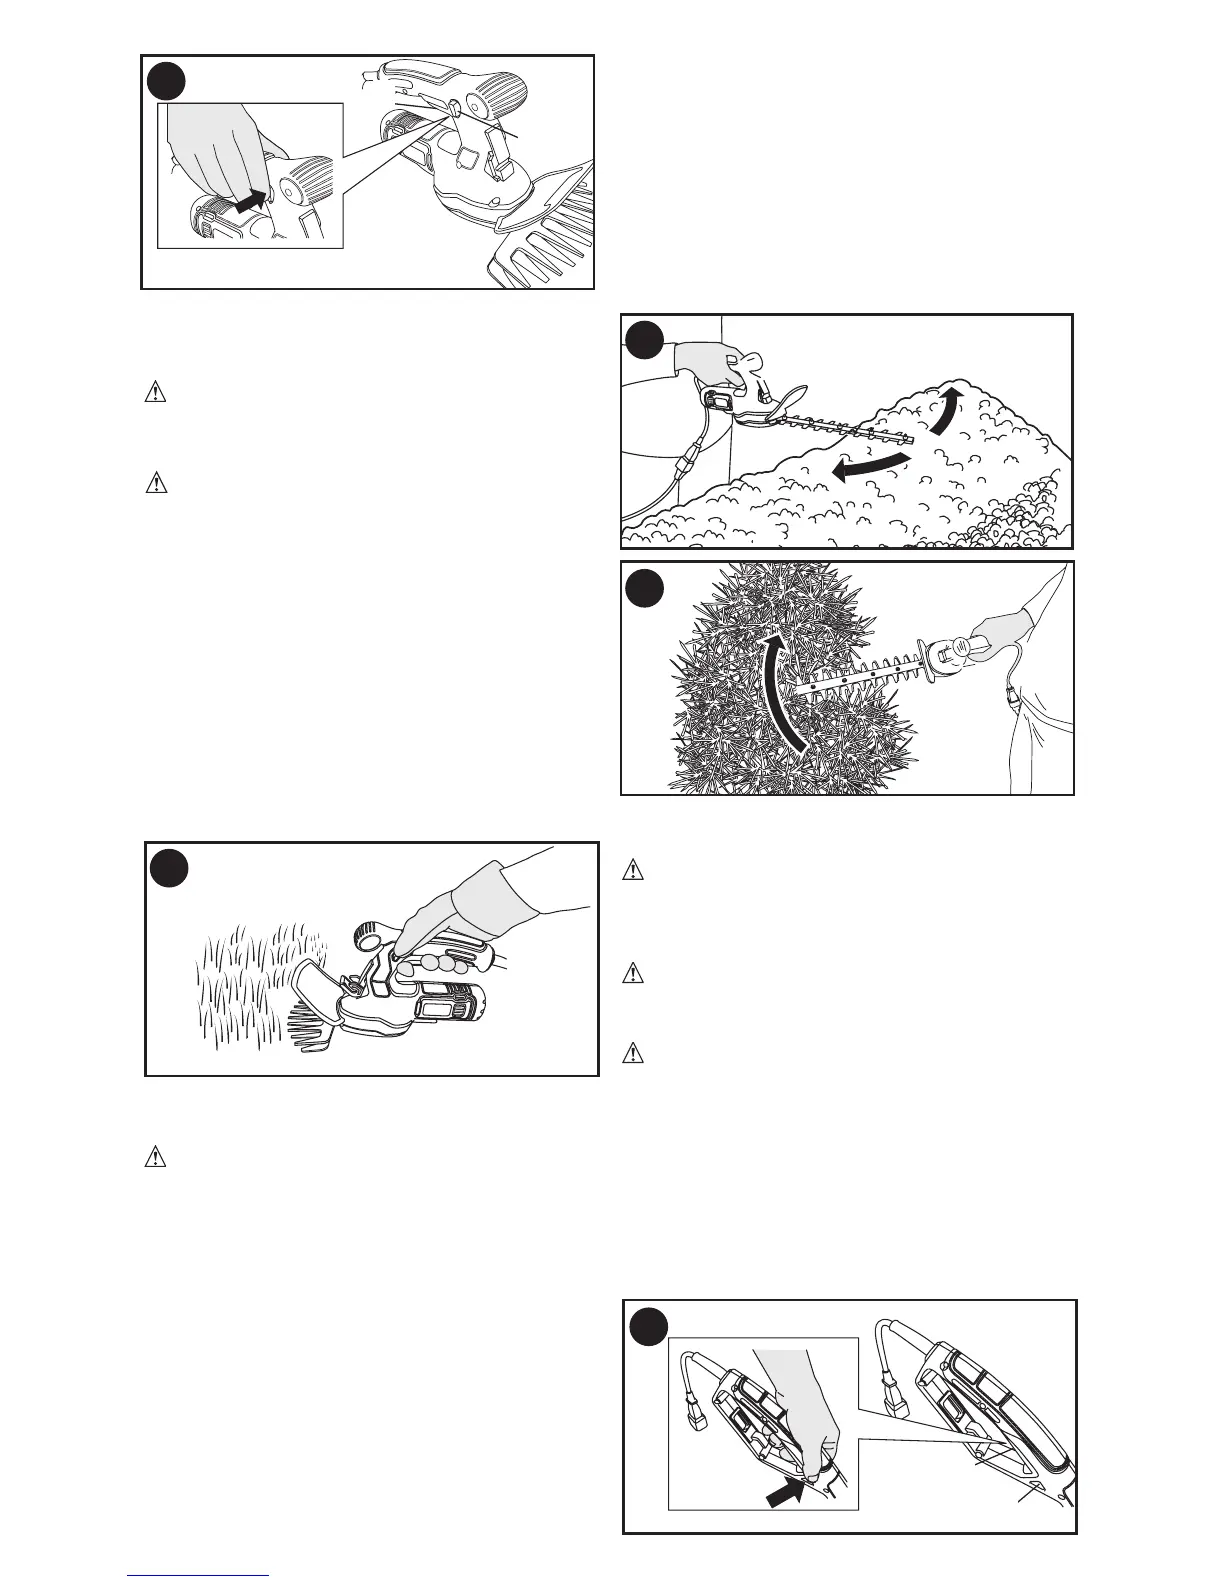
TRIMMING GRASS
WARNING:
Blades coast after turn off.
• In order to achieve optimum cutting
results, only cut dry grass.
WARNING:
Hold the tool with one
hand as shown in figure M. Keep your
other hand well away from the blade.
Maintain a stable working position so that
you do not slip. Do not overreach.
• When cutting long grass, work in stages
from the top. Take small cuts.
• Keep the tool away from hard objects and
delicate plants.
• If the tool starts running slowly, reduce
the load.
• To make a closer cut, slightly tilt the tool.
• Spray the blade with a light coating of
general purpose oil before first use and
whenever the blades begin to look dry.
TRIMMING SHRUBS
WARNING:
Blades coast after turn off.
• Slightly tilt the tool (up to 15° relative to
the line of cut) so that the blade tips point
slightly towards the shrub as shown in
figure N. This will cause the blades to cut
more effectively.
• Start by trimming the top of the shrub.
Hold the tool at the desired angle and
move it steadily along the line of cut. The
double-sided blade allows you to cut in
either direction.
• In
order to obtain a very straight cut,
stretch a piece of string along the length
of the shrub at the desired height. Use the
string as a guide line, cutting just above it.
• In order to obtain flat sides, cut upwards
with the growth as shown in figure O.
Younger stems move outwards when the
blade cuts downwards, causing shallow
patches in the shrub.
• Take care to avoid any foreign objects.
Especially avoid hard objects such as
metal wire and railings, as these could
damage the blades.
• Spray the blades with a light coating of
general purpose oil before first use and
whenever the blades begin to look dry.
POLE USE
WARNING:
LET THE TOOL WORK
AT ITS OWN PACE. DO NOT OVERLOAD.
SWITCHING ON AND OFF
WARNING:
Blades coast after turn off.
SWITCHING ON
WARNING: When in pole mode, only
the pole switch turns the tool on/off.
•
On the pole handle push and hold the
lock-off button (9) to the right or to the left
and then squeeze the trigger switch (8)
as
shown in figure P.
• Release the lock-off button.
Note:
Once the tool is on, the lock-off
button can be released.
N
O
P
L
M
8
9
2
1
 Loading...