7
IMPORTANT CHARGING NOTES
1.Longestlifeandbestperformancecanbeobtainedifthebattery
packischargedwhentheairtemperatureisbetween60°Fand80°F
(16°-27°C).DONOTchargethebatterypackinanairtemperature
below+40°F(+4.5°C),orabove+105°F(+40.5°C).Thisisimportant
andwillpreventseriousdamagetothebatterypack.
2.Thechargerandbatterypackmaybecomewarmtotouch
whilecharging.Thisisanormalcondition,anddoesnotindicatea
problem.Tofacilitatethecoolingofthebatterypackafteruse,avoid
placingthechargerorbatterypackinawarmenvironmentsuchas
inametalshed,oranuninsulatedtrailer.
3.Ifthebatterypackdoesnotchargeproperly:
a.Checkcurrentatreceptaclebyplugginginalamporother
appliance
b.Checktoseeifreceptacleisconnectedtoalightswitch
whichturnspoweroffwhenyouturnoutthelights.
c.Movechargerandbatterypacktoalocationwherethe
surroundingairtemperatureisapproximately60°F-80°F
(16°-27°C).
d.Ifchargingproblemspersist,takethetool,batterypackand
chargertoyourlocalservicecenter.
4.Thebatterypackshouldberechargedwhenitfailstoproduce
sufficientpoweronjobswhichwereeasilydonepreviously.DO
NOTCONTINUEtouseundertheseconditions.Followthecharging
procedure.Youmayalsochargeapartiallyusedpackwhenever
youdesirewithnoadverseaffectonthebatterypack.
5.Foreignmaterialsofaconductivenaturesuchas,butnotlimited
to,steelwool,aluminumfoil,oranybuildupofmetallicparticles
shouldbekeptawayfromchargercavities.Alwaysunplugthe
chargerfromthepowersupplywhenthereisnobatterypackinthe
cavity.Unplugchargerbeforeattemptingtoclean.
6.Donotfreezeorimmersechargerinwateroranyotherliquid.
WARNING: Shock hazard.Donotallowanyliquidtoget
insidecharger. Never attempt to open the battery pack for any
reason. If the plastic housing of the battery pack breaks or cracks,
return to a service center for recycling.
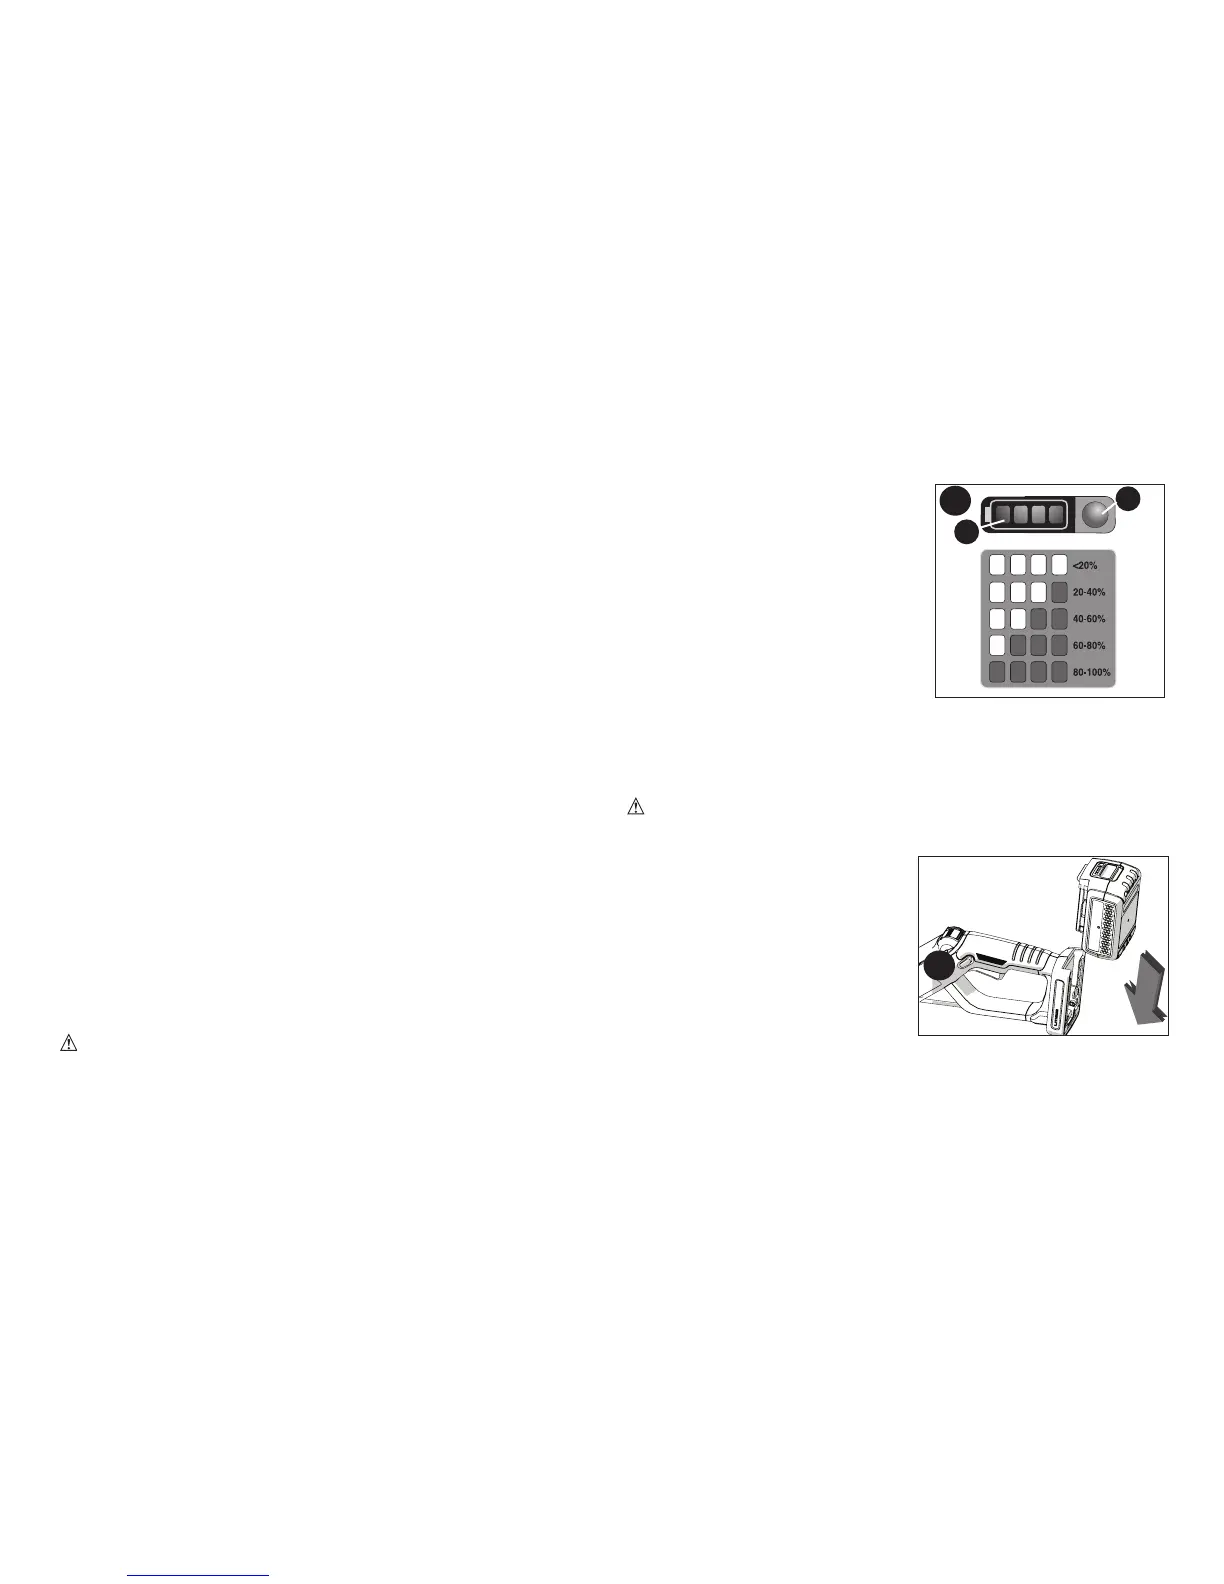
STATE OF CHARGE INDICATOR (FIGURE B)
Thebatteryisequippedwithastate
ofchargeindicator.Thiscanbeused
todisplaythecurrentlevelofcharge
inthebatteryduringuseandduring
charging.Itdoesnotindicatetool
functionalityandissubjecttovariation
basedonproductcomponents,
temperatureandend-userapplication.
Checking state of charge during use:
•Pressthestateofchargeindicator
button(B1).
•ThefourLED’s(B2)willilluminate
indicatingthepercentofchargein
thebattery.SeechartinfigureB.
•IfLEDlightdoesnotilluminate,chargebattery.
INSTALLING AND REMOVING THE BATTERY PACK
WARNING: Make certain the lock-off button is engaged to
prevent switch actuation before removing or installing battery.
TO INSTALL BATTERY PACK:
Insertbatterypackintotooluntilfully
seatedandanaudibleclickisheard
(figure C).Makesurebatterypack
isfullyseatedandfullylatchedinto
position.
TO REMOVE BATTERY
PACK: Depressthebatteryrelease
buttoninthebackofthebatterypack
andpullbatterypackoutoftool.
C
B
B2
B1

 Loading...