9
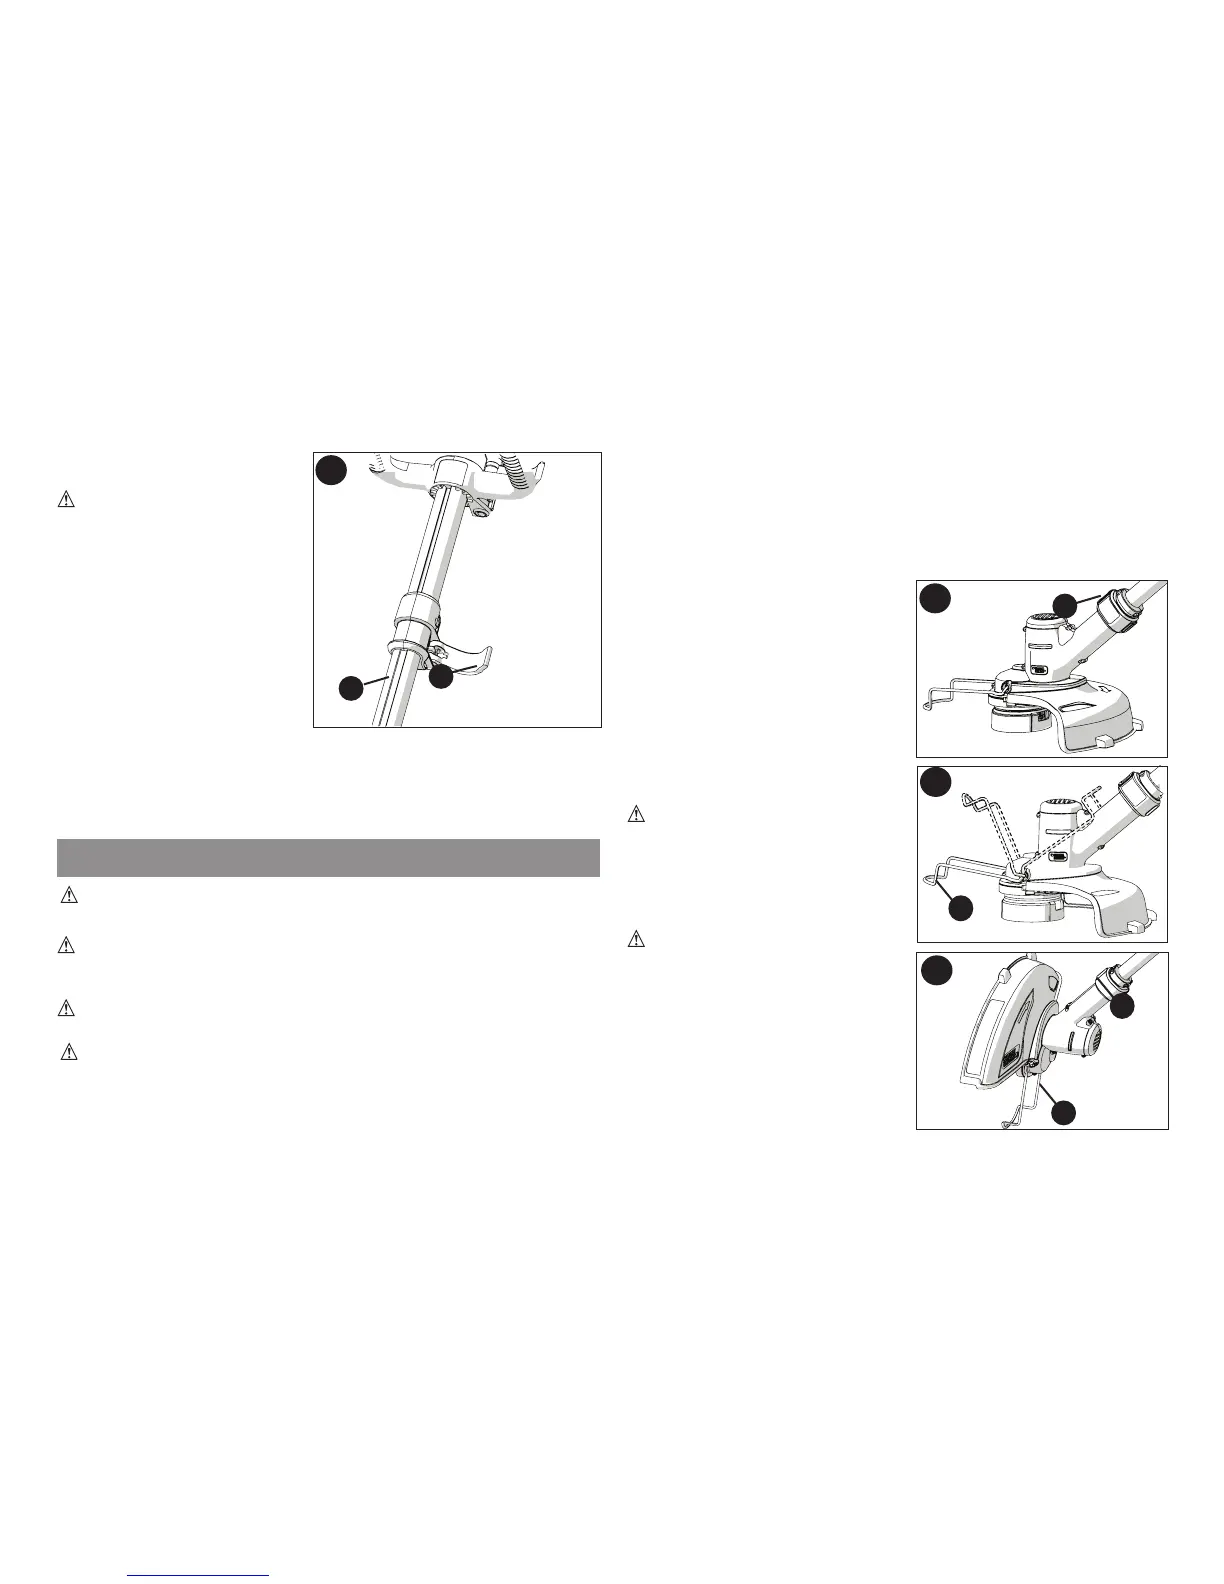
ADJUSTING THE HEIGHT OF
THE TOOL (FIGURE H)
CAUTION: Adjustthe
lengthofthetrimmertoobtain
properworkingpositionsas
showninfigure N.
•Thistoolhasatelescopic
mechanism,allowingyou
tosetittoacomfortable
height.
Toadjusttheheightsetting:
•Releasetheheightadjust
lockingclamp(H1).
•Gentlypullthetube(H2)
upordowntothedesired
height.
•Closetheheightadjustlockingclamp(H1).
RELEASING THE CUTTING LINE
Intransit,thecuttinglineistapedtothespoolhousing.
•Removethetapeholdingthecuttinglinetothespoolhousing.
OPERATING INSTRUCTIONS
WARNING: Alwaysusepropereyeprotectionthatconforms
toANSIZ87.1(CAN/CSAZ94.3)whileoperatingthispowertool.
WARNING:Removethebatterybeforemakinganyassembly,
adjustments,orchangingaccessories.Suchpreventivesafetymeasures
reducetheriskofstartingthe
trimmer
accidentally.
CAUTION: Beforeyoubegintrimming,onlyusethe
appropriatetypeofcuttingline.
CAUTION: Inspectareatobetrimmedandremoveanywire,
cord,orstring-likeobjectswhichcouldbecomeentangledinthe
rotatinglineorspool.Beparticularlycarefultoavoidanywirewhich
mightbebentoutwardlyintothepathofthetool,suchasbarbsatthe
baseofachainlinkfence.
SETTING THE TOOL TO TRIMMING OR EDGING MODE
(FIGURE I, J AND K)
•Thetoolcanbeusedintrimmingmodeasshowninfigure Iorin
edgingmodetotrimoverhanginggrassalonglawnedgesandflower
bedsasshowninfigure K.
TRIMMING MODE
Fortrimming,thetrimmerhead
shouldbeinthepositionshownin
figure I.Ifitisnot:
•Removethebatteryfromthetool.
•Pressandholdtheheadrelease
button(I1).
•Whileholdingtheauxillaryhandle,
rotatetheheadclockwise.
•Releasetheheadreleasebutton.
•Lifttheedgeguide(J1)intothe
closedposition.
Note:Theheadwillonlyrotateinone
direction.
CAUTION: Wireedgeguide
shouldonlybeusedwheninthe
edgingmode.Keepwireedgeguide
intheretractedpositionwheninthe
trimmingmode.
EDGING MODE (FIGURE K)
WARNING:Whenbeing
usedasanEdger,stones,piecesof
metalandotherobjectscanbe
thrownoutathighspeedbythe
line.Thetrimmerandguardare
designedtoreducethedanger.
However,MAKE SUREthatother
personsandpetsareatleast100
feet(30m)away.
Foredging,thetrimmerheadshouldbein
thepositionshowninfigure K.Ifitisnot:
H
H1
H2
I
K
I1
K2
J
J1
K1

 Loading...