45
CHAPTER 6: Upgrading the Extender’s Firmware
3. Power down the computer that will be running the upgrade program.
4. Disconnect the twisted-pair cable and any previously connected CPU from the
transmitter.
5. Connect the transmitter to the computer that will be running the upgrade
program as shown in Figure 6-1. You only need to connect the keyboard
strand of the three-to-one cable between the transmitter and the computer.
Plug the monitor and mouse directly into their normal ports on the CPU.
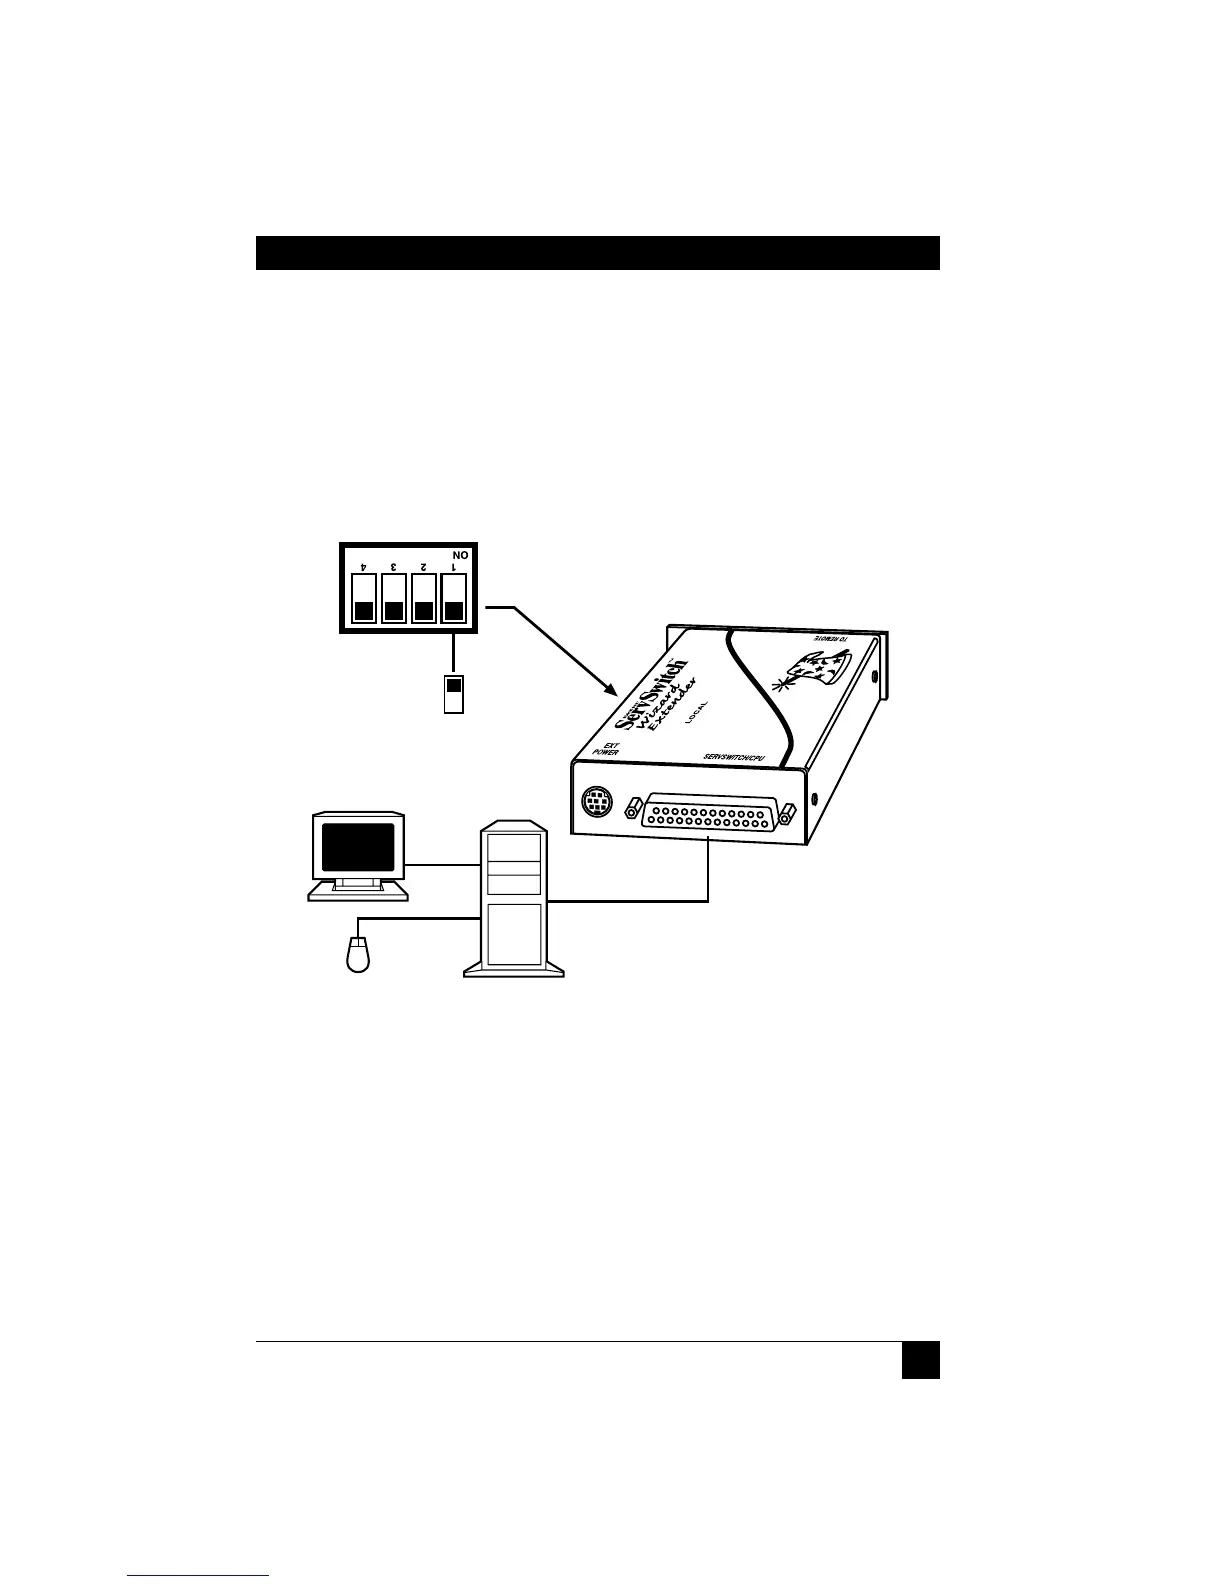
Figure 6-1. Upgrading the transmitter.
6. Set position 1 of the transmitter’s DIP switch to ON.
7. Insert the DOS disk into your computer’s floppy drive and power on the
computer. The upgrade should be performed automatically.
8. When the upgrade has completed, power down the computer and disconnect
the transmitter from it.
9. Set position 1 of the transmitter’s DIP switch back to OFF.
10. Power down the computer again.
Move position 1 of the
transmitter’s DIP switch to
ON to put the transmitter
in upgrade mode
Transmitter
Computer CPU
running upgrade
program
Monitor
and mouse
attached to
CPU
Extender’s included three-to-one cable
with the keyboard strand connected to
the CPU’s keyboard port and the other
strands unconnected