46
SERVSWITCH™ WIZARD EXTENDER
11. Power down the Extender’s receiver and disconnect the twisted-pair cable and
any previously connected keyboard from it.
12. Use standard PS/2 extension cable such as product code EVNPS03 to
connect the receiver’s keyboard port to the keyboard port of the computer
that will be running the upgrade program, as shown in Figure 6-2. (This is
correct—the upgrade procedure reverses the normal signal flow on the CPU’s
keyboard port.) Plug the monitor and mouse directly into their normal ports
on the CPU.
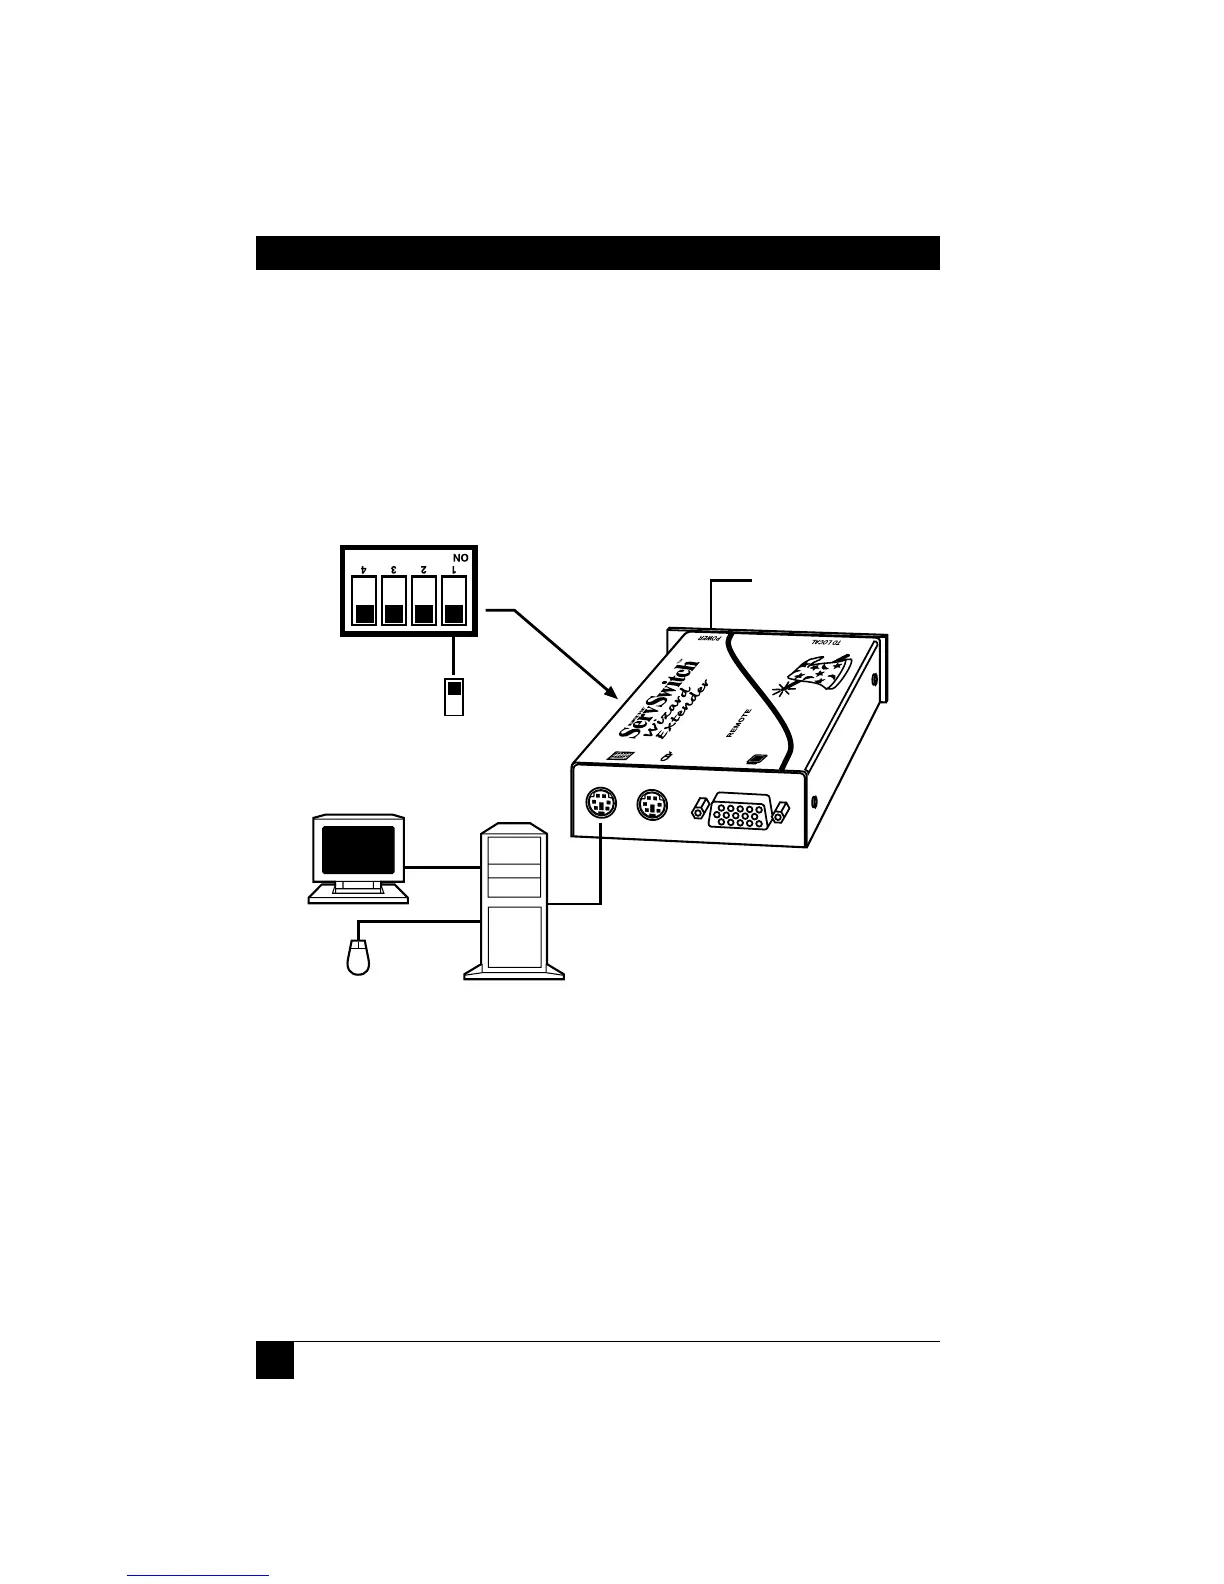
Figure 6-2. Upgrading the receiver.
13. Set position 1 of the receiver’s DIP switch to ON.
14. Power up the receiver.
15. Make sure the DOS boot disk is still in your computer’s floppy drive and
power on the computer. The upgrade should be performed automatically.
16. When the upgrade has completed, power down the computer and disconnect
the receiver from it.
17. Set position 1 of the receiver’s DIP switch back to OFF.
Move position 1 of the
receiver’s DIP switch to
ON to put the receiver in
upgrade mode
Receiver
Disconnect the power adapter
before changing the setting of
DIP-switch position 1
Computer CPU
running upgrade
program
Monitor
and mouse
attached to
CPU
PS/2 extension cable such as EVNPS03
connecting the receiver’s keyboard
port to the CPU’s keyboard port