724-746-5500 | blackbox.com
Page 16
Chapter 3: Hardware Installation
3. Hardware Installation
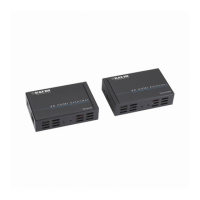
1. Connect an HDMI or DVI source (such as a Blu-ray disc player) to the
transmitter.
2. Connect an HDMI or DVI display (such as an LCD TV) to the receiver.
3. Connect a CAT5/5e/6 cable between the transmitter and the receiver.
4. Make sure the CAT5/5e/6 cable is tightly connected (not loose).
5. Plug in the 5-VDC power supply to the receiver’s power jack.
6. Plug in the 5-VDC power supply to the transmitter’s power jack.
7. If you see a flickering or blinking image on the display, adjust the rotary
control switch to improve the cable skew. 0 stands for the strongest HDMI
signal level for the longest possible transmission distance. 7 stands for the
weakest HDMI signal for short transmission distance. Adjust the signal level
from 7 to 0 and stop turning the rotary switch when the audio/video is
playing normally. Inappropriately setting the signal level might damage the
extender.
 Loading...