! DANGER
Do not insert any tool or
foreign objects into the valve
outlet or safety relief valve.
The valve may be damaged
resulting in a leak.
Leaking
propane may result in explo-
sion, fire, severe personal
injury, or death.
If a leak is detected at any
time, STOP and call the
fire department.
If unable to stop a gas leak,
immediately close LP tank
valve and immediately
contact an LP gas supplier
or fire department.
! WARNING
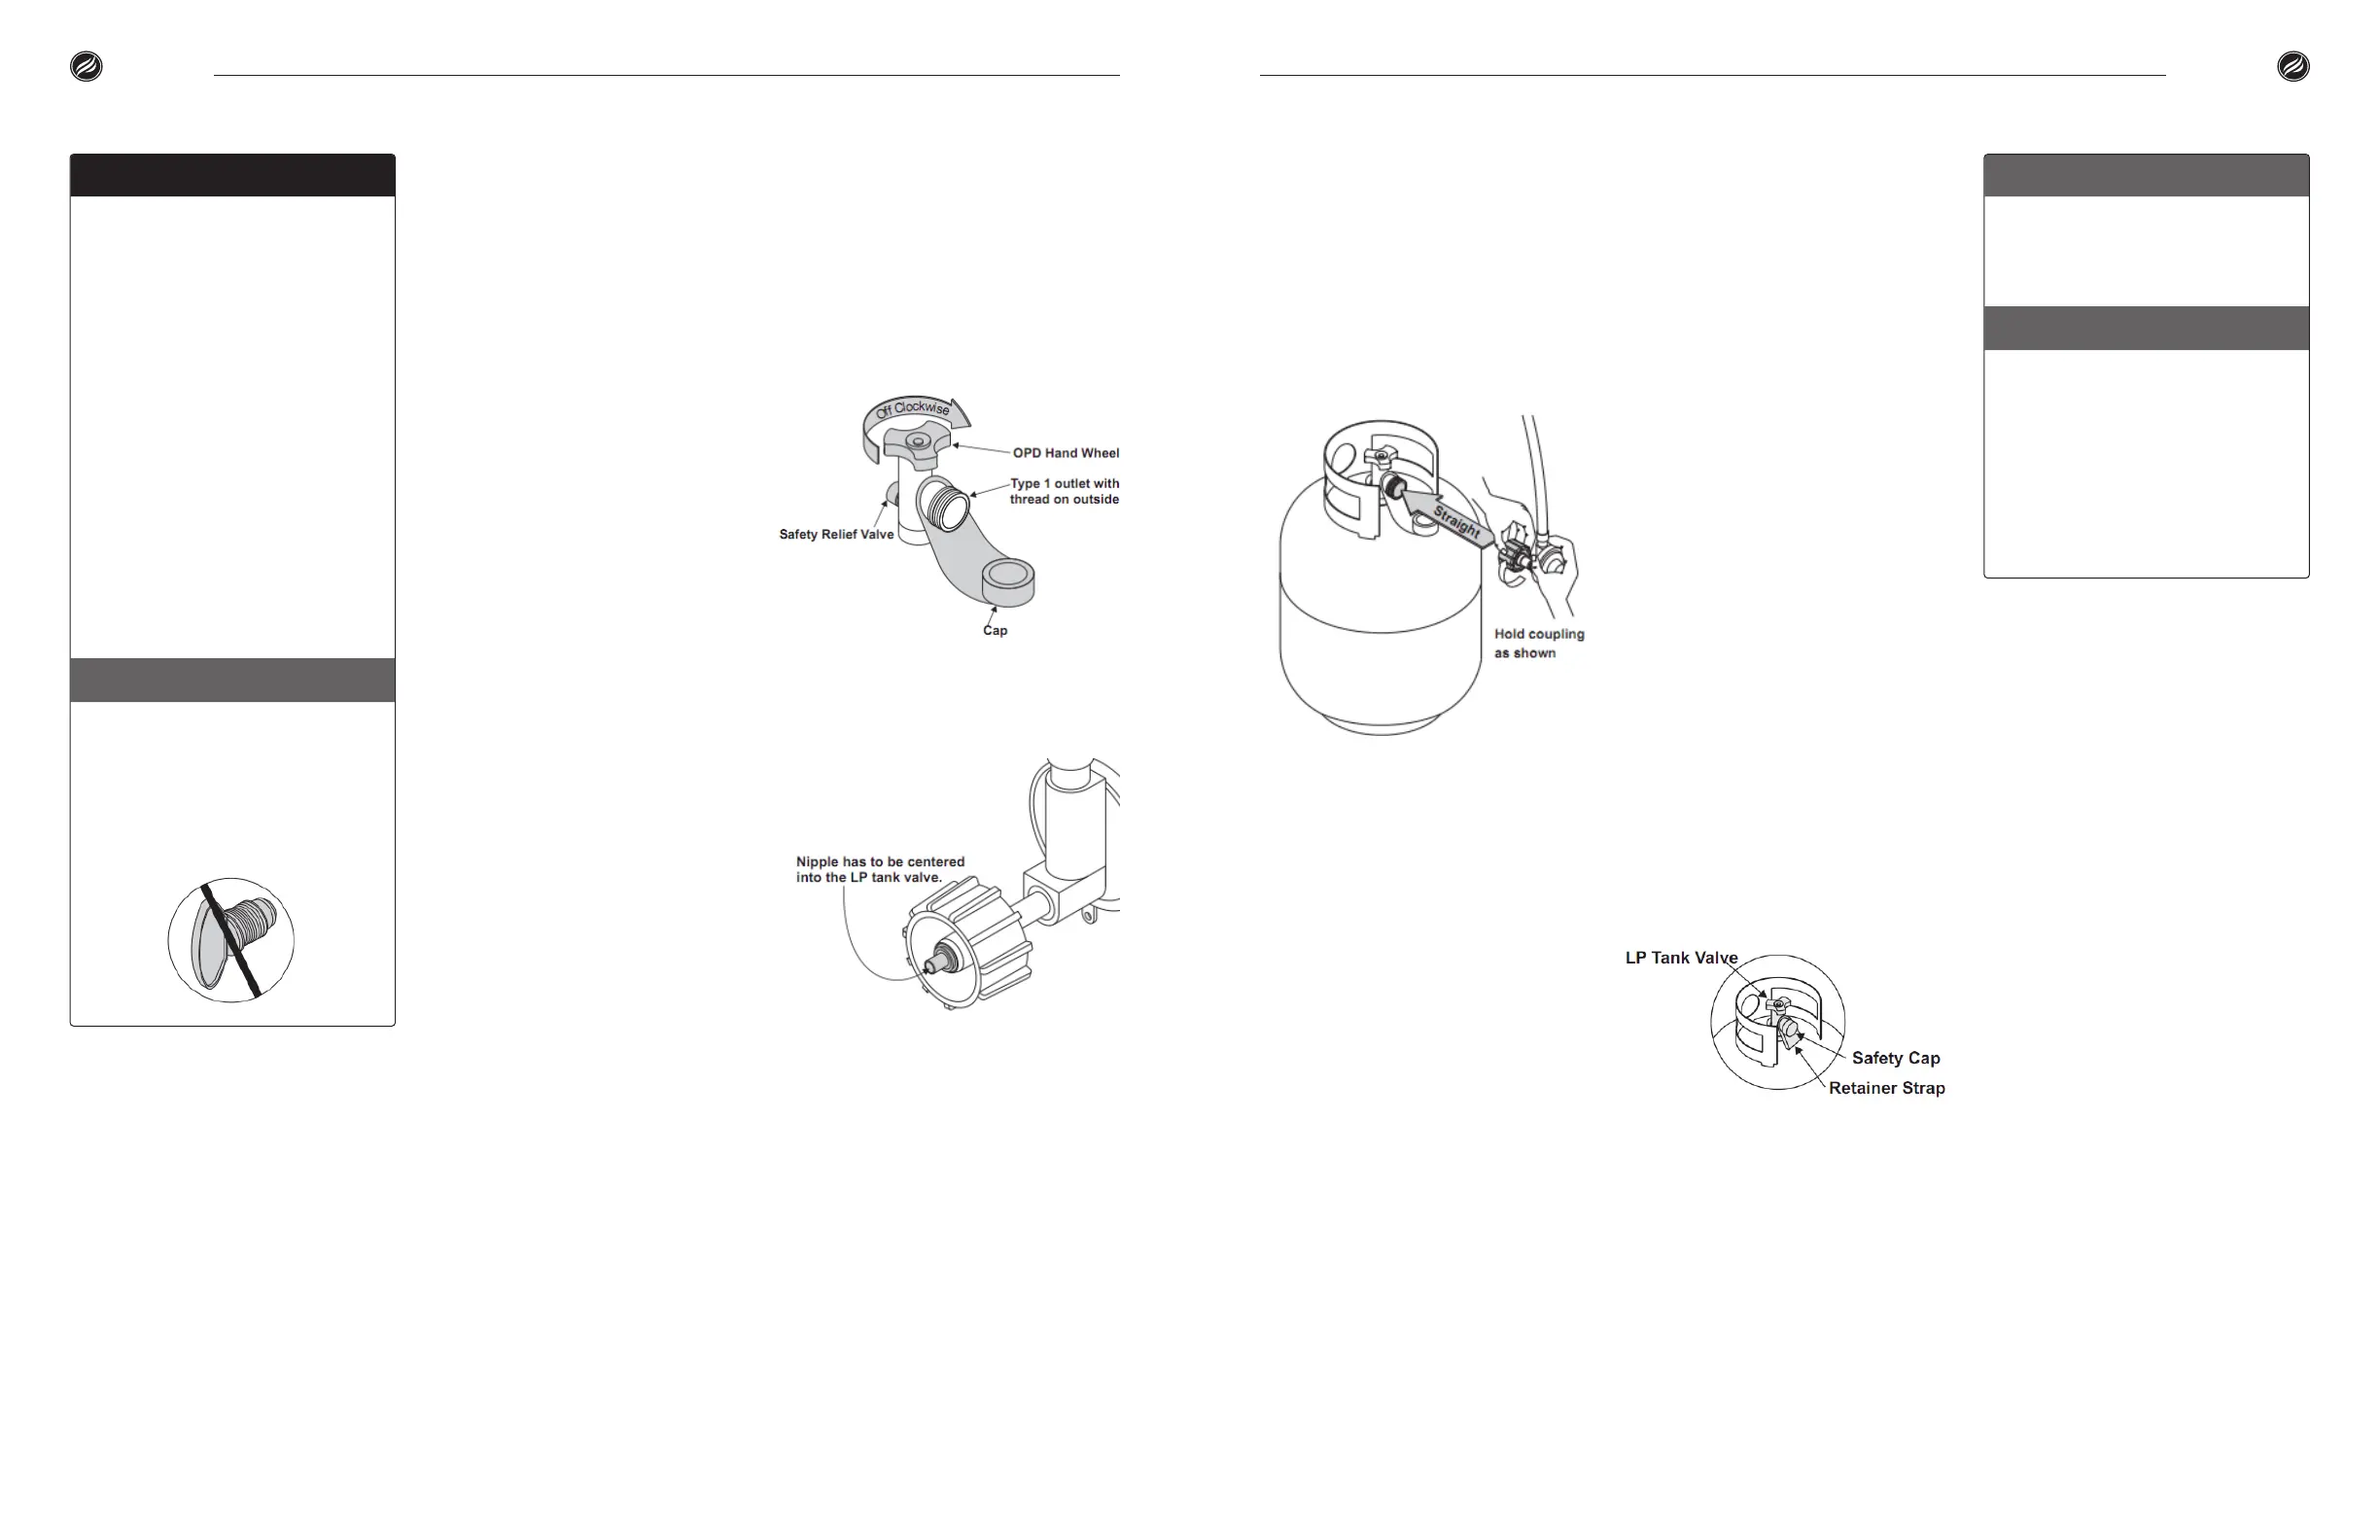
Do not insert a POL trans-
port plug (plastic part with
external threads) into the
Type 1 tank valve outlet. It
will defeat the Safety Relief
Valve feature.
REGULATOR SAFETY
If regulator fails in unit, it must be
replaced with a Blackstone approved
model and must only be replaced by
a professionally licensed, authorized
dealer. Failure to comply will void
the warranty.
FITTINGS & HOSES
• Annual checking and tightening
of metal ttings is recommended.
• Cylinder supply system must be
arranged for vapor withdrawal.
• Before each use, check to see if
hoses are cut or worn. Replace
damaged hoses before using
appliance. Use only Blackstone
approved replacement parts for
valve, hose, or regulator.
CONNECTING THE
REGULATOR TO THE
LB. LP TANK
Leak test new and exchanged
LP tanks BEFORE connecting
to griddle. Please reference the
Leak Test Instructions section.
01. LP tank must be properly
secured to griddle. (Refer to
assembly section.)
02. Turn all control knobs to the
OFF position.
03. Turn LP tank OFF by turning
OPD hand wheel clockwise to a
full stop.
Section 02
CONNECTION & REMOVAL
04. Remove protective cap from LP
tank valve.
05. Hold regulator and insert nipple
into LP tank valve.
Fuel | Propane – 20lb. Tank
! WARNING
Keep the fuel supply
hose away from any
heated surface(s).
! WARNING
Never attempt to attach
this griddle to the self-con-
tained LP gas system of a
camper trailer, recreational
vehicle or motor home.
Do not use the LP Tank until
it has been leak-tested.
06. Hand-tighten the coupling nut,
holding regulator in a straight
line (see gure below) with LP
tank valve so as not to cross
thread the connection.
07. Turn the coupling nut clock-
wise and tighten to a full stop.
The regulator will seal on the
back-check feature in the LP
tank valve, resulting in some
resistance.
08. An additional one-half to
three-quarters turn is required
to complete the connection.
Tighten by hand only – do not
use tools.
NOTE: If connection cannot be
completed, disconnect regulator and
repeat steps 5 and 6.
If still unable to complete
connection, do not use this
regulator!
Call 435-252-3030 ext 1 for iden-
tical replacement parts.
LB. LP TANK
REMOVAL FOR
TRANSPORT OR
STORAGE
01. Turn OFF all control knobs and
LP tank valve.
02. Turn coupling nut counter-
clockwise by hand only. Do not
use tools to disconnect.
03. Li LP tank up and o of
support bracket.
04. Install safety cap onto LP
tank valve.
Always use cap and strap
supplied with valve.
Failure to use safety cap as directed
may result in serious personal injury
and/or property damage.
A disconnected LP tank in storage or
during transportation must have a
safety cap installed (as shown).
20lb. Tank – Propane | FuelModel 1863 | Owner’s Manual | | Owner’s Manual | Model 1863
22 23


 To Next Page