BLACKSTONEPRODUCTS.COM/SUPPORT
ENGLISH
| OWNER’S MANUALUSING YOUR BLACKSTONE
STEP 01
Plug power cord into unit, then into outlet. OR, gently lay unit
on its back and insert eight (8) AA batteries.
STEP 02
Press and hold the
❶
POwER button.
STEP 03
❷
FLAME INDICATOR should be green, if flame indicator is
red, press once to open safety valve.
STEP 04
❸
Push in and turn knob for piezo ignition (remove drawer
and look through viewing holes to check flame ignition)
If flame does not ignite safety valve will close, cutting o gas flow. Wait 5
If flame does not ignite safety valve will close, cutting o gas flow. Wait 5
minutes for gas to dissipate and try again.
minutes for gas to dissipate and try again.
STEP 05
Leave burner on high until
❹
desired TEMPERATURE is
reached, add food and
❺
turn burner knob to low/medium to main-
tain heat. If you begin to notice temperature drop adjust your burner.
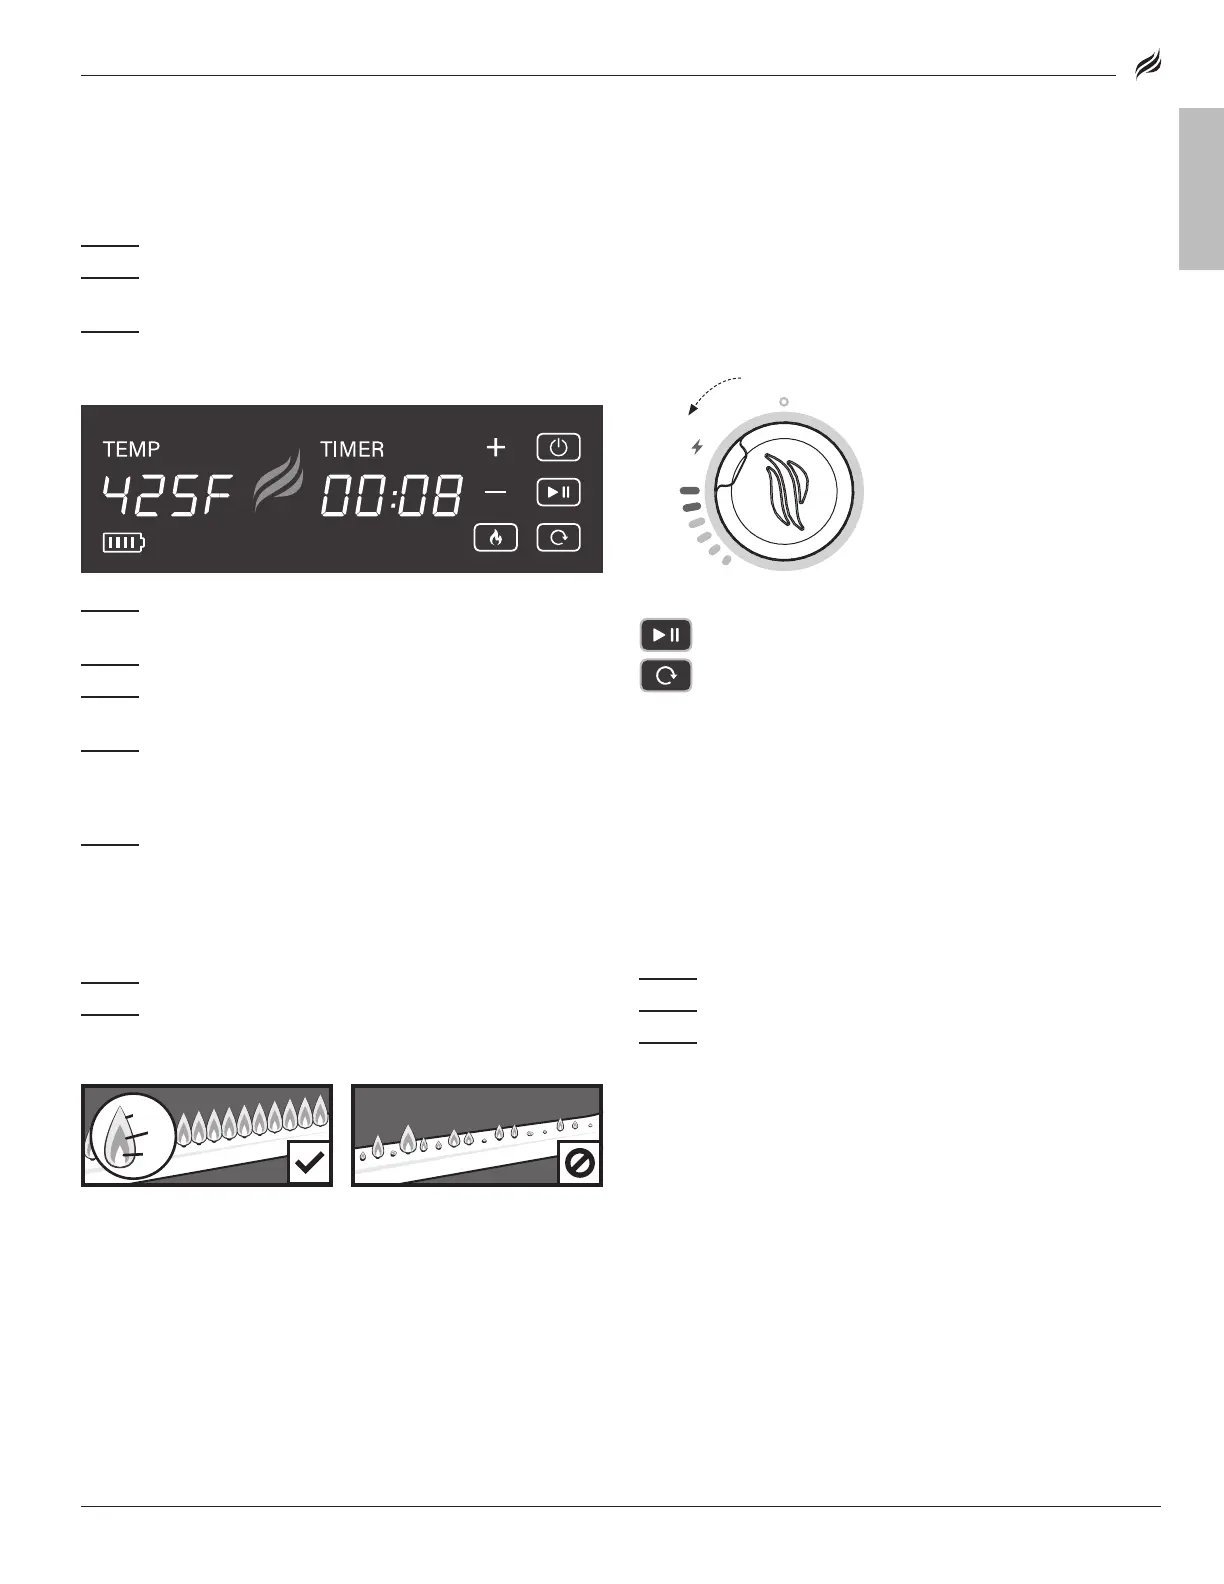
Start/ pause timer.
Press to reset timer. Press and hold to switch between °F/°C.
2. AIR FRYER IGNITION
USING YOUR AIR FRYER
• Blow out drawers before cooking to keep passageways clean.
• DO NOT restrict the flow of the combustion air or the hot
exhaust gasses.
• DO NOT place fryer drawers on or near a hot gas or electric burner,
or in a heated oven.
• DO NOT cook food in the fryer without the drawer in place.
• DO NOT add liquids (water or sauces) to hot food in the drawer as it
may flash to steam and cause burns.
• The side panels may discolour slightly during use, but will return as
the appliance cools.
CLEANING YOUR AIR FRYER
• DO NOT clean with alcohol or any other flammable substance.
• DO NOT clean the air fryer unit with a water spray or the like.
• The basket is NOT dishwasher safe.
Note: The safety valve will close and cut o gas flow if:
• There is gas flowing but no flame present (5 seconds).
• The batteries die or the unit loses power.
• The flame goes out on its own (3 seconds).
• The timer (if set) reaches zero.
If more cooking time is desired, the appliance will need to be re-ignited. The
If more cooking time is desired, the appliance will need to be re-ignited. The
appliance will continue to run if no timer is set.
appliance will continue to run if no timer is set.
Note: When running on battery:
If the unit is left idle for 30 minutes, the unit will enter sleep mode. To
wake it up, tap the
❶
POwER button.
❺
❸
❶
❷
❹
❹
❶
❷
❸
HEALTHY FLAME PATTERN YELLOw OR IRREGULAR
3. ALwAYS CHECK BURNER FLAME BEFORE USE.
STEP 01
Light burners and rotate knobs from HIGH to LOW.
STEP 02
Look below the cooking surface to view burners. When knob
is at HIGH, flames should be larger than when knob is at LOW.
3. ALwAYS CHECK BURNER FLAME BEFORE USE.
STEP 01
Light burner and rotate knob from LOW to HIGH.
STEP 02
Look below the turntable to view burner. When knob is at
HIGH, flames should be larger than when knob is at LOW.
❶
❶
Flickers of yellow color.
Flickers of yellow color.
❷
Dark blue color.
❸❸
Vibrant blue. Vibrant blue.
If there is a sudden drop or low
If there is a sudden drop or low
flame issue, please reference the
flame issue, please reference the
Troubleshooting chapter.
IF IGNITION DOES NOT OCCUR IN 5 SECONDS:
STEP 01
Turn the burner control knob OFF.
STEP 02
Wait 5 minutes.
STEP 03
Repeat the lighting procedure.
If burner does not ignite, please reference the Troubleshooting chapter.
If burner does not ignite, please reference the Troubleshooting chapter.
IF IGNITION DOES NOT OCCUR IN 5 SECONDS:
STEP 01
Turn the burner control knob OFF.
STEP 02
Wait 5 minutes.
STEP 03
Repeat the lighting procedure.
If burner does not ignite, please reference the Troubleshooting chapter. If burner does not ignite, please reference the Troubleshooting chapter.
HEALTHY FLAME PATTERN YELLOw OR IRREGULAR
❶❶
Flickers of yellow color. Flickers of yellow color.
❷❷
Dark blue color. Dark blue color.
❸❸
Vibrant blue. Vibrant blue.
If there is a sudden drop or low If there is a sudden drop or low
flame issue, please reference the flame issue, please reference the
Troubleshooting chapter. Troubleshooting chapter.
❶❶
Push the control knob in to
start gas flowing.
❷❷
Turn the control knob
counter-clockwise to activate
the starter.
❸❸
Adjust the temperature to
desired level.
2. PIEzO-ELECTRIC GRIDDLE IGNITION
DO NOT lean over the appliance while lighting.
IGNITION INSTRUCTIONS
1. CHECK VALVES
STEP 01
Turn knob to OFF position.
STEP 02
Push in knob and release. Knob should spring back.
If knobs
DO NOT
spring back, replace valve assembly before using appliance.
spring back, replace valve assembly before using appliance.
STEP 03
Rotate knob to LOW then turn back to OFF. Knob should
turn smoothly.
MODEL:
 Loading...