BLACKSTONEPRODUCTS.COM/SUPPORT
ENGLISH
| OWNER’S MANUALASSEMBLY GUIDEMODEL:
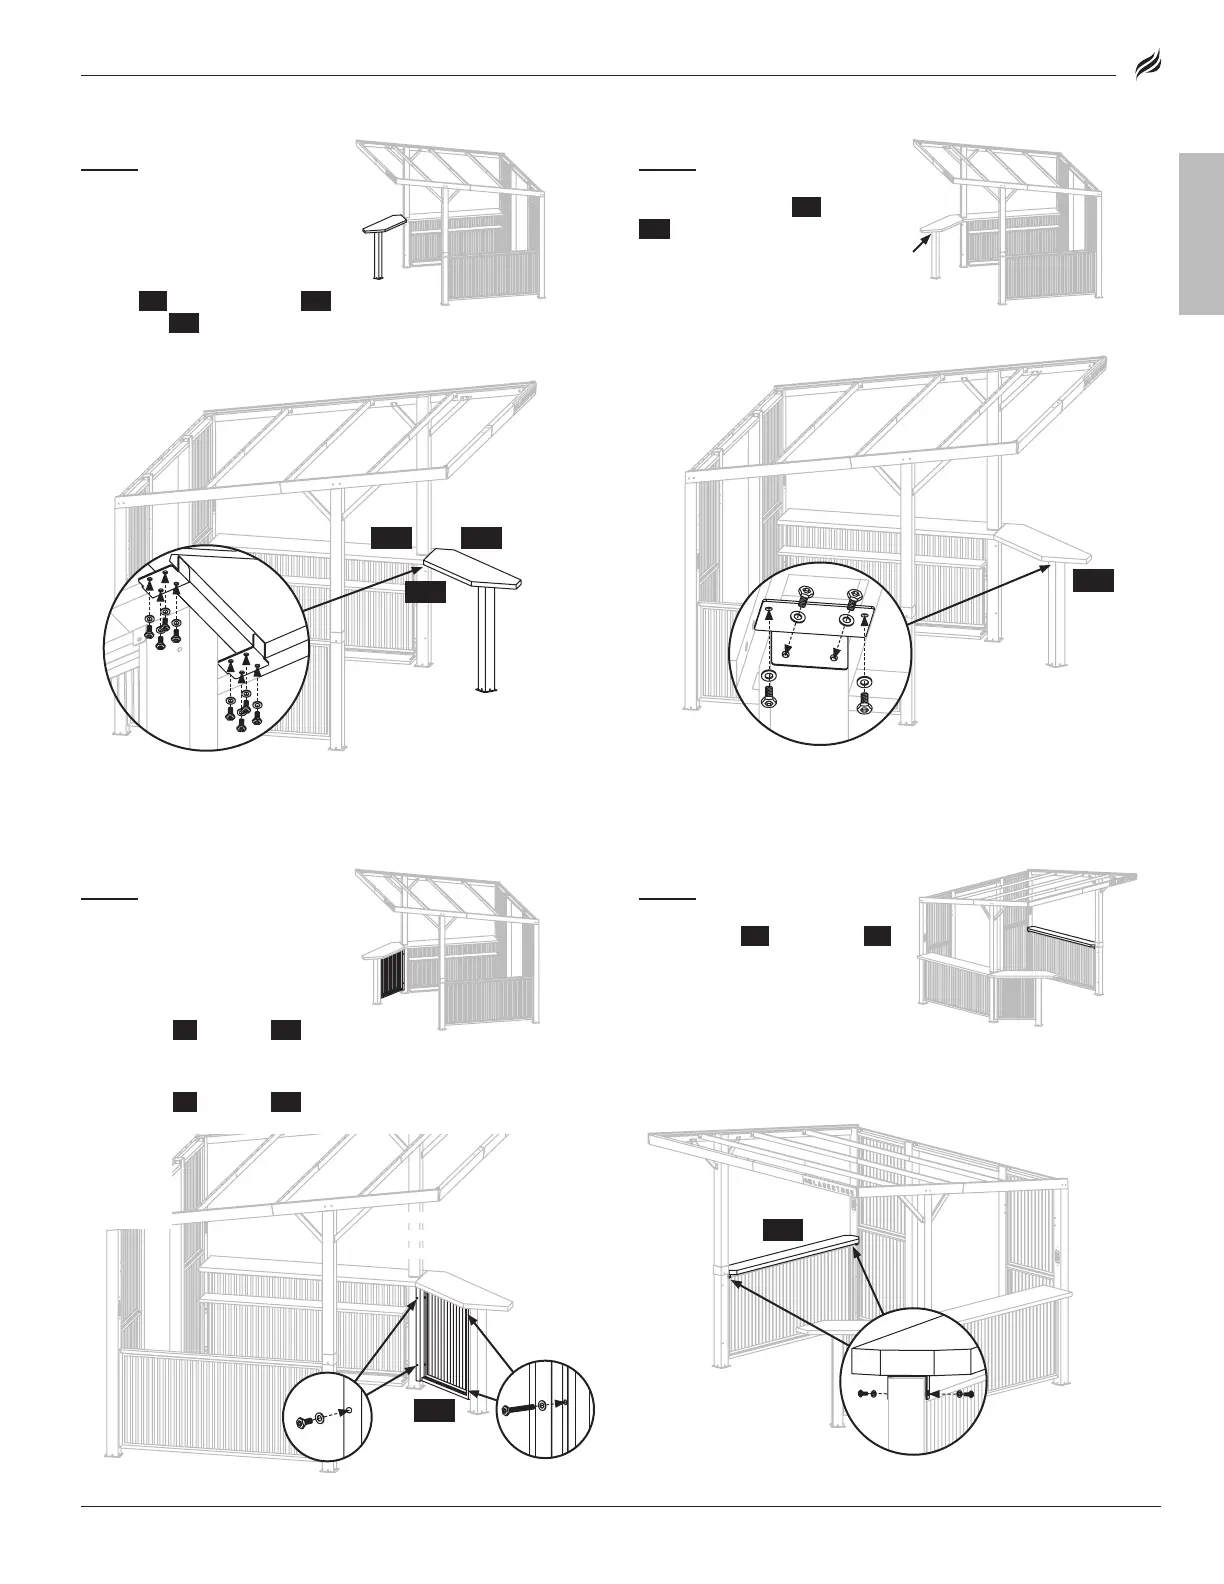
STEP 22
Note: DO NOT tighten
the bolts completely until all the
bolts and washers are properly
installed.
Use eight (8) [AA] bolts and eight
(8) [FF] flat washers to attach the
two (2) {L2} shelf braces and {K5}
shelf to the {K4} shelf assembly.
STEP 23
Use four (4) [AA] bolts
and four (4) [FF] flat washers to
attach shelf brace 3 {L3} to the
{K5} shelf asssembly.
STEP 24
Note: DO NOT tighten
the bolts completely until all the
bolts and washers are properly
installed.
Use two (2) [AA] bolts and two
(2) [FF] flat washers to attach
side panel 1 {J1} to post 8 {A8}.
Use two (2) [DD] bolts and two
(2) [FF] flat washers to attach
side panel 1 {J1} to post 9 {A9}.
STEP 25
Use four (4) [AA] bolts
and four (4) [FF] flat washers to
attach shelf 1 {K1} to the other {J3}
side panel.
Optional right side installation
Optional right side installation
(Refer to left-side up, right-side
(Refer to left-side up, right-side
up label.)
[DD] × 2
[FF] × 4
J1
K1
Optional right side
installation
[FF] × 4
Optional right side
installation
L3
[FF] × 4
[
] × 8
[FF] × 8
Optional right side
installation
K4
K5
L2
Optional left side installation
Optional left side installation
Optional left side installation (Refer
Optional left side installation (Refer
to left-side up, right-side up label.)
to left-side up, right-side up label.)
Optional left side installation
Optional left side installation
Optional left side installation
Optional left side installation