5
Getting Started
Plugging in Power
Getting started is as simple as plugging in power and
connecting your signal input and output.
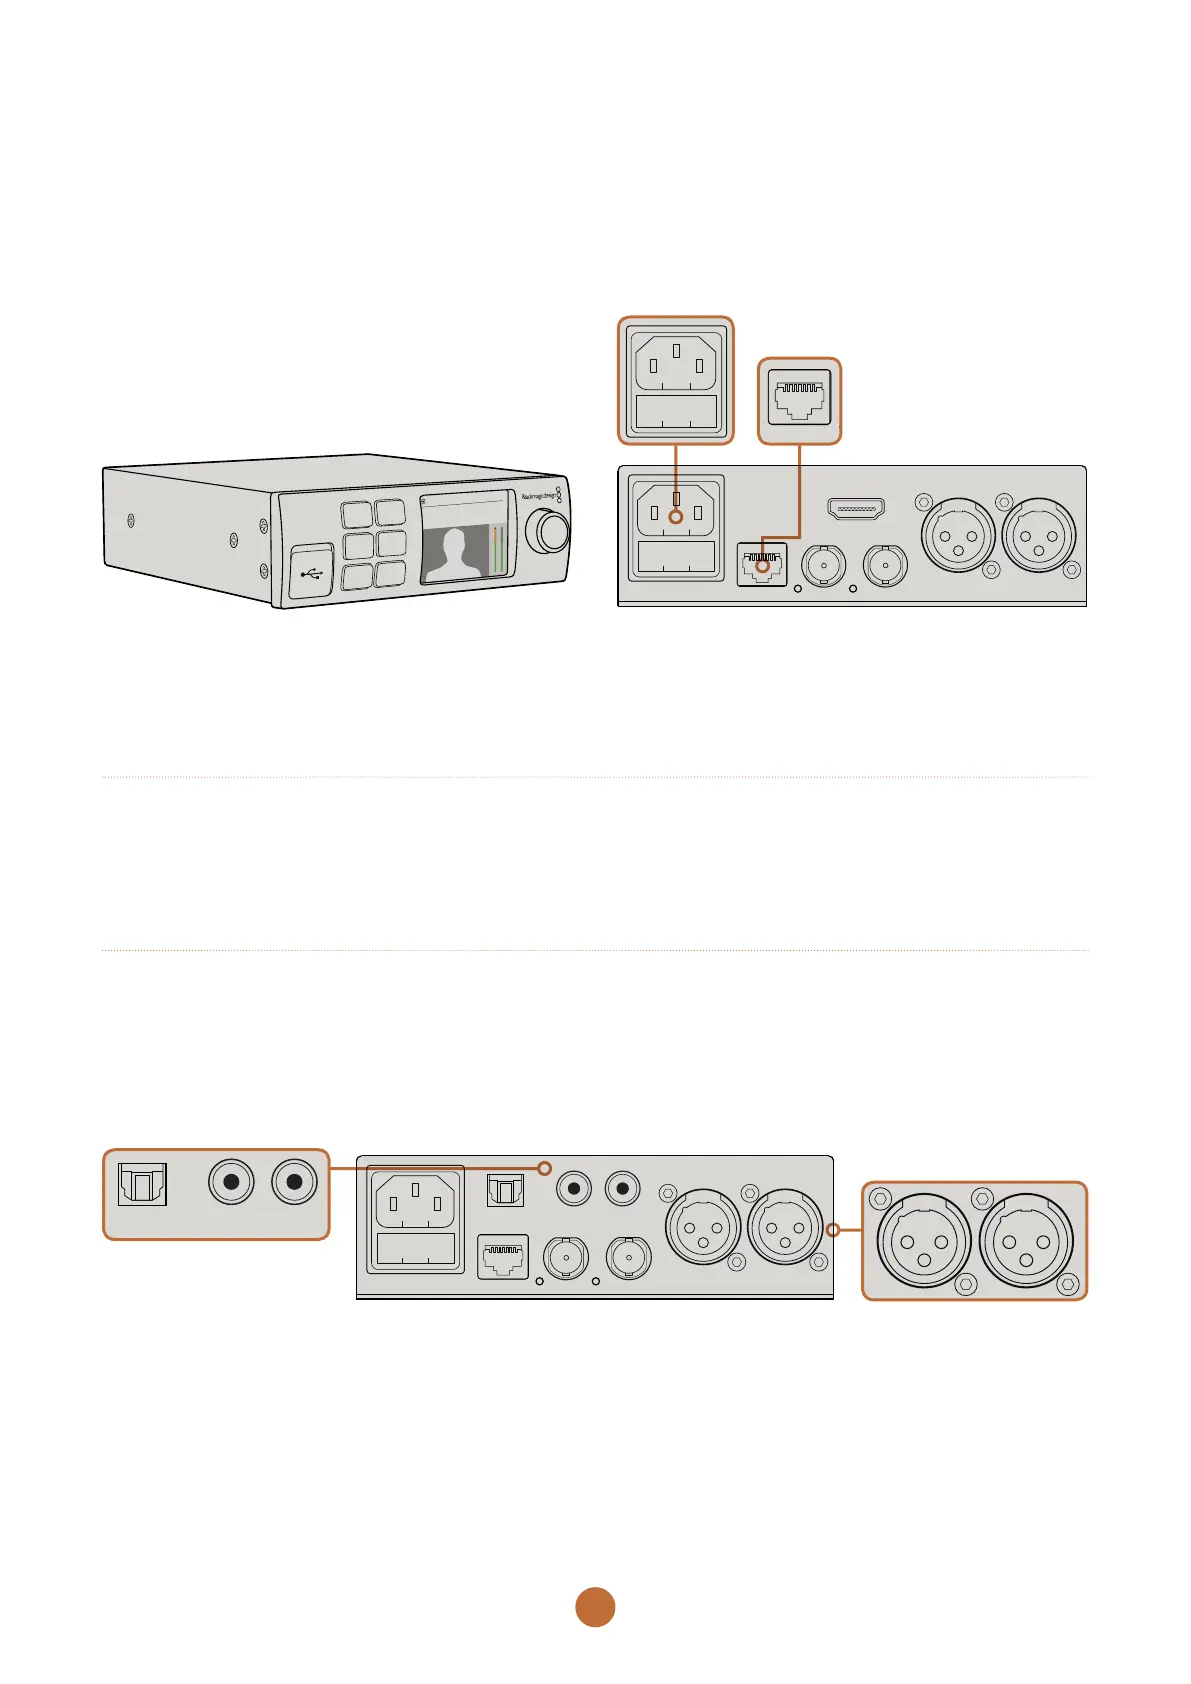
To supply power, plug in a standard IEC power cable to
your Teranex Mini converter’s power input on the rear panel.
Plugging in Video
Plug your source video into your Teranex Mini converter’s
video input and plug the video output into your destination
equipment. Video input and output varies by converter.
Depending on your Teranex Mini model, you may have the
option of SDI, HDMI, component, composite or S-video
input or output.
Plugging in Audio
If you’re using embedded audio in SDI or HDMI, audio is
already transported via the video input. If using external
digital or analog audio, plug into the XLR connectors. The
‘R’ channel XLR connector can be used for timecode. Some
Teranex Mini converters also support RCA and optical
audio. Refer to the individual converters detailed in this
manual for more information.
Connect analog or digital audio to your Teranex Mini converter’s optical audio, RCA, or balanced XLR connectors.
That’s all there is to getting started! Now you can change
your conversion settings and start using your Teranex Mini.
See the ‘changing settings’ section to learn more.
ETHERNET PoE+ SDI IN
L - ANALOG
AES/EBU
R - ANALOG
AES/EBU - T/C
HDMI OUT
SDI LOOP OUT
01:23:47:08
2160p59.94
SDI t
o A
nalog 12G
1
2
SET
VIDEO
MENU
AUDIO
ETHERNET PoE SDI IN
L - ANALOG
AES/EBU
R - ANALOG
AES/EBU - T/C
OPTICAL
AUDIO
STEREO OUT
L R
SDI OUT
OPTICAL
AUDIO
STEREO OUT
L R
Connect power to your Teranex Mini converter using a standard
IEC power cable. Power can also be supplied via a PoE+
compatible Ethernet switch.
Teranex Mini Converters support 12G-SDI data rates so
will automatically switch between SD, HD and Ultra HD
all the way up to 2160p60.
 Loading...