9
Changing Settings
There are three ways to change settings on your Teranex
Mini. You can use the switches on the front panel, the
Blackmagic Teranex Setup utility, or by mounting a Teranex
Mini Smart Panel which lets you change settings using
control buttons, a rotary knob and LCD.
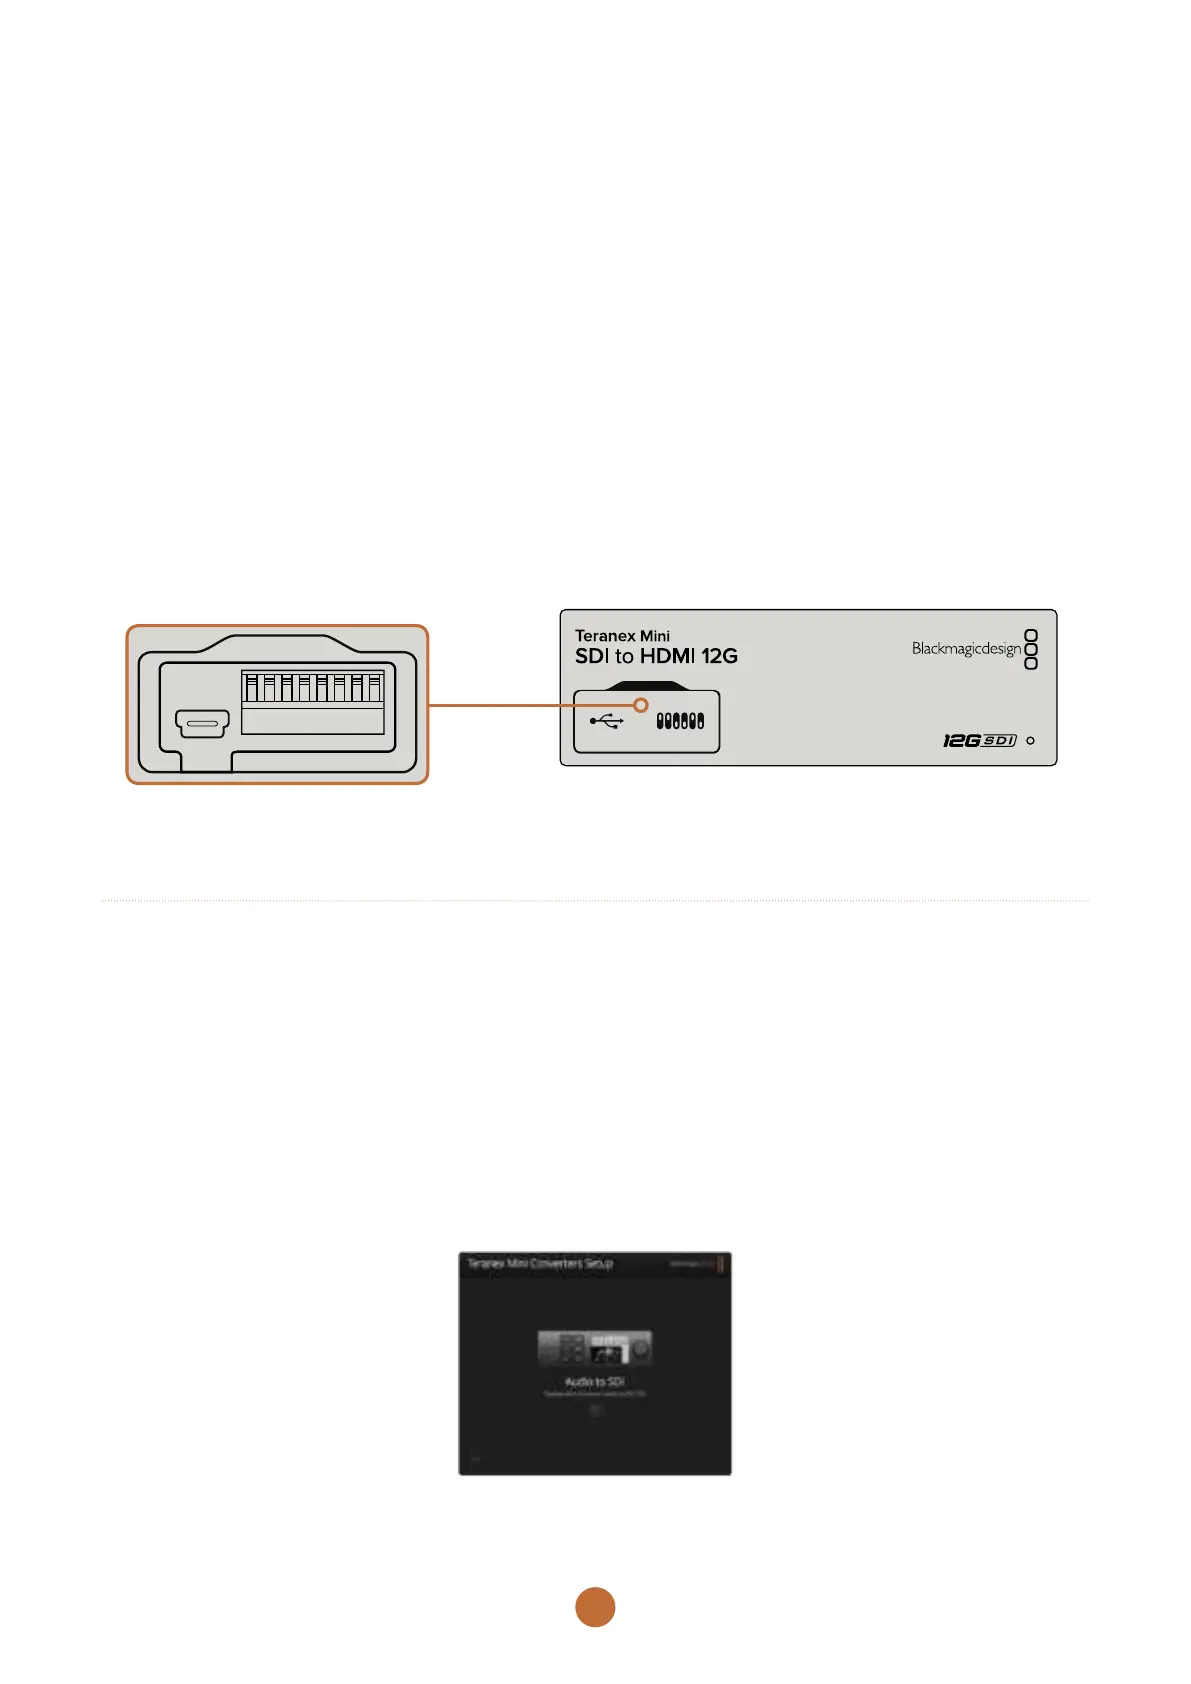
Changing Settings using Switches
On the front panel of your Teranex Mini you’ll see a plastic
door which protects a set of small switches used for settings
on your converter. The ‘on/off’ switches are used to
configure internal settings and you can easily change them
using the tip of a pen.
You’ll find a switch settings diagram printed on the base
of your converter. Ensure your switch settings correspond
to the legend by observing the switch numbers from 1 to
8, left to right. When using the optional Teranex Mini Smart
Panel, the switch settings will be overridden by the Smart
Panel settings. Your Teranex Mini will retain its last settings
whether applied via switch, Smart Panel or Blackmagic
Teranex Setup software. If reverting to switch control after
removing the Smart Panel or updating your converter’s
settings via software, you may need to toggle individual
switches for new settings to take effect.
For a full description of the switches and their settings,
refer to your converter model in this manual.
Change settings by adjusting the switches with a pen.
Changing Settings using Blackmagic Teranex Setup
Once installed on your computer, connect the setup utility
to your Teranex Mini via USB or Ethernet. If you can’t find
your Teranex Mini via Ethernet, you may first need to
configure it using a USB connection as detailed in the
section ‘changing network settings.’
The first thing you’ll see when launching the software is
the home page. Here you can select the Teranex Mini you
want to configure. To change settings, click on the ‘settings’
icon below the image of your Teranex Mini.
If you have more than one Teranex Mini connected to your
network, only the relevant settings for your selected Teranex
Mini will be visible. Select your desired converter by clicking
the arrows on the left and right side of the Blackmagic
Teranex Setup home page.
Adjustments will be immediately saved to your Teranex
Mini. This means if power is lost, your settings will be re-
established as soon as power is restored.
The Teranex setup utility lets you update your Teranex Mini’s internal software
and adjust your settings using a Mac OS X or Windows computer.
 Loading...