EasyManua.ls Logo

Black+Decker BXAC40006GB - User Manual

Black+Decker BXAC40006GB
16 pages
Print Icon
To Next Page IconTo Next Page
Loading...
BXAC40006GBwww.blackanddecker.co.uk
Question and Answer IconNeed help?

Do you have a question about the Black+Decker BXAC40006GB and is the answer not in the manual?

Summary

Control Panel Overview

Control Panel Buttons

Details the functions of the numbered buttons on the control panel, including Power, Mode, Speed, Timer, Temperature, and Sleep.

Control Panel Indicators

Explains the meaning of the various indicator lights and the display window on the control panel.

Safety Instructions

General Safety Precautions

Provides essential warnings and safety rules to prevent electric shock, fire, and injury during appliance use.

Using Your Appliance

Initial Operation Guidelines

Instructions for first-time use, including voltage checks, child safety, and proper cable handling.

Safety of Others

Child and Pet Safety

Emphasizes the need for supervision, preventing children from playing with the appliance, and pet safety.

After Use and Storage

Post-Operation Procedures

Details on cleaning the unit, unplugging it, and storing it safely when not in use.

Inspections and Repairs

Professional Servicing Guidelines

Instructions against self-repair and the requirement to use authorized personnel for maintenance.

Additional Safety for Air Conditioners and Fans

Installation and Operation Guidelines

Covers placement on a flat surface, avoiding water immersion, correct voltage, and proximity warnings.

Refrigerant R290 Safety

Handling and Storage Precautions

Addresses the flammable nature of R290, room size requirements, ventilation, and user warnings.

R290 Refrigerant Safety Details

Flammability and Handling Warnings

Further details on R290 safety, including cleaning processes, storage, piercing/burning, room area, and leak detection.

Electrical Safety

Grounding and Plug Precautions

Guidelines on earthing, matching plugs to outlets, using adaptors, and avoiding water contact.

Extension Cables and Product Class

Cable Specifications and Damage

Information on using 3-core cables, length limitations, and procedures for damaged supply cords.

Remote Control Operation

Button Functions and Display

Details the functions of remote control buttons like Power, Speed, Timer, and Mode selection.

Moving the Unit

Handling and Transport

Instructions on how to safely move the air conditioner using its castor wheels and carry handle.

Installing the Batteries

Battery Safety and Installation

Covers warnings about battery leakage and mixing, and provides steps for inserting AAA batteries into the remote.

Assembling the Air Conditioner

Window Hose Installation

Instructions for attaching and positioning the window hose for effective hot air expulsion.

Window Hose Mounting

Hose Attachment and Best Practices

Guidance on connecting the hose, avoiding kinks, and maintaining optimal length for performance.

Carbon Filter Installation

Filter Placement Procedure

Instructions on how to correctly install the included carbon filter into the unit.

Appliance Power Control

Turning On and Off

Explains how to use the power button on the remote control or the appliance to turn it on and off.

Operating Modes and Settings

Speed and Airflow Control

Details on selecting fan speed and manually adjusting the direction of airflow using louvers.

Temperature and Mode Selection

Instructions for manually adjusting temperature and selecting between Auto, Cooling, Fan, and Dehumidifying modes.

Sleep Mode Functionality

Explanation of how to activate Sleep mode for overnight operation with gradual temperature changes.

Timer Functions

Setting the Timer

How to activate and set the 24-hour timer for desired operation or delay start times.

Draining the Unit

Water Tank Drainage

Steps to follow when the water tank is full, including emptying the tank and replacing the plug.

Continuous Drainage Setup

Instructions for setting up continuous drainage using the drain tube, bypassing the water tank.

Cleaning and Maintenance

Housing and Filter Cleaning

Guidelines for cleaning the unit's exterior housing and maintaining the air filter for optimal performance.

Technical Data and Guarantee

Storage and Mains Plug Replacement

Procedures for storing the unit and guidelines for authorized mains plug replacement.

Product Guarantee Information

Details on the 2-year guarantee, conditions of validity, and customer service contact information.

Model Specifications

Performance Ratings and Consumption

Lists technical specifications for cooling, heating, energy efficiency, and power consumption.

Environmental and Contact Details

Includes sound power level, global warming potential, and importer contact information.

Overview

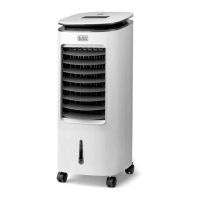
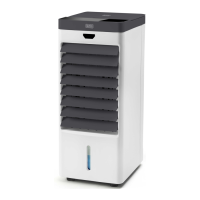
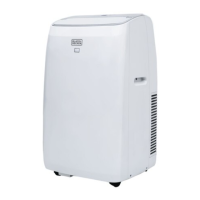
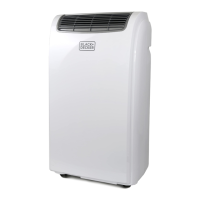
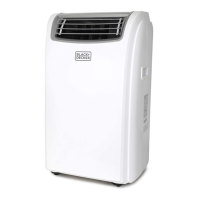
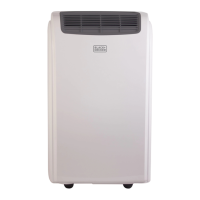
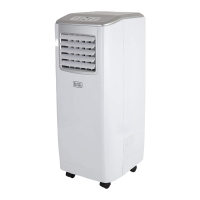
This document describes the BLACK+DECKER BXAC40006GB Portable 9,000 BTU 3-in-1 Air Conditioner, designed for cooling small and medium spaces. It is intended for indoor household use only.

Function Description

The BLACK+DECKER BXAC40006GB is a portable 3-in-1 air conditioner that offers cooling, fan, and dehumidifying modes. It is equipped with a control panel and a remote control for easy operation. The unit features a 24-hour programmable timer and a sleep mode for overnight use. It uses Propane gas R290 as a refrigerant and includes an active carbon filter for air purification.

Usage Features

Getting Started: To begin using the air conditioner, first install the batteries in the remote control. The remote requires 2 x AAA batteries. Ensure correct polarity when inserting them. Once the batteries are in place, the remote control is ready for normal use.

Installing the Window Hose: Before operating the unit, the window hose must be installed to release hot air to an outside, open-air area. Clip the hose to the back of the air cooling unit, ensuring no bends or kinks that could clog the pipe. The distance between the unit and the window should be at least 50cm. Use only the provided hose to prevent malfunction. When the air conditioner is not in use, plug the hole with the provided cover.

Installing the Carbon Filter: The unit comes with an active carbon filter that needs to be installed before use. The manual provides illustrations on how to correctly place this filter into the unit.

Turning On/Off: To turn the appliance on or off, press the Power On/Off button on either the remote control or the unit's control panel. When turned on, LED indicators and the display will light up, and air will start emitting from the vents.

Speed Selection: The unit offers two speed settings: High and Low. Use the Speed button on the remote control or the appliance's control panel to select the desired speed. The corresponding indicator on the unit's body will light up.

Controlling Air Flow: Air flow can be manually controlled by adjusting the inner and outer louvers at the front of the unit. Gently hold the outer louvers by the lip and push them upwards to open or downwards to close. For inner louvers, push them sideways to the left or right to redirect the air flow.

Temperature Selection: While the unit automatically adjusts its mode based on room temperature, manual temperature control is possible in certain modes. Use the Up and Down buttons on the remote control or the + and - buttons on the control panel to adjust temperature levels. The temperature can be set in increments of 1 degree, from 18 to 32 degrees Celsius.

Selecting Functions (Modes): Press the Mode button on the remote control or the control panel to switch between Auto, Cooling, Fan, and Dehumidifying modes. Press the button repeatedly until your preferred function is selected.

  • Automatic Mode: This is the default mode. The unit automatically detects ambient temperature and selects the appropriate function. If the temperature is above 23 degrees, it enters cooling mode; if 23 degrees or below, it enters ventilation mode. Temperature levels cannot be manually controlled in this mode.
  • Cooling Mode: The unit blows out cold air to decrease ambient temperature. Select this mode by pressing the 'Mode' button repeatedly until the corresponding indicator lights up.
  • Fan Mode: The unit blows out natural air to cool the ambient temperature. Select this mode by pressing the 'Mode' button repeatedly until the corresponding indicator lights up. Temperature levels cannot be manually controlled in this mode.
  • Dehumidifying Mode: This function removes moisture from the air. Select this mode by pressing the 'Mode' button repeatedly until the corresponding indicator lights up. A brief vibration may occur as the compressor starts, which is normal.
  • Sleep Mode: This mode allows the unit to operate overnight. Press the Sleep button while the unit is in operation. In sleep mode, the unit operates at low speed, and its temperature will increase or decrease by 1 degree for the first two hours, then maintain a constant temperature until turned off. The unit automatically turns off after 12 hours of continuous operation in sleep mode.

Timer Function: The unit has a 24-hour programmable timer.

  • Setting the Timer: Press the Timer button on the remote control or control panel. '0' will appear on the LCD display. Continuously press the Timer button to select the desired operation time (1 to 24 hours).
  • Pre-Setting the Timer (Delay Timer): To set a delay time, press the Timer button while the unit is plugged in but not operating. '0' will appear on the LCD display. Continuously press the Timer button to select the desired delay time (1 to 24 hours). To cancel a pre-set delay timer, press the Power On/Off button to turn the unit on, then press it again to turn it off if necessary.

Draining the Unit: Water is extracted from the air into a built-in water tank during operation. When the tank is full, the compressor and motor stop, a buzzing sound is emitted, and the 'Water' and 'Comp' indicators flash.

  • To empty the water tank: Turn off the unit. Place a container under the drain hole. Remove the drain plug and cap to allow water to drain. Replace the plug when the container is full, empty the container, and repeat until the unit is empty. Securely replace the rubber plug and cap.
  • Draining without the tank: Remove the drain plug and cap, insert the drain tube into the water outlet, and connect the other end of the tube to a drain. The drain must be at or below the outlet level. The 'Water' indicator will not flash when using this method.
  • Extending the drainage tube: The drainage tube can be extended using a tube of similar diameter (18mm) and an appropriate connector.

Self-Diagnosis: The unit has a self-diagnosis feature that warns of errors or malfunctions. Errors are indicated by 'E1' or 'E2' on the display panel. In case of a malfunction, contact a specialized technician or customer support.

Maintenance Features

Cleaning and Maintenance: Always switch off the appliance and remove the plug from the socket before cleaning or maintenance to prevent electric shock. Clean the unit regularly for optimal performance.

Cleaning the Housing: Wipe the unit's housing with a soft, damp cloth. Do not use aggressive chemicals, gasoline, detergents, chemically treated cloths, or other cleaning solutions, as they may damage components.

Cleaning the Filter: To clean the filter, lightly tap it or use a vacuum cleaner to remove loose dust and dirt. Rinse the filter thoroughly under running water (no more than 40 degrees Celsius). Dry the filter thoroughly before placing it back into the unit. Never operate the unit without the filters.

Before Storing the Unit: Drain any water from the tank. Operate the unit in ventilation-only mode for a few hours to thoroughly dry the interior. Clean or change the filter. Unplug and store the power cord. Place the unit back into its original box.

Mains Plug Replacement: This section is for authorized service personnel only. If a new mains plug is needed, safely dispose of the old plug. Connect the brown lead to the live terminal, the blue lead to the neutral terminal, and if the product is Class I (earthed), the green/yellow lead to the earth terminal. For Class II double insulated products (2 wires in the cord set), no earth connection is needed. Follow fitting instructions for good quality plugs. Any replacement fuse must have the same rating as the original fuse supplied with the product.

Black+Decker BXAC40006GB Specifications

General IconGeneral
TypePortable
Cooling Capacity12000 BTU
Energy Efficiency RatingA
Weight30 kg
RefrigerantR290
Room Size30 m²
Fan Speed3
Remote ControlYes
Dehumidification Capacity1.2 l/h
FunctionsCooling, Fan
Timer24 hours

Related product manuals