12
ENGLISH
(Original instructions)
13
ENGLISH
(Original instructions)
The completion of charge is indicated by the
green LED remaining on continuously. The pack
is fully charged and may be used at this time or
left on the charger
Warning! Recharge discharged batteries as soon as possible
after use or battery life may be greatly diminished.
Charger diagnostics
This charger is designed to detect certain problems that can
arise with the battery packs or the power source.
Problems are indicated by one LED ashing in different
patterns.
Bad battery
The charger can detect a weak or damaged
battery.
The red LED ashes in the pattern indicated
on the label. If you see this bad battery blink pattern, do not
continue to charge the battery.
Return it to a service center or a collection site for recycling
Hot/cold pack delay
When the charger detects a battery that
is excessively hot or excessively cold, it
automatically starts a Hot/Cold Pack Delay, suspending
charging until the battery has normalized.
After this happens, the charger automatically switches to the
Pack Charging mode. This feature ensures maximum battery
life. The red LED ashes in the pattern indicated on the label
when the hot / cold pack delay is detected
Important charging notes
u Longest life and best performance can be obtained if the
battery pack is charged when the air temperature is
between 60°F and 80°F (16°- 27°C).
u DO NOT charge the battery pack in an air temperature
below +40°F (+4.5°C), or above +105°F (+40.5°C).
This is important and will prevent serious damage to the
battery pack.
u The charger and battery pack may become warm to touch
while charging. This is a normal condition, and does not
indicate a problem.
To facilitate the cooling of the battery pack after use, avoid
placing the charger or battery pack in a warm environment
such as in a metal shed, or an uninsulated trailer.
u If the battery pack does not charge properly:
u Check current at receptacle by plugging in a lamp or
other appliance
u Check to see if receptacle is connected to a light switch
which turns power off when you turn out the lights.
u Move charger and battery pack to a location where the
surrounding air temperature is approximately 60°F -
80°F (16° - 27°C).
u If charging problems persist, take the tool, battery pack
and charger to your local service center.
u The battery pack should be recharged when it fails to
produce sufcient power on jobs which were easily done
previously. DO NOT CONTINUE to use under these condi-
tions. Follow the charging procedure. You may also charge
a partially used pack whenever you desire with no adverse
affect on the battery pack.
u Foreign materials of a conductive nature such as, but
not limited to, steel wool, aluminium foil, or any buildup
of metallic particles should be kept away from charger
cavities. Always unplug the charger from the power supply
when there is no battery pack in the cavity.
Unplug charger before attempting to clean.
u Do not freeze or immerse charger in water or any other
liquid.
Warning! Do not allow any liquid to get inside charger.
NEVER ATTEMPT TO OPEN THE BATTERY PACK FOR
ANY REASON. IF THE PLASTIC HOUSING OF THE
BATTERY PACK BREAKS OR CRACKS, RETURN TO A
SERVICE CENTER FOR RECYCLING.
Battery state of charge indicator
The battery is equipped with a state of charge indicator.
This can be used to display the current level of charge in the
battery while in the mower and during charging. It does not
indicate tool functionality and is subject to variation based on
product components, temperature and end-user application.
Checking state of charge:
u Press the state of charge indicator button (A1).
u The three LEDs (A2) will illuminate indicating the percent
of charge in the battery. See chart in gure A.
u If LED light does not illuminate, charge battery.
Installing and removing the battery packs
Warning! Make certain the Safety key is removed to prevent
Actuation before removing or Installing battery.
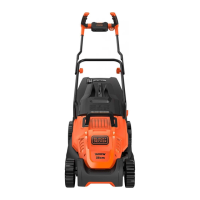
To install battery packs:
u Lift the battery port cover (12) up to expose the battery
port (15).
u Slide the battery (16) into the battery port until it is fully
seated and an audible click is heard (gure B).
Make sure battery pack is fully seated and fully latched
into position. Repeat process for the second battery port.
u Close the battery port cover. Ensure the cover is fully
latched before starting mower.
To remove battery packs:
u Open the battery port cover (12) as described above.
u Depress the battery release button (16a) on the battery
pack and pull battery pack out of tool as shown in gure C.
POWERCOMMAND battery pack selection
Warning! Make certain the Safety key is removed to prevent
Actuation before selecting active battery.
The mower is equipped with a POWERCOMMAND battery
selection button (11). This is used to extend runtime. Press the
battery selection button (gure D) on the left or right.
u The side marked “1” activates the left side battery port.