ENGLISH
8
(Original instructions)
• Lock the tool by setting the
forward/reverse slider (2) to the centre
position.
• To remove a tool head, depress the head
release button (3) and take the head off
the tool.
• To fit a tool head, line it up with the tool
as shown and push it onto the tool until
it snaps into place.
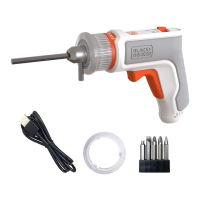
Fitting and removing a drill bit or
screwdriver bit
The drill/screwdriver head is fitted with a
keyless chuck to allow for an easy exchange
of bits.
• Lock the tool by setting the
forward/reverse slider (2) to the centre
position.
• Open the chuck (9) by turning the front
part clockwise with one hand while
holding the rear part with the other.
• Insert the bit shaft into the chuck (9).
• Firmly tighten the chuck (9) by turning
the front part anti-clockwise with one
hand while holding the rear part with the
other.
• To remove the screwdriver bit from the
bit holder, lift the bit from the recess.
• To store the screwdriver bit, firmly push
it into the holder.
Use
Warning! Let the tool work at its own pace.
Do not overload.
Warning! Before drilling into walls, floors or
ceilings, check for the location of wiring and
pipes.
Charging the battery (fig. C)
The battery needs to be charged before first
use and whenever it fails to produce
sufficient power on jobs that were easily
done before. The battery may become
warm while charging; this is normal and
does not indicate a problem.
Warning! Do not charge the battery at
ambient temperatures below 10 °C or above
40 °C. Recommended charging temperature:
approx. 24 °C.
Note: The charger will not charge a battery
if the cell temperature is below
approximately 0 °C or above 40 °C. The
battery should be left in the charger and
the charger will begin to charge
automatically when the cell temperature
warms up or cools down.
• To charge the battery (5), insert it into
the charger (12). The battery will only fit
into the charger in one way. Do not force.
Be sure that the battery is fully seated in
the charger.
• Plug in the charger and switch on at the
mains.
The charging indicator (11) will flash green
continuously (slowly).
The charge is complete when the charging
indicator (11) lights green continuously. The
charger and the battery can be left
connected indefinitely with the LED
illuminated. The LED will change to flashing
green (charging) state as the charger
occasionally tops off the battery charge. The
charging indicator (11) will be lit as long as
the battery is connected to the plugged-in
charger.
• Charge discharged batteries within 1
week. Battery life will be greatly
diminished if stored in a discharged state.
Leaving the battery in the charger
The charger and battery pack can be left
connected with the LED glowing indefinitely.
The charger will keep the battery pack fresh
and fully charged.
Charger diagnostics
If the charger detects a weak or damaged
battery, the charging indicator (11) will flash
red at a fast rate. Proceed as follows:
• Re-insert the battery (5).
• If the charging indicators continues
flashing red at a fast rate, use a different
battery to determine if the charging
process works properly.