11
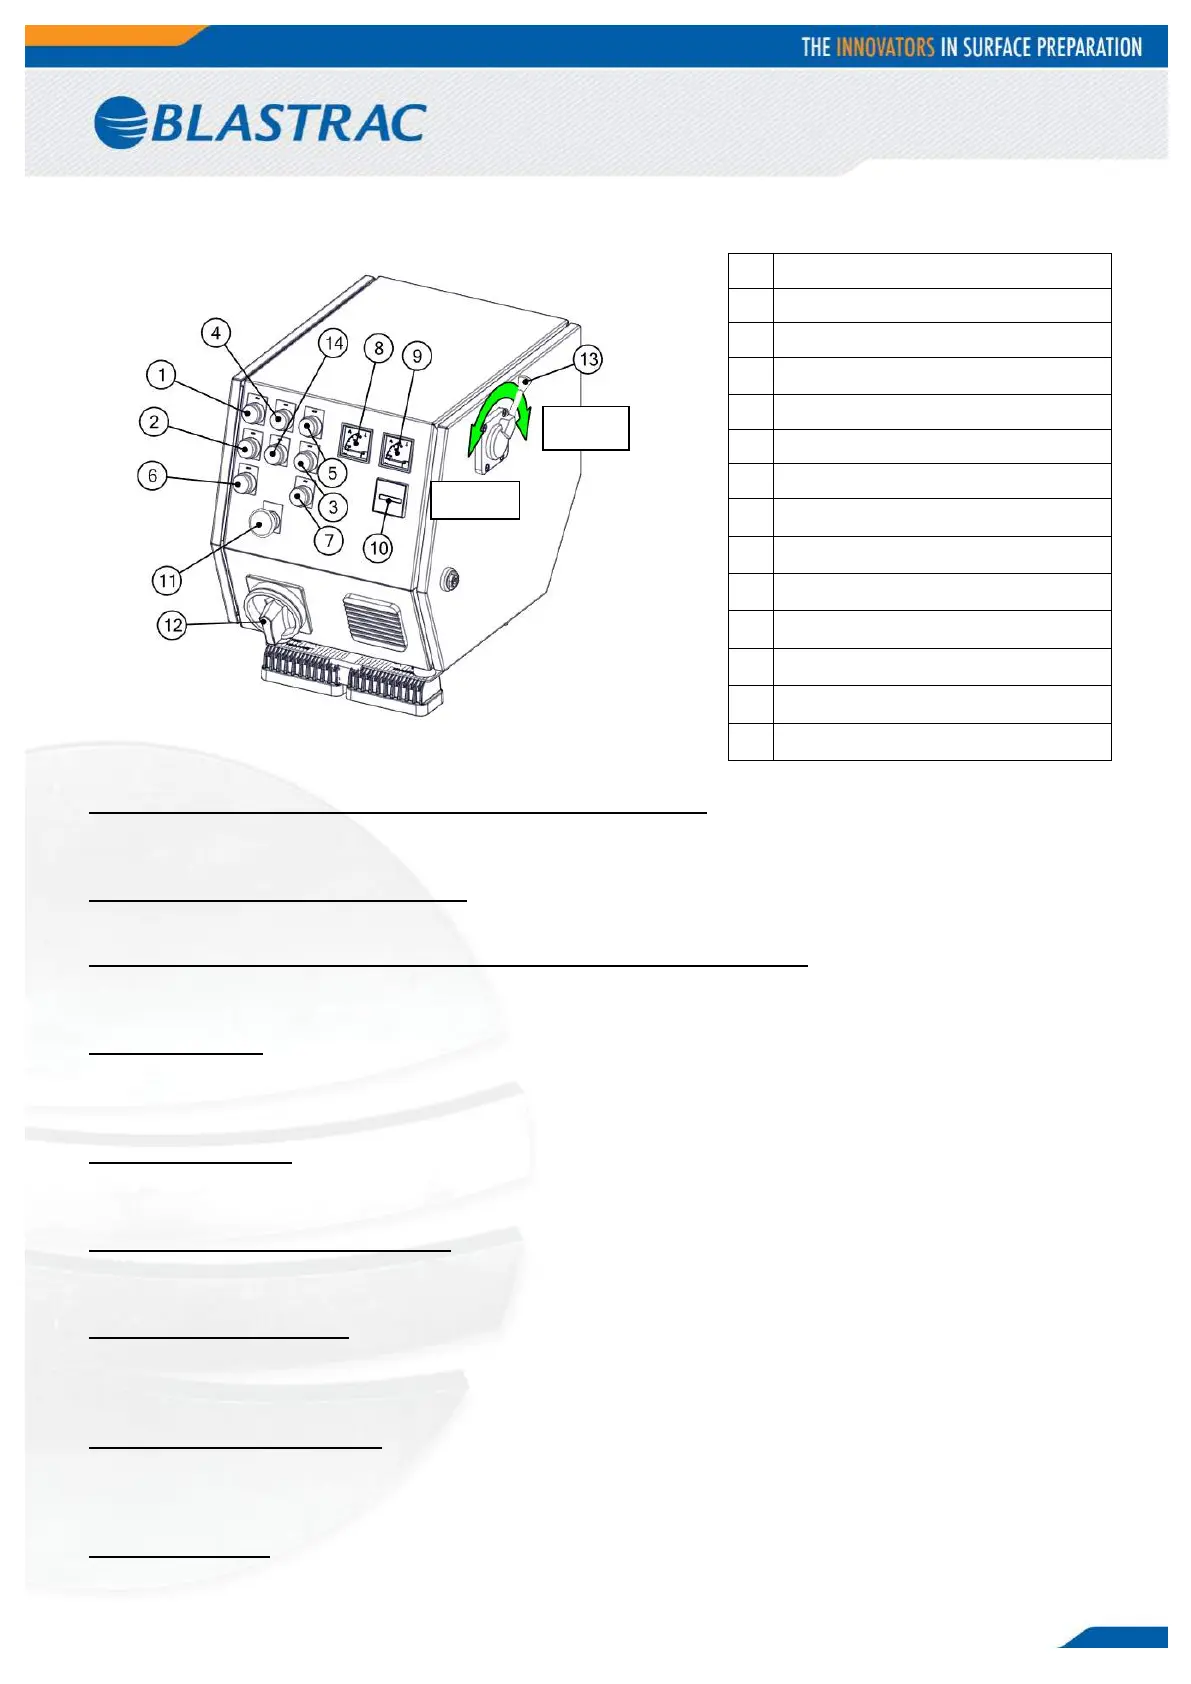
4.4 Control box
The control box is equipped with all control elements and instruments for monitoring and controlling the
machine.
1 + 2 + 6 Control lamp, push buttons “Control ON/OFF”
Pressing the push button “Control ON” switches the control on and makes the control lamp light up.
Pressing the push button “Control OFF” switches the control off.
4 Control lamp motor protection
This red lamp lights up when the complete electronics has been switched off by overload of one of the motors.
5 + 3 + 7 Control lamp, push buttons “Blast wheel ON/OFF”
Pressing the push button “Blast wheel ON” switches the blastwheel motor on and makes the white control lamp
light up. Pressing the push button “Blast wheel OFF” cuts off the power supply immediately.
8 + 9 Ammeters
These meters indicate the power consumption of the blastmotors in ampere. The ammeters show the blast
cleaning load onto the surface. When switching on the motors the current value peaks shortly.
The no-load current is approximately (2x) 7A. The maximum operating current is (2x) 20A.
9 Hour counter
Shows the number of actual working hours performed by the blastwheel. Useful for maintaining a proper
maintenance schedule.
11 Emergency shutdown button
Red mushroom-shaped emergency shutdown push button, this button cuts off all power to the machine.
Turn to unlock. After use of the emergency button, all functions have to be re-started manually.
12 Main power switch
The main power switch is located on the control box. It has to be switched OFF when connecting the machine
to the power supply. It has to be switched ON before operating the machine. The main power switch can be
locked in the “OFF” position by using a padlock and placing it through the main switch.
13 Abrasive control lever
This lever is located on the right hand side of the control box. It regulates both magnetic valves to control the
flow of abrasive towards the blast wheels. The valves are hand-operated, pull the lever towards you to open.
Push the lever towards the machine to close.
14 Worklights
Button for turning the LED worklights ON or OFF.